Home / Articles / Finders keepers, losers weepers - why untested consoles are (mostly) worth buying
first published 20 Mar 2023
2nd edition 11 Jul 2023; reuploaded 6 Feb 2024
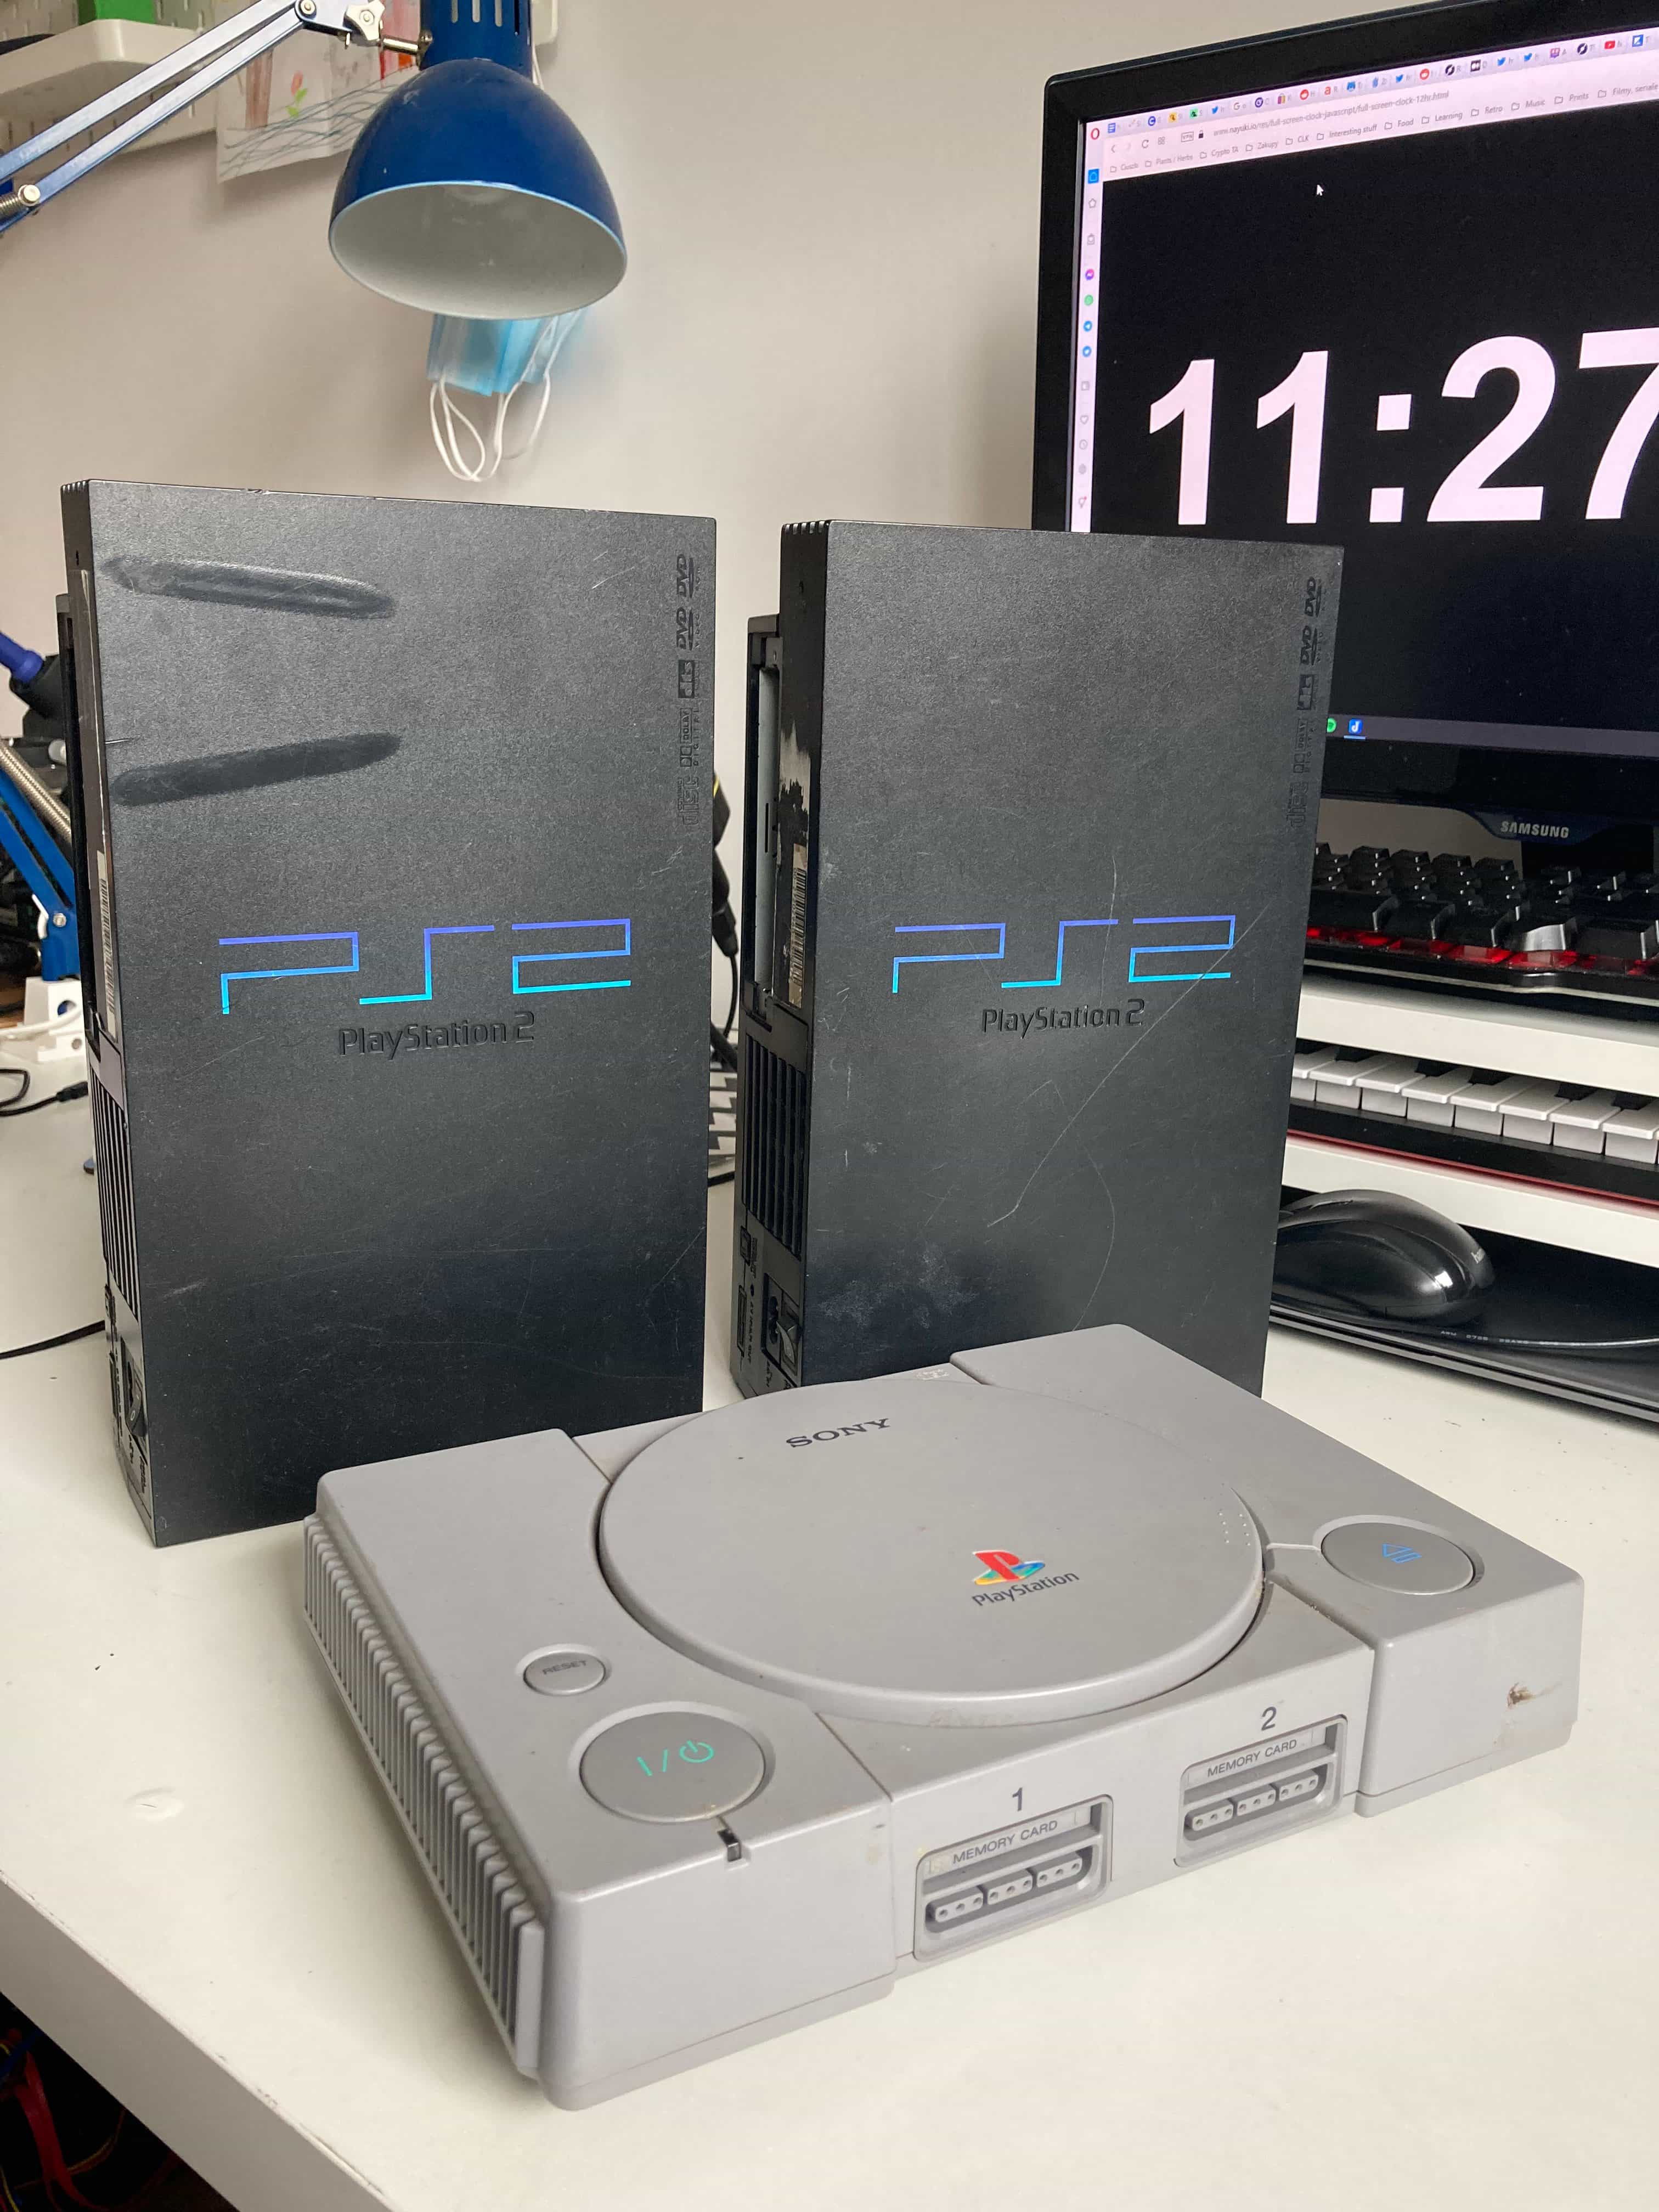
Yes, bargains in the retro gaming world can still be had. Despite numerous videos, Twitter posts, and forum talks about decreasing amount of items at Goodwills, flea markets, garage sale, lack of online offers (and increased competition from other prospective buyers), scalpers, “I-know-what-I-have” and “it’s-old-I-don’t-bother-to-see-if-its-even-working-but-it-is-RARE-and-by-extension-expensive” sellers and the like, given enough tenacity (and perhaps a stroke of luck), you can still get cool stuff (and not pay a lot). These 3 consoles were bought on two separate auctions for a total of around 20$.
What's the catch, then? All three of them were sold as untested – which is, in my opinion, the best way to score consoles and other retro stuff on the cheap. The reasoning is simple - many people simply don’t have AV cables or power cables to power retro hardware, and some sellers are rather vague with their description of “untested” – untested if it powers on, untested if it loads games, if there is any display, and so on. And then, some sellers just can’t be bothered with checking the working state of said hardware – which is sorta understandable if we’re dealing with anything that involves proprietary tidbits.
Suffice to say, there’s a lot of legroom in interpretation, which can be a blessing and a curse.
By the latter, of course, I mean that you could be buying a broken console - in that case you can at least try to fix it in the spirit of making a little personal project out of your newfound gaming paperweight. Sure, it is a gamble, but the Internet is full to the brim with resources on retro consoles, and the recent retro craze only helped more people to research and teach about their ins and outs. Mind you, Sony has sold more than 150 million of these consoles! It's not like you're getting into some arcane digital spelunking with this. Check this: Sega Saturn - a console with considerably less sales figures (estimated 9.5 million units, sources are uncertain) was taken under the scalpel by an incredibly talented gentleman, who then created an absolutely marvelous plug-in cartridge that allows you to play games from an SD card. In an almost 30-year old gaming fossil! And don't get me started on other consoles... The retro scene is more alive than ever, and if you think you just porked yourself because your console has a dead laser - there are more people in this predicament than you imagine. Such is the beauty of enthusiast circles - when faced with a problem, the collective whirlwind of creativity and ingenuity delivers awe-inducing results.
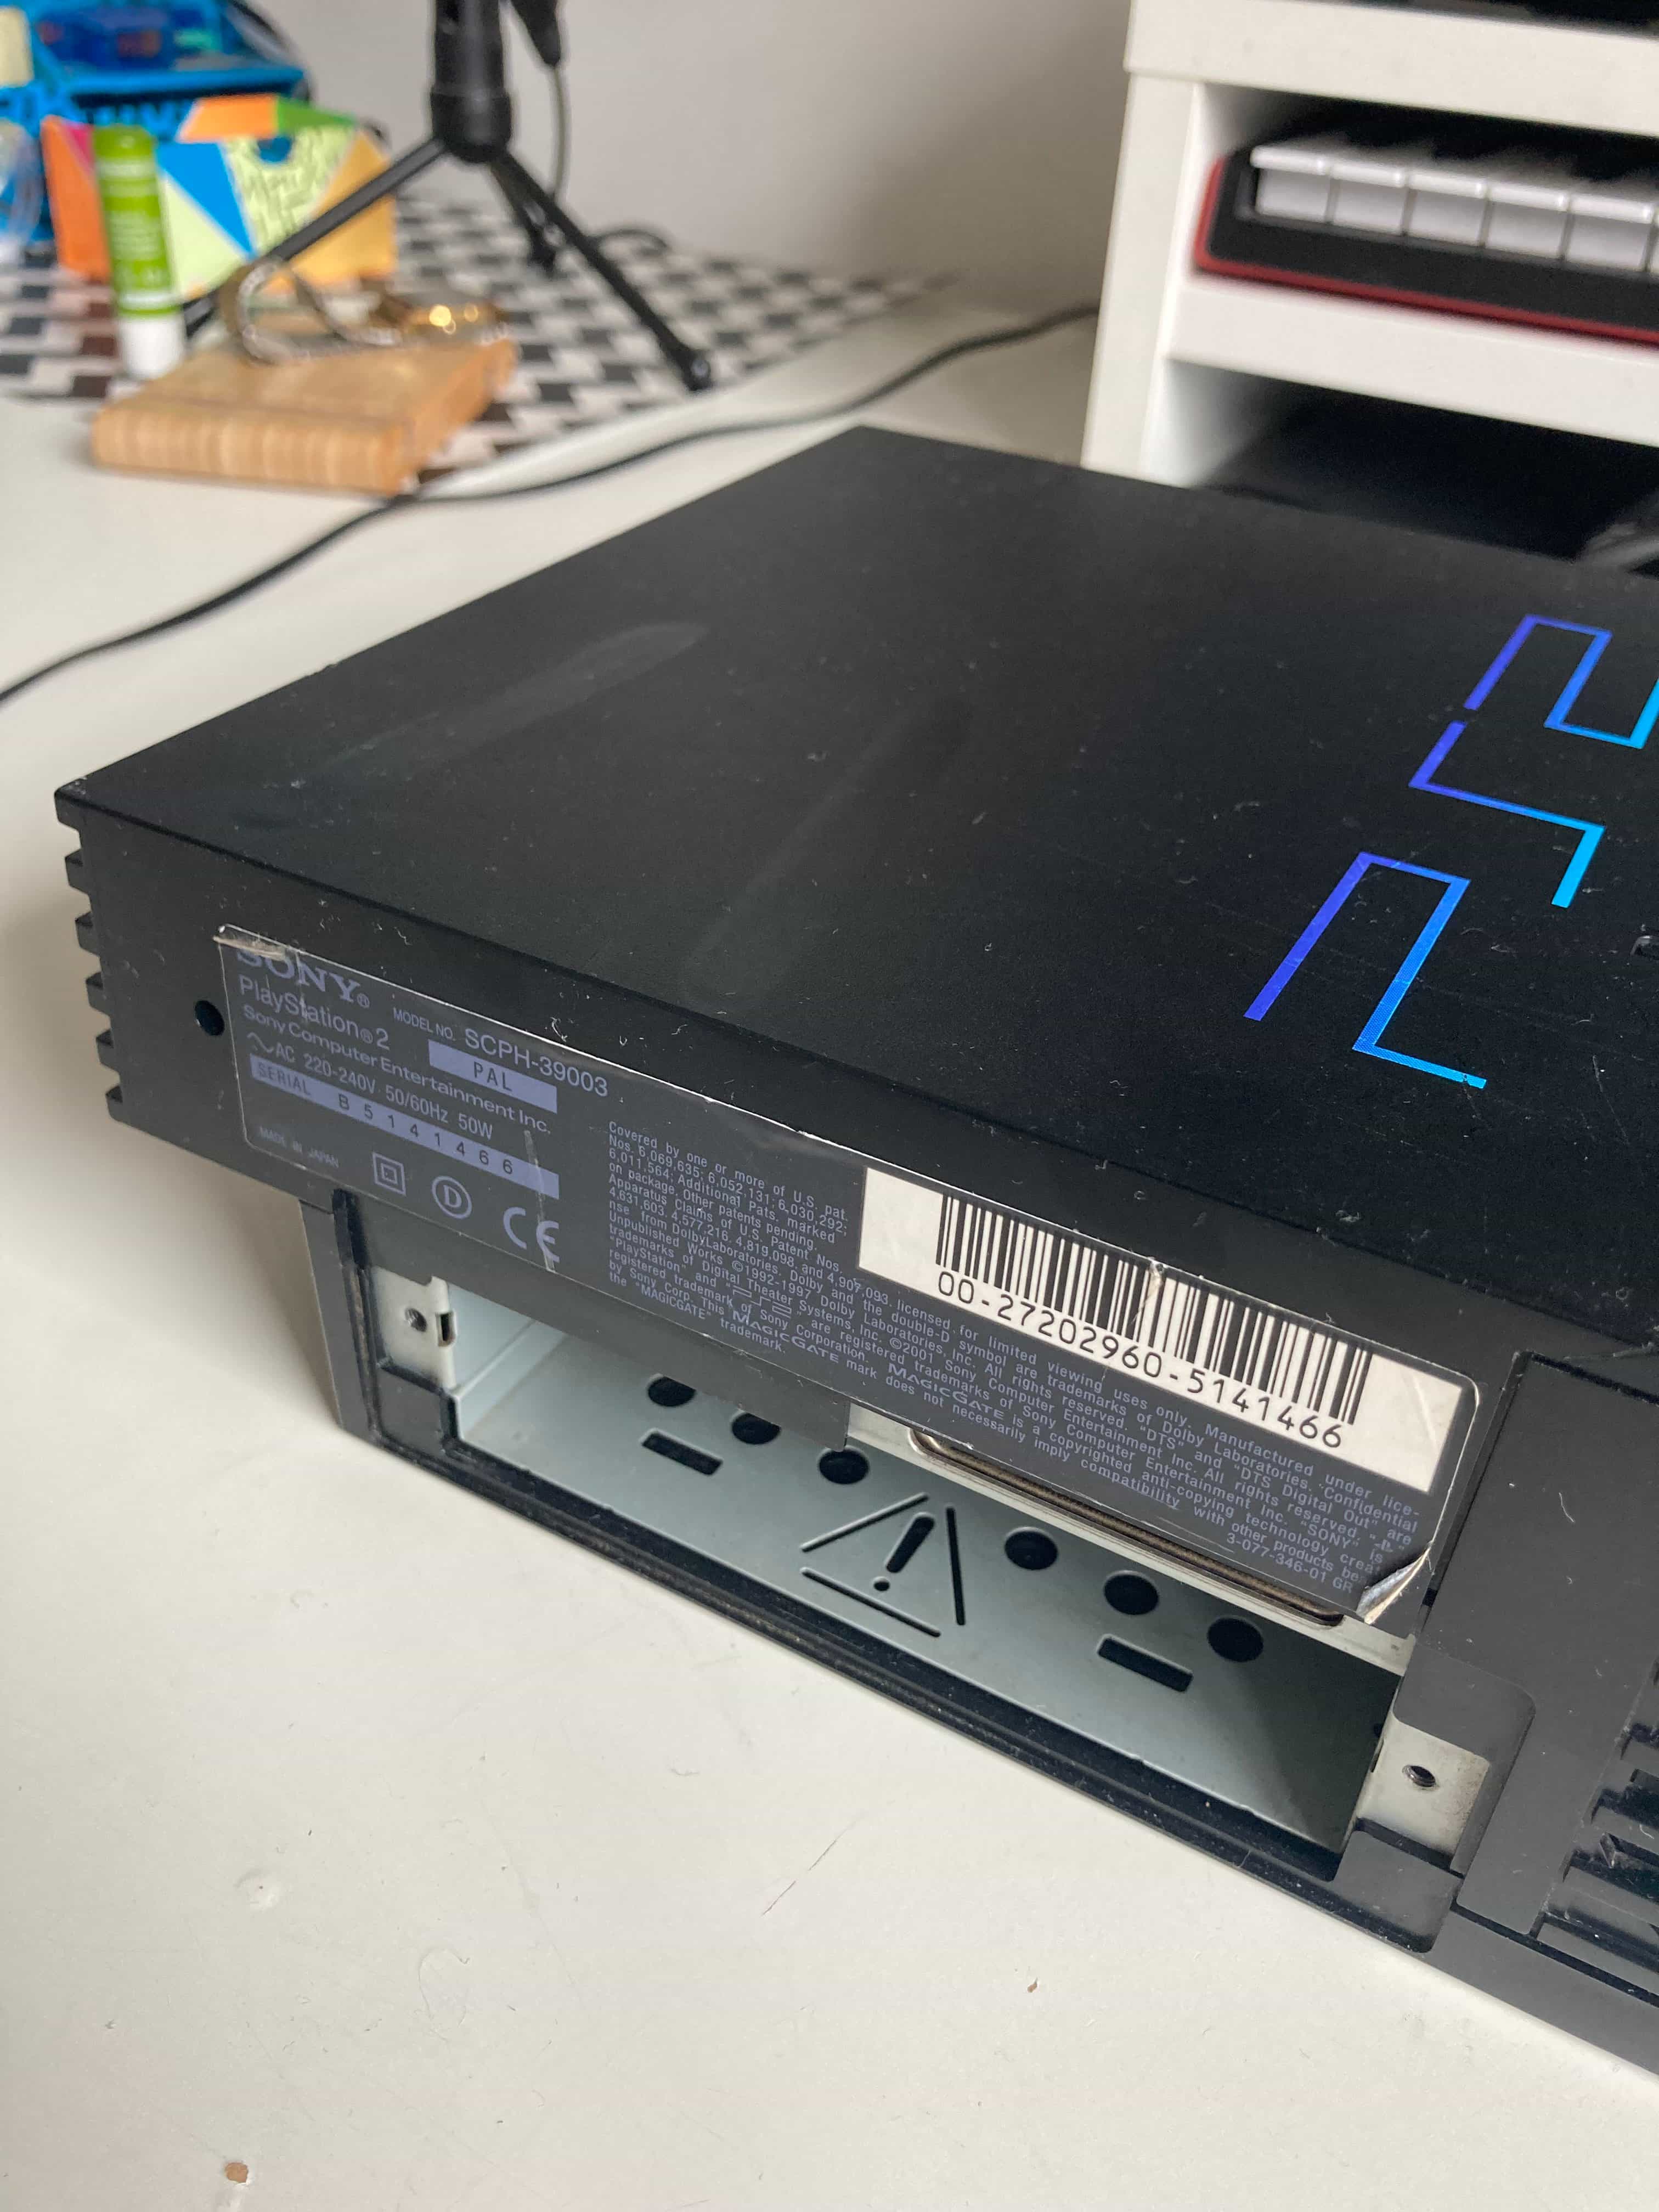
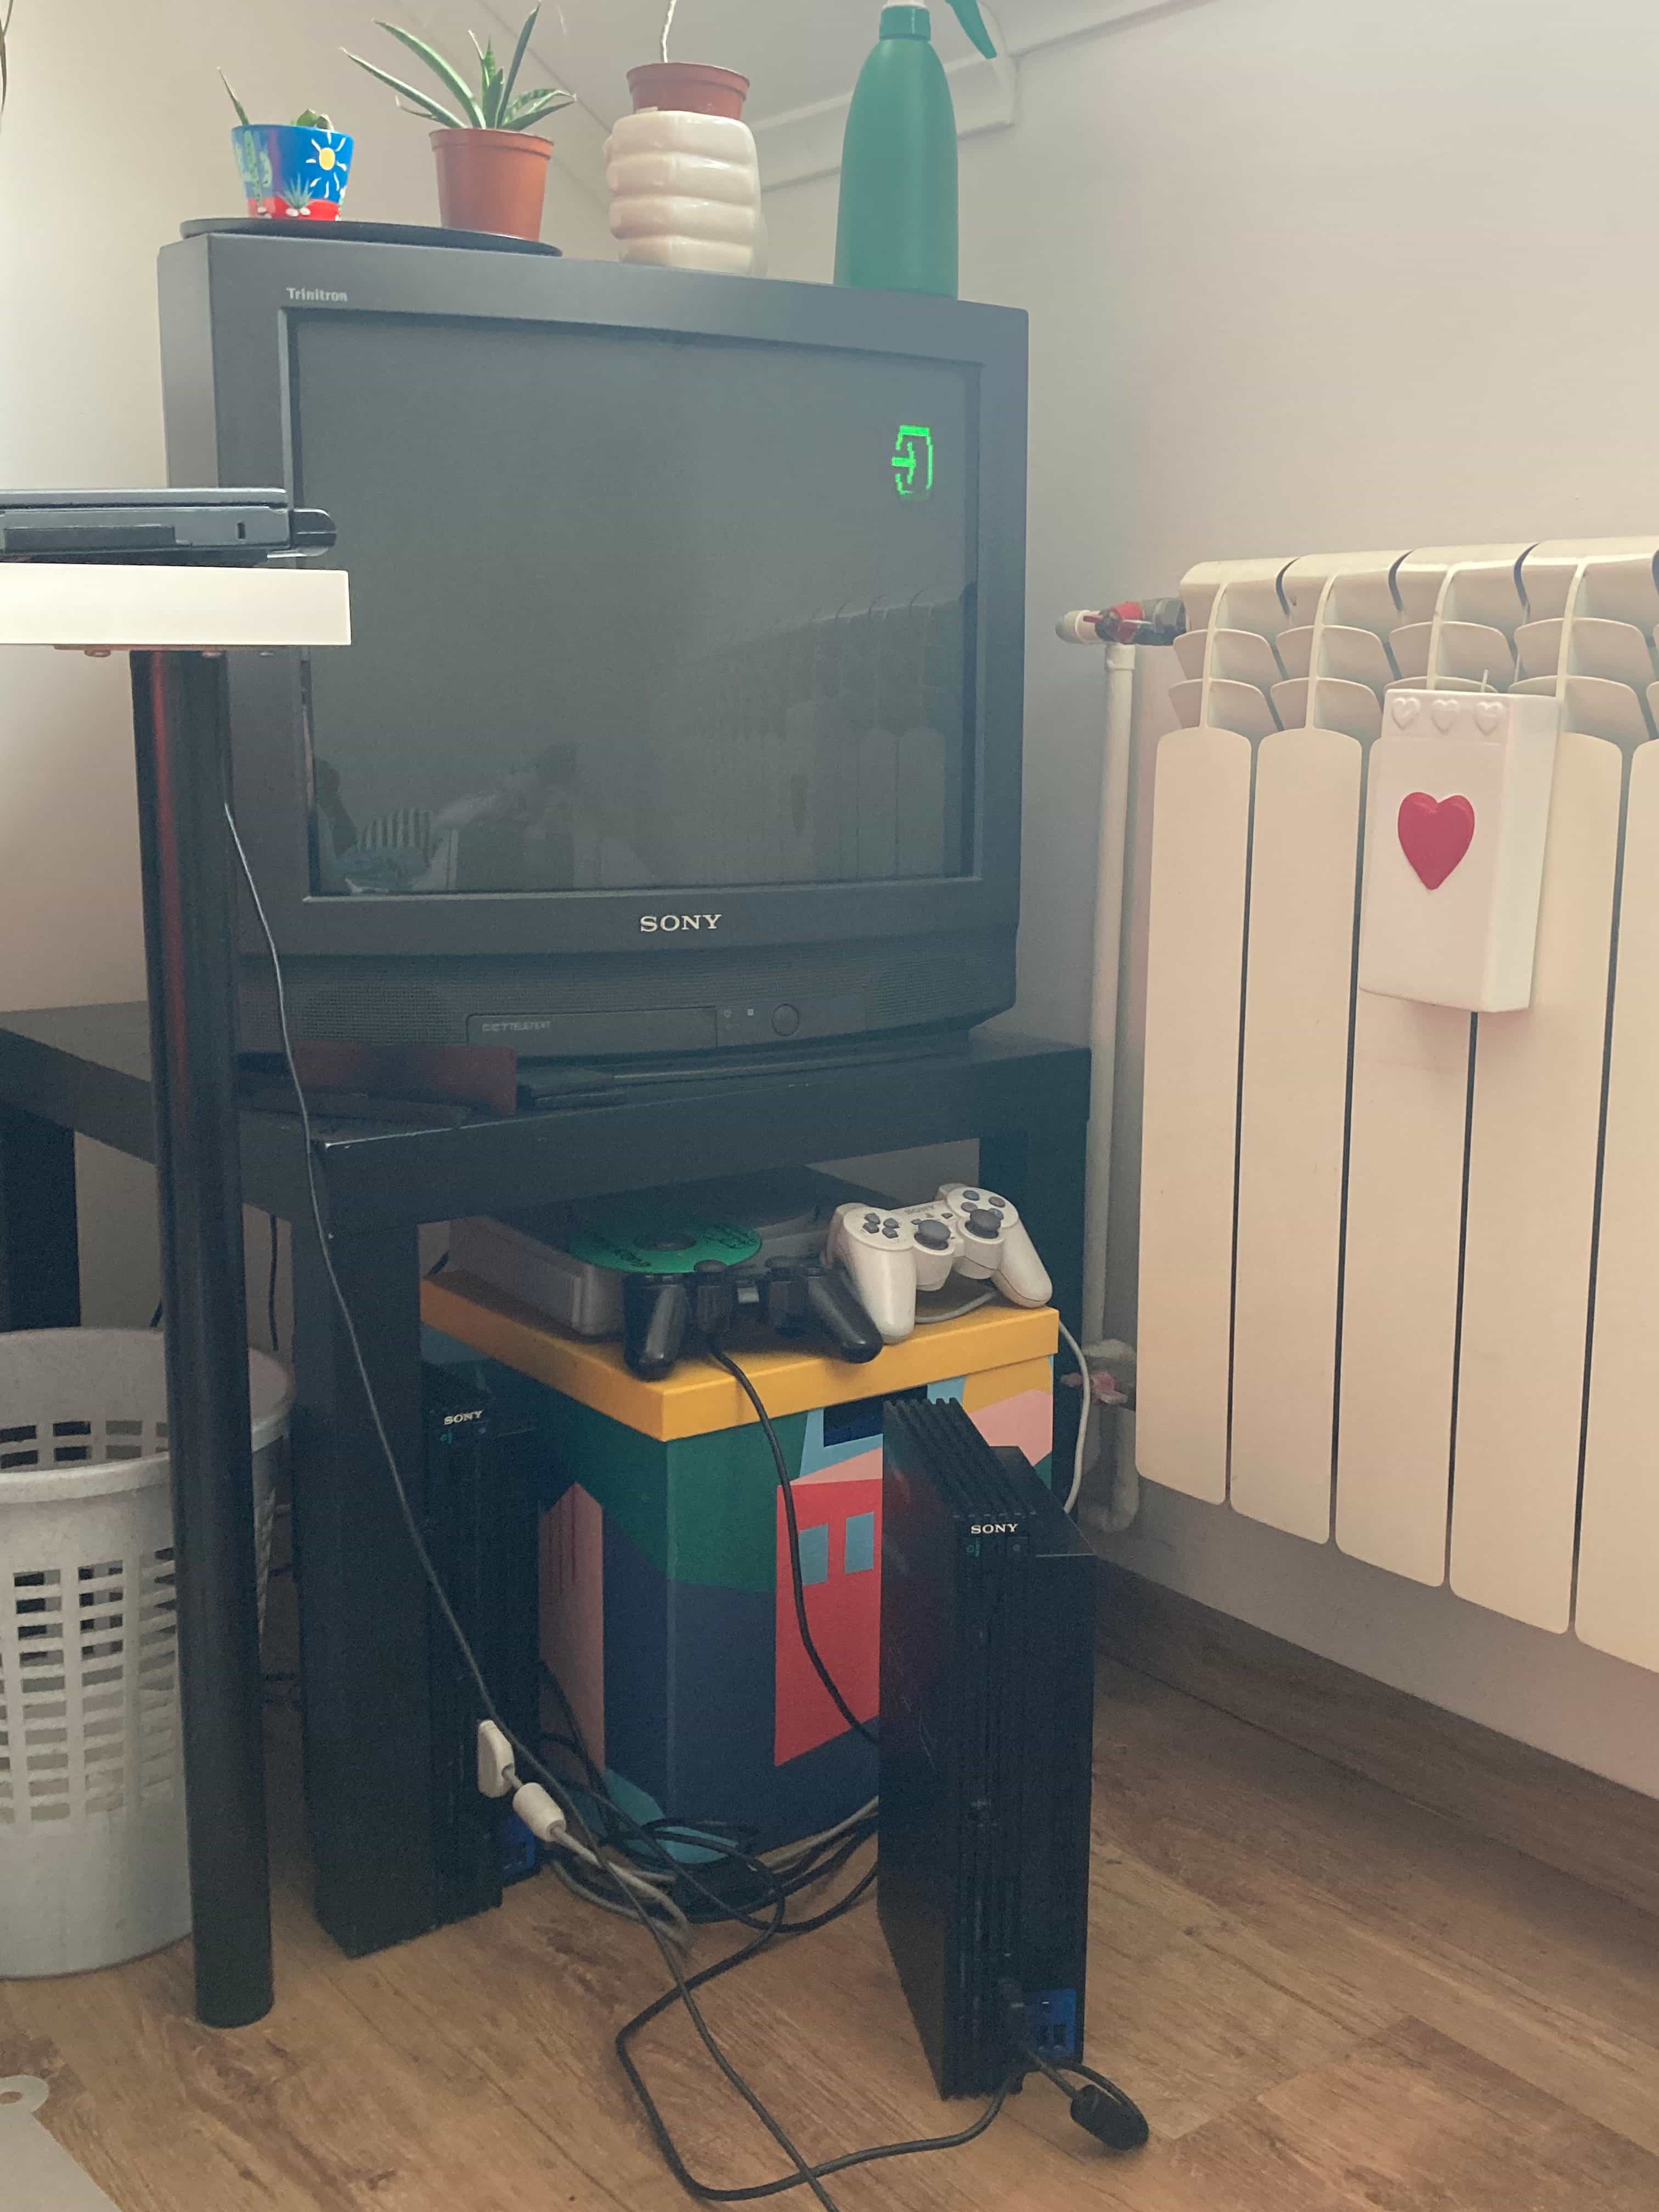
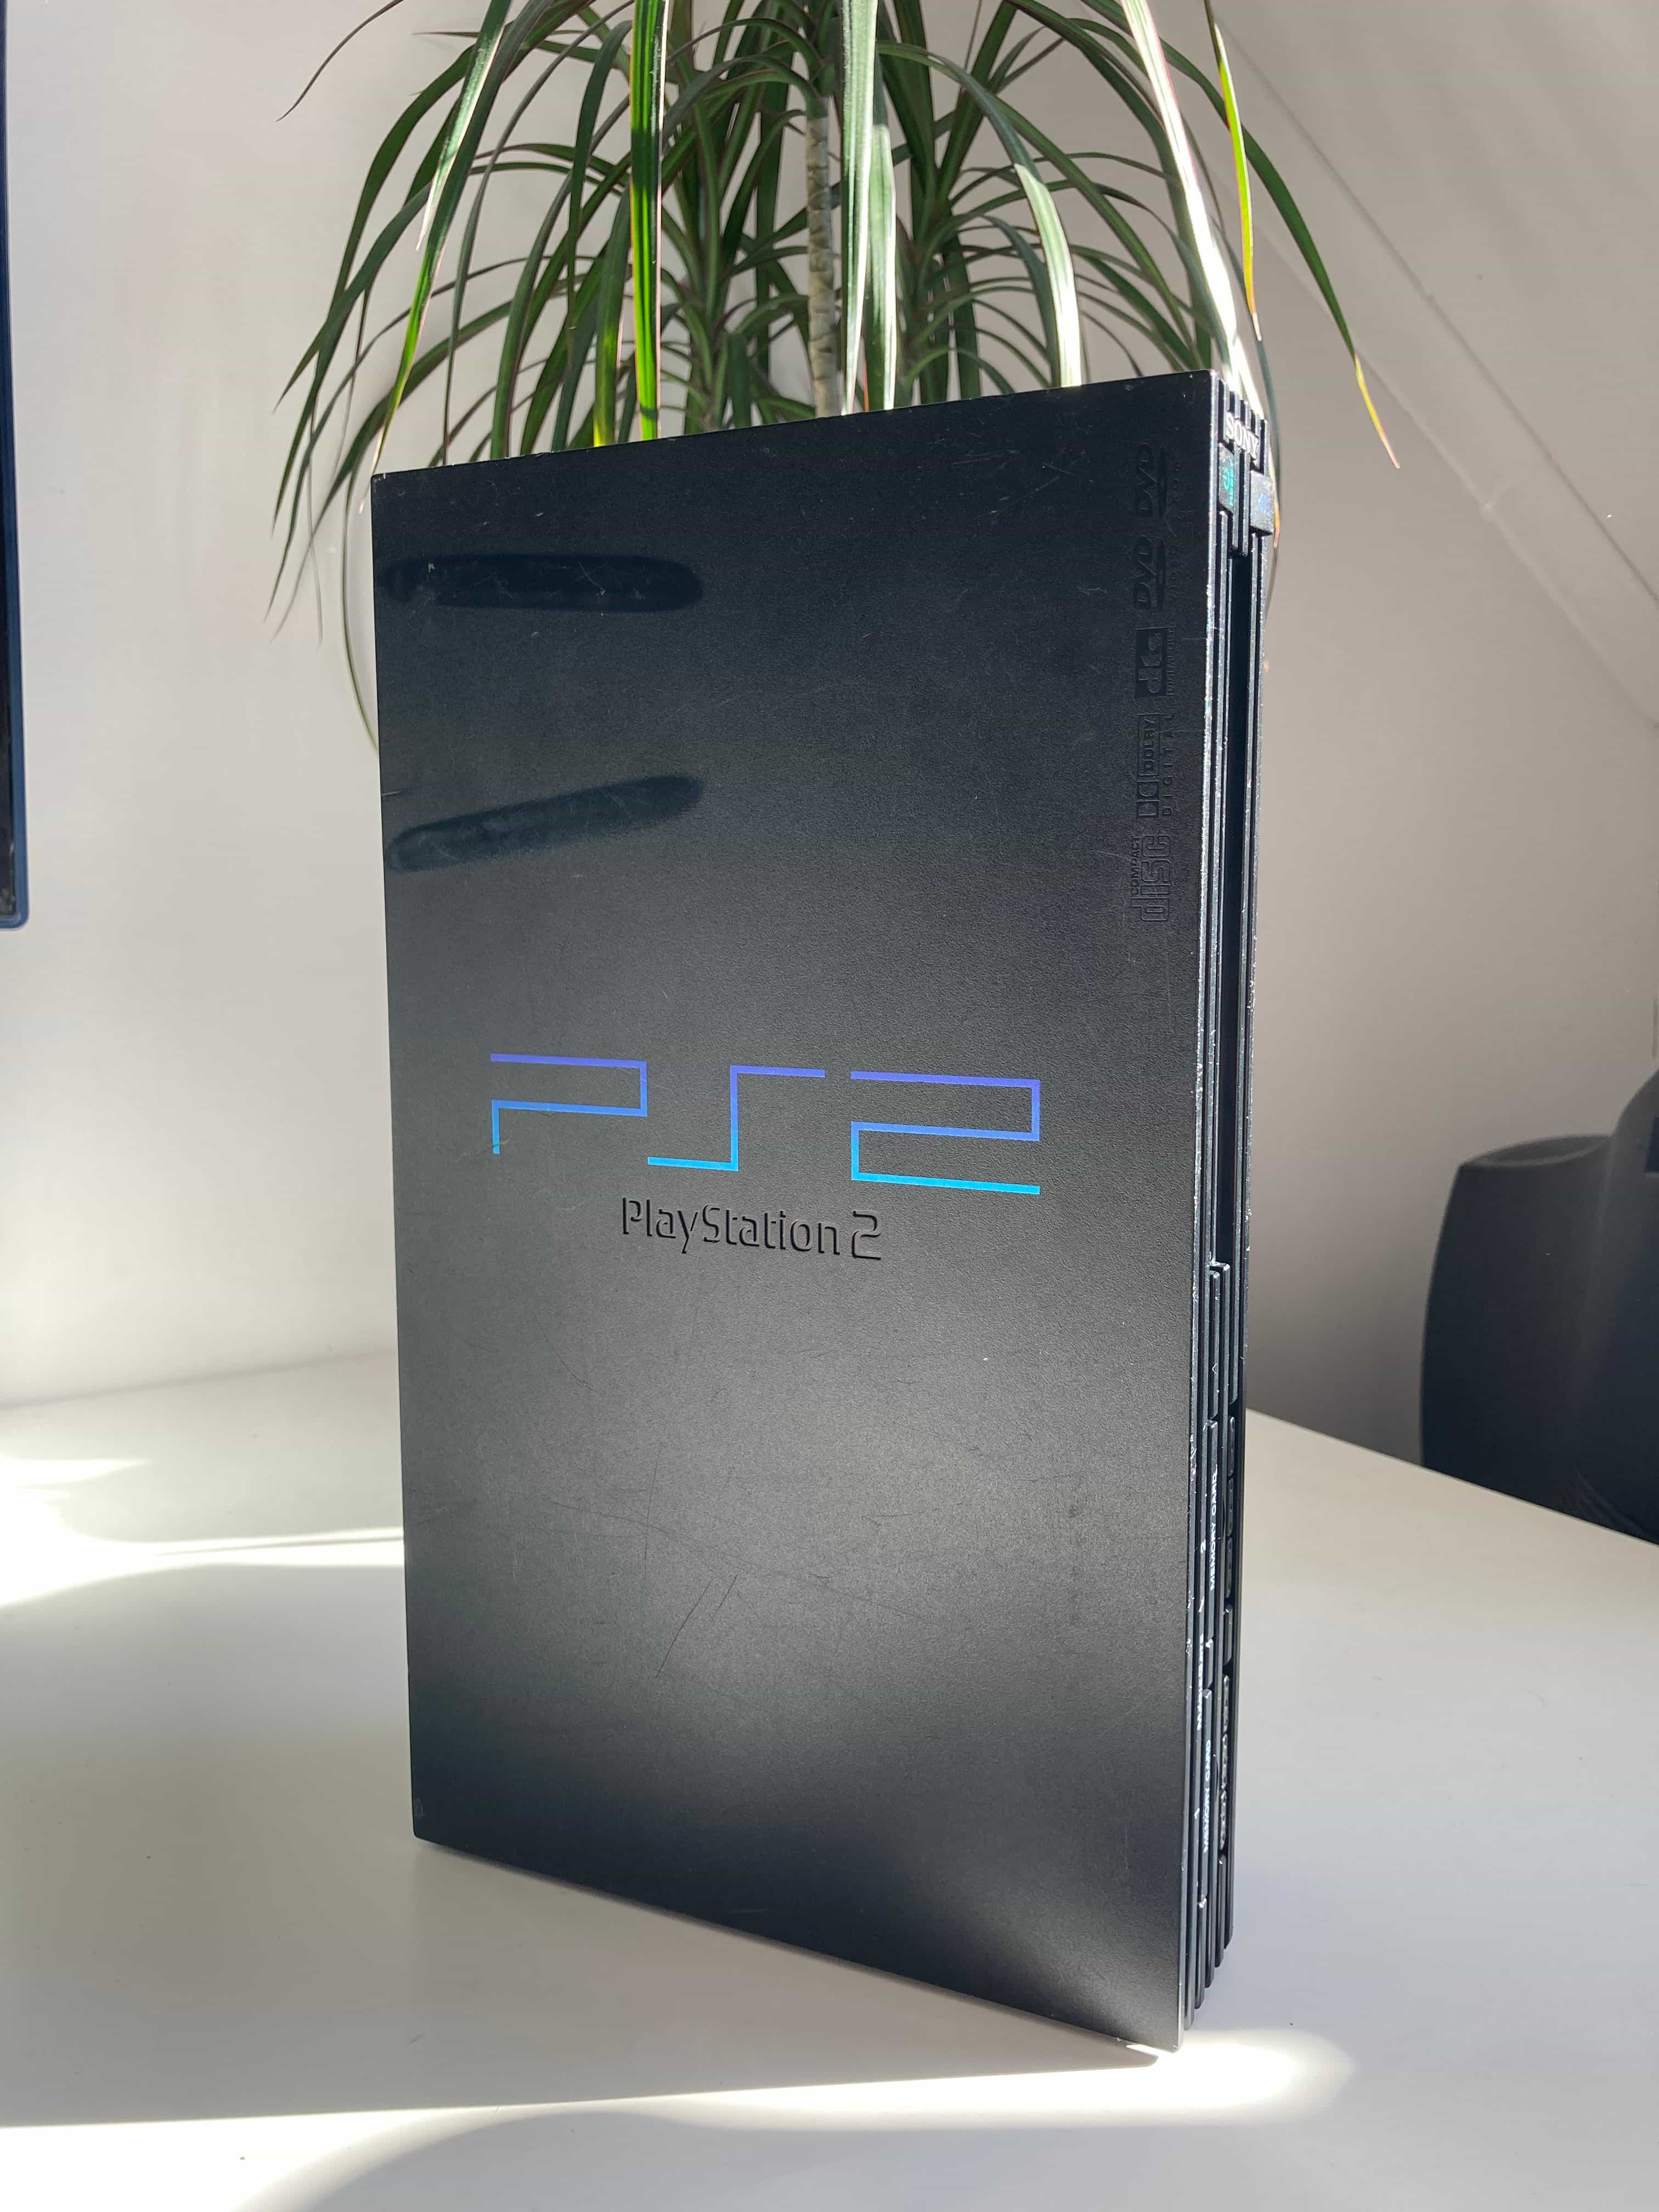
The PlayStations fall into the category of “cables being necessary to check the state of the device”. Both PS1s and PS2s require an AC jack (oh!) and an AV cable with a proprietary Sony interface on one side (jeez!). There’s three of them – one Playstation and two Playstation 2s. In this post, I’m focusing on the leftmost console with the odd black marks – a classic model SCPH-39003 PS2. The other two will be covered in future articles; note that I'm not sure what shape all three are in exactly, whether they switch on, play games etc. I picked this one because it was the earliest “fat” PS2 model I own.
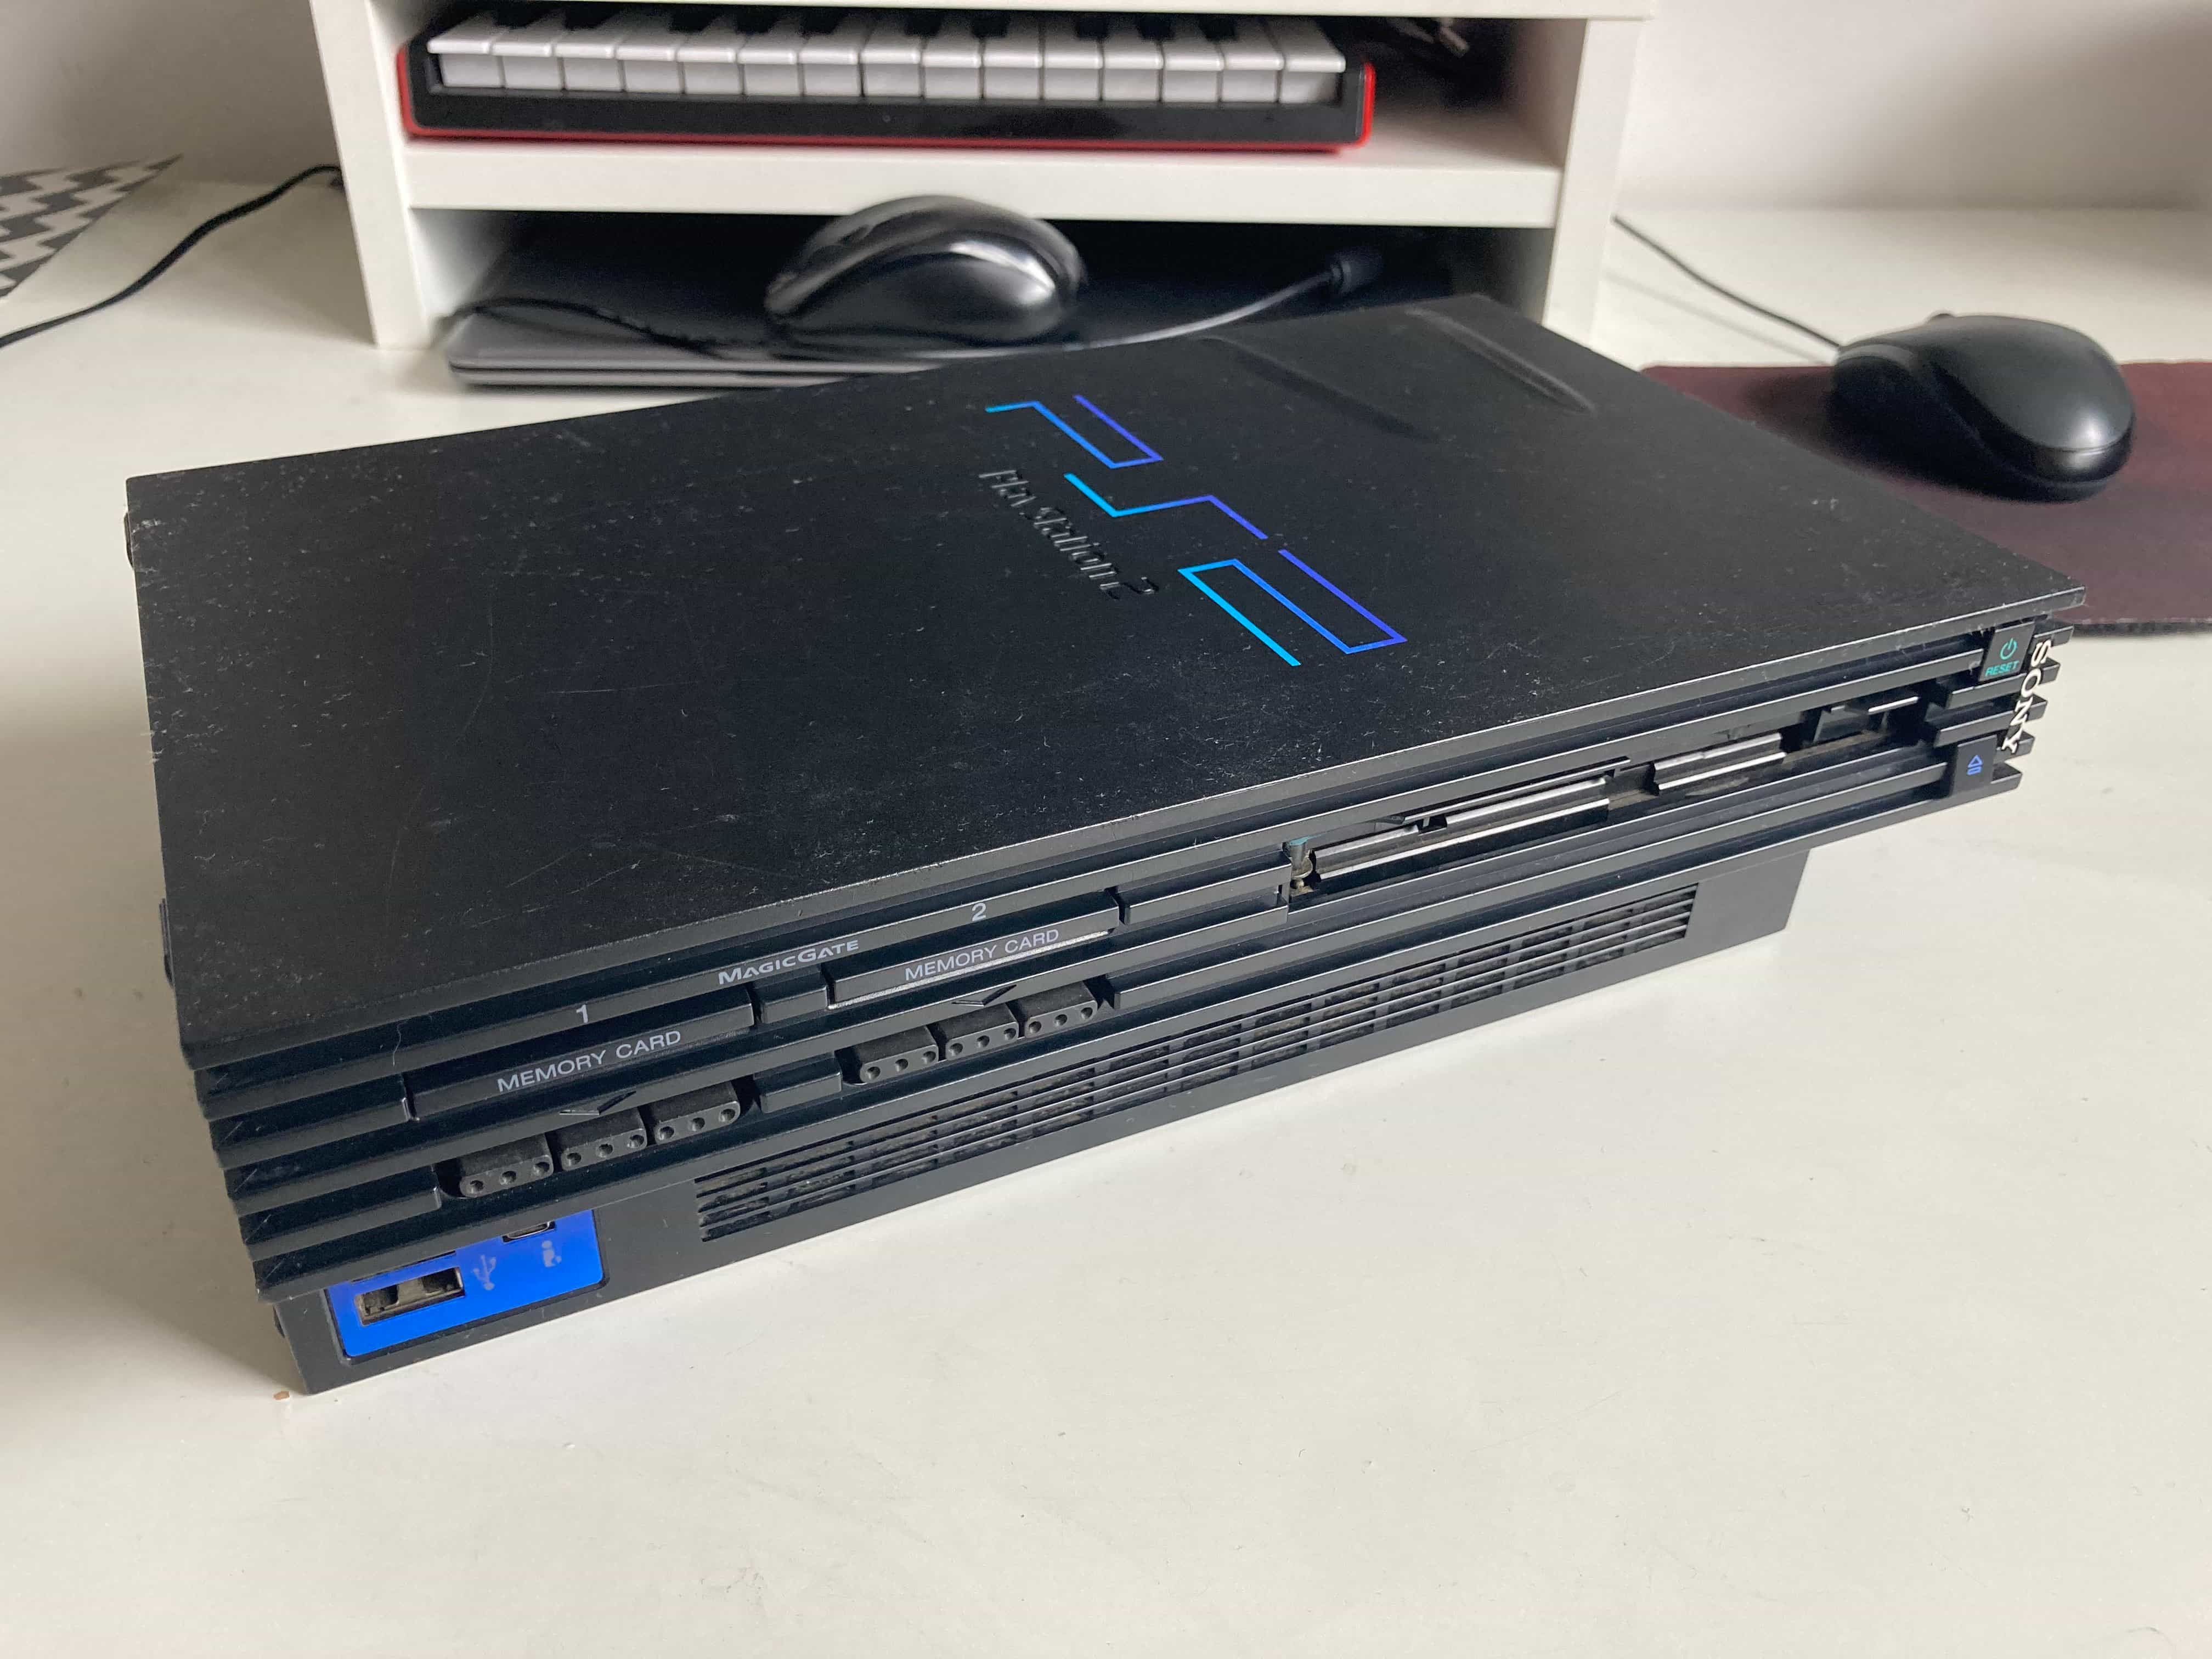
From the outside it looks like it lived a long life, if not a bit abused given those interesting imprints on the top right corner of the top shell, which look a bit like warmed up plastic. (It kind of looks like what a soldering iron or a hot-air gun would do if left on top of the PS2…) I can only hope that the console provided an abundance of good gaming moments for the previous owner(s). There are scratches, as should be expected of a 20-year-old console, but more notably the front bezel is missing, which might hint at the console's past - this is, however, a rather long shot. More on that later. Besides that, it's dusty, a bit dirty, the bottom screw covers are missing, and the rear label with the model number is peeling off slightly. Could be worse.
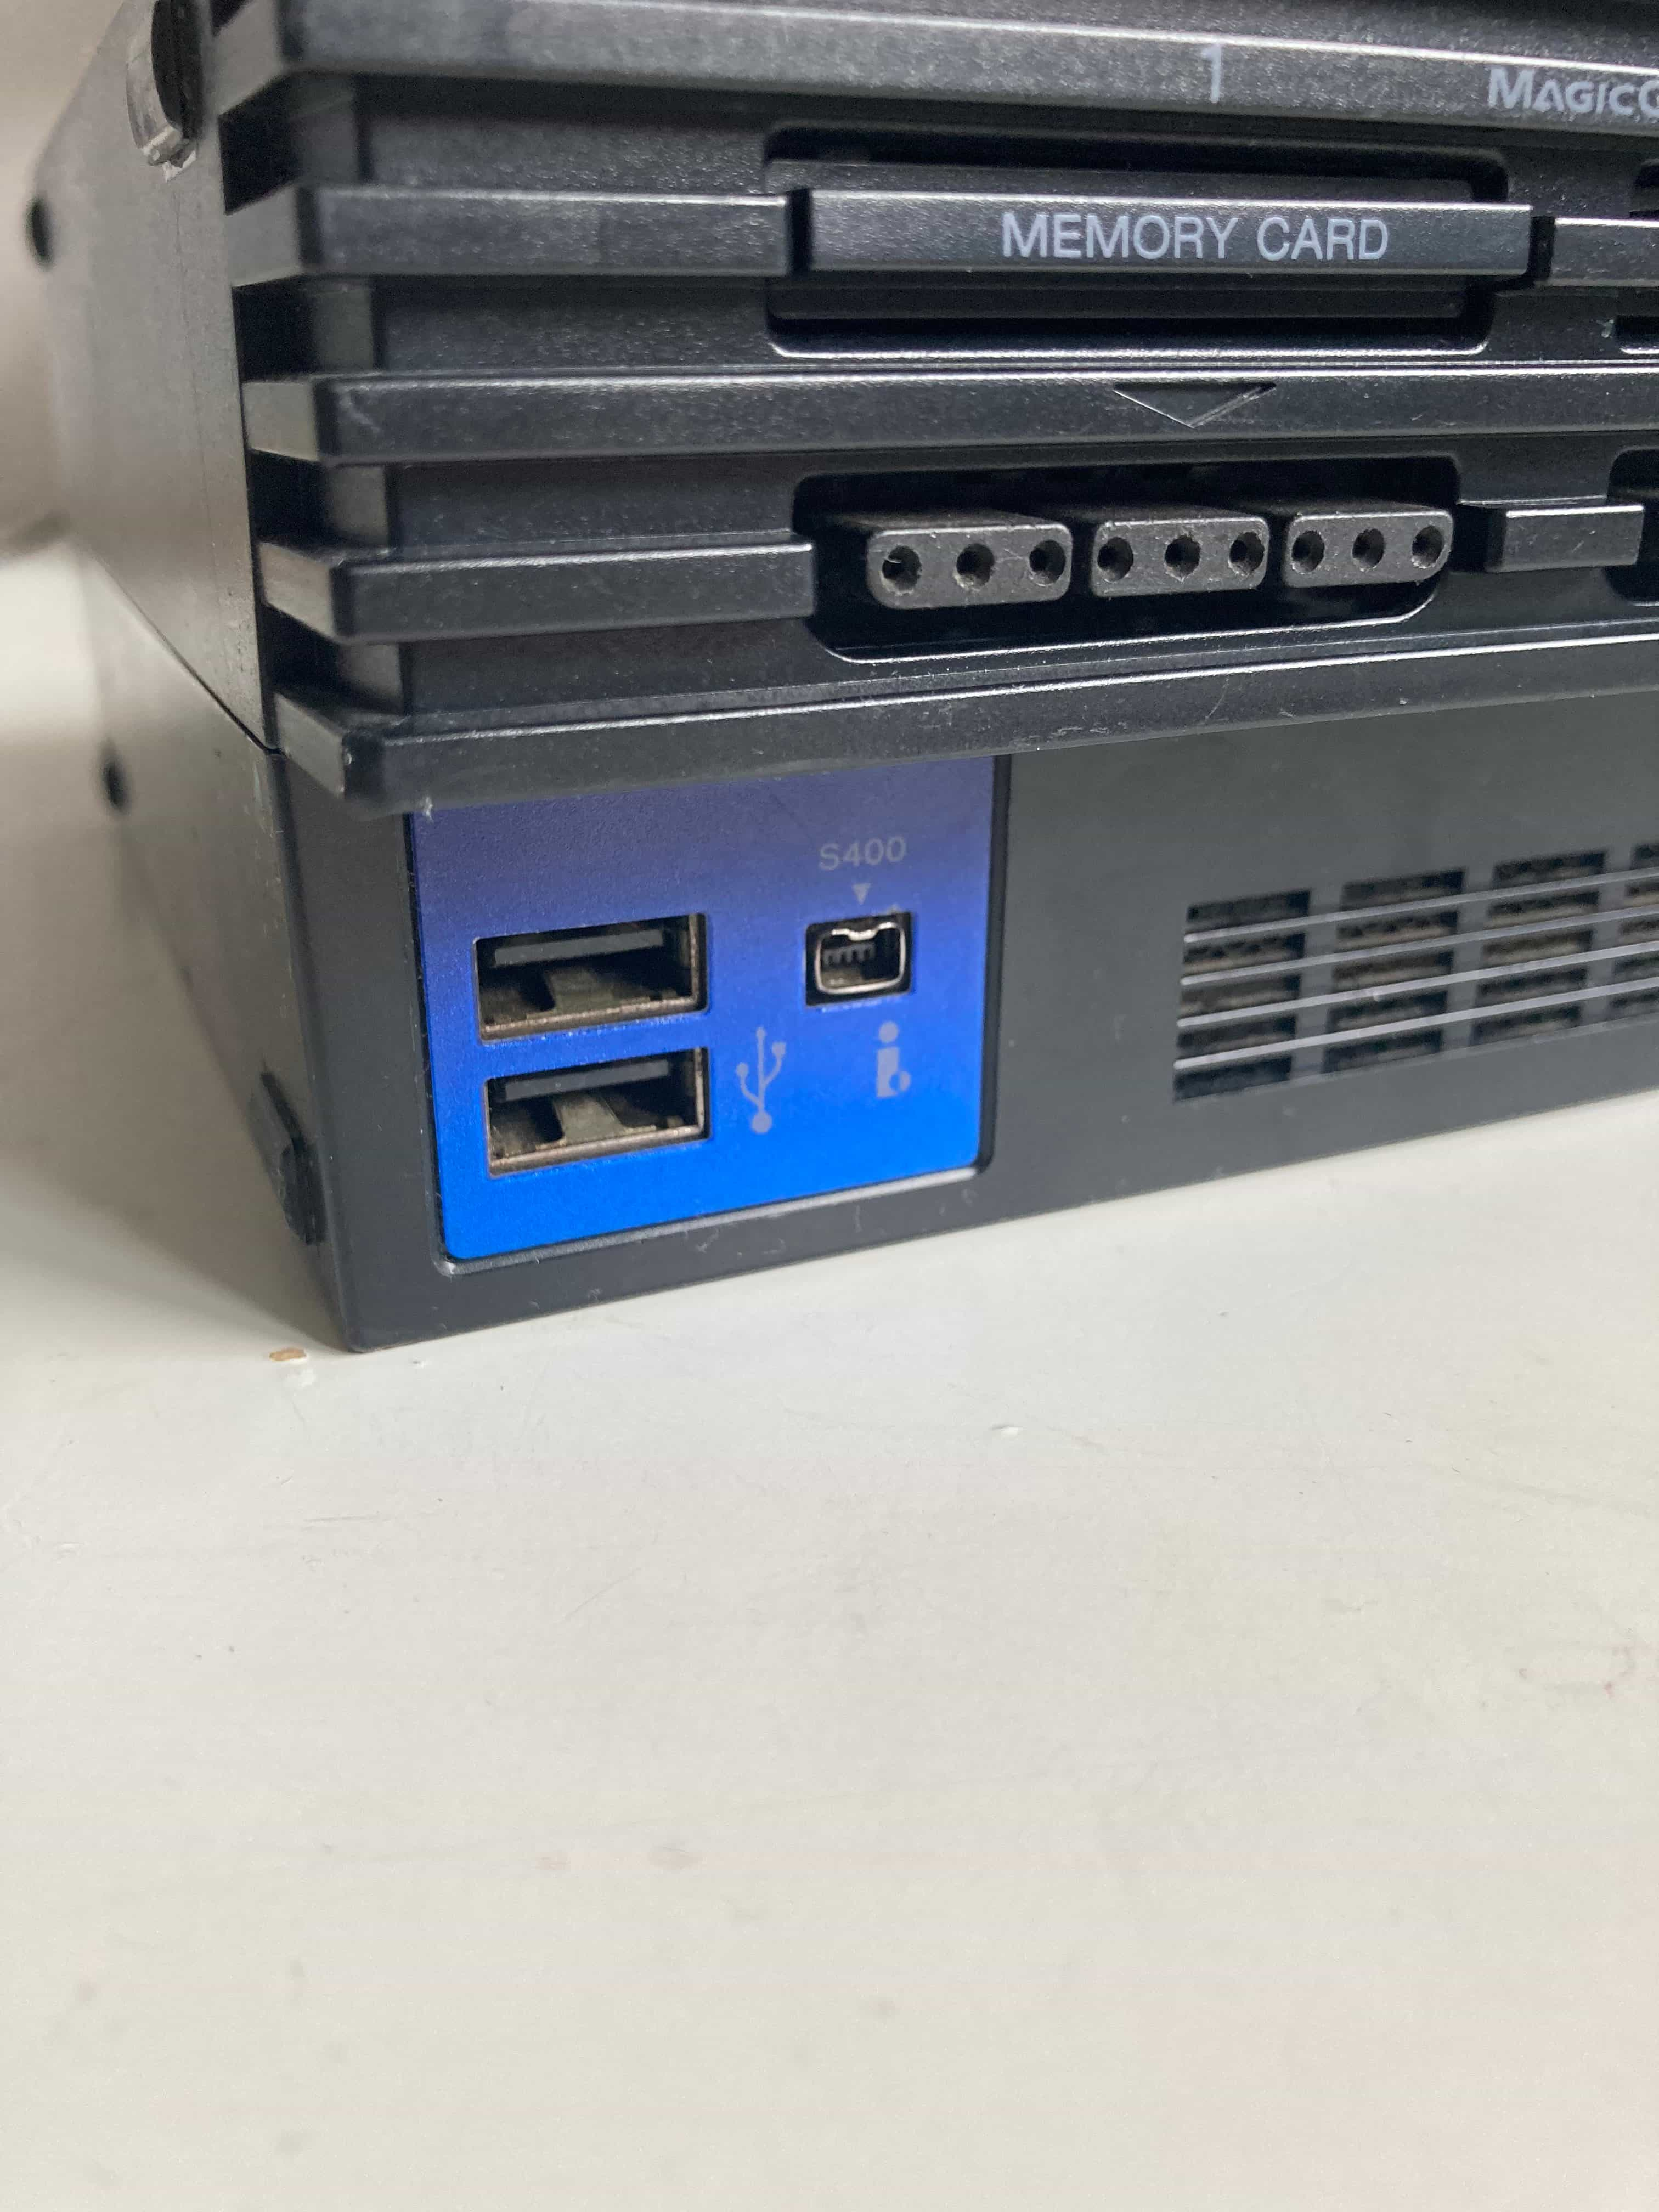
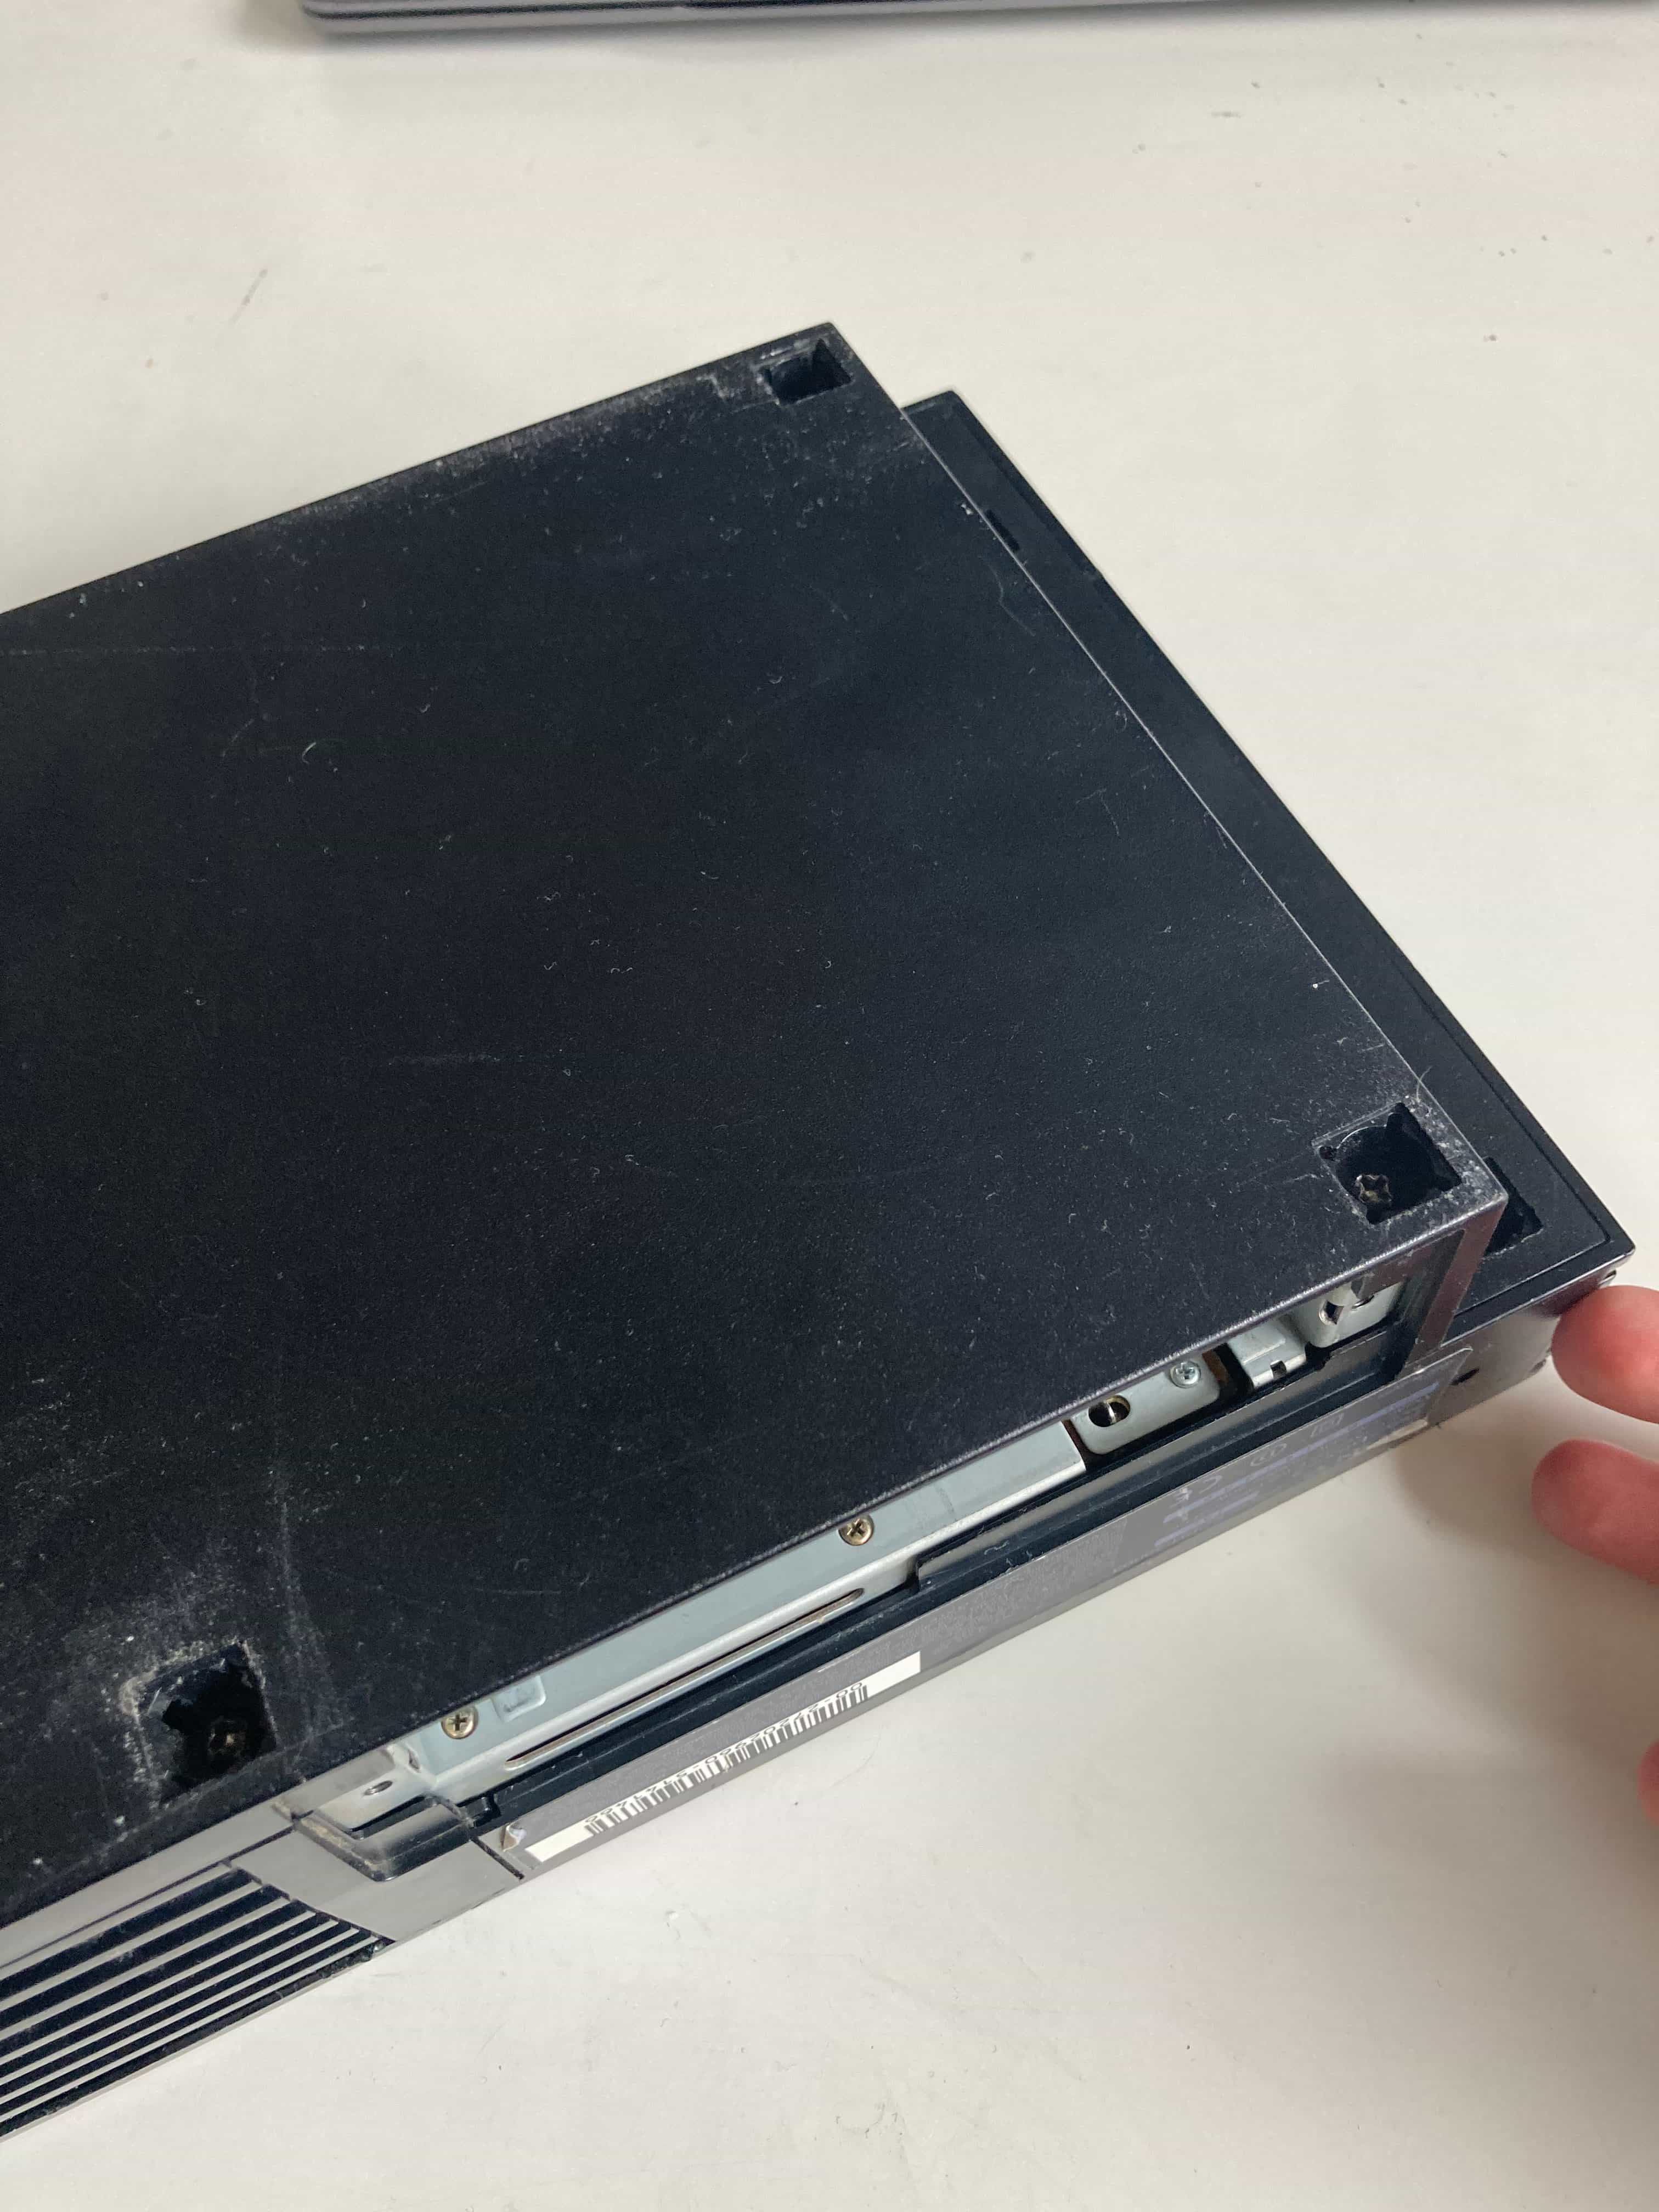
The 3900x series were the last ones to come with a FireWire 400 port next to the USB ports. They called it the I-Link, using which you could connect two consoles together to play the same game, yet on separate screens in a sort of a LAN-like experience, which sounds good on paper, however not many games supported it (even less so gamers, I imagine) and it was dropped from subsequent revisions (my other 50004 does not have the port, but it has the opening for it in the shell which is covered by that blue sticker).
That’s nice and all, but there’s one “problem” you can’t spot from text and images - IT SMELLS REAL BAD. Like a mixture of cigarette smoke, old electronics, rust, dust, and whatnot. Strong enough that you can smell it from two meters away. This will have to be taken care of. Let's plug it in and give it a shot!
There are no signs of life from the console at all. The lack of the red LED on the Reset button seems particularly concerning – it could be anything from a broken fuse to the power rail being shorted in some way. Pressing it made no difference.
Shall we dig in a little bit deeper? The console is missing one screw, and two other showed the symptoms of being stripped – I gotta be careful with those.
However, my ideas about a proper repair job were upended as soon as I opened the case.
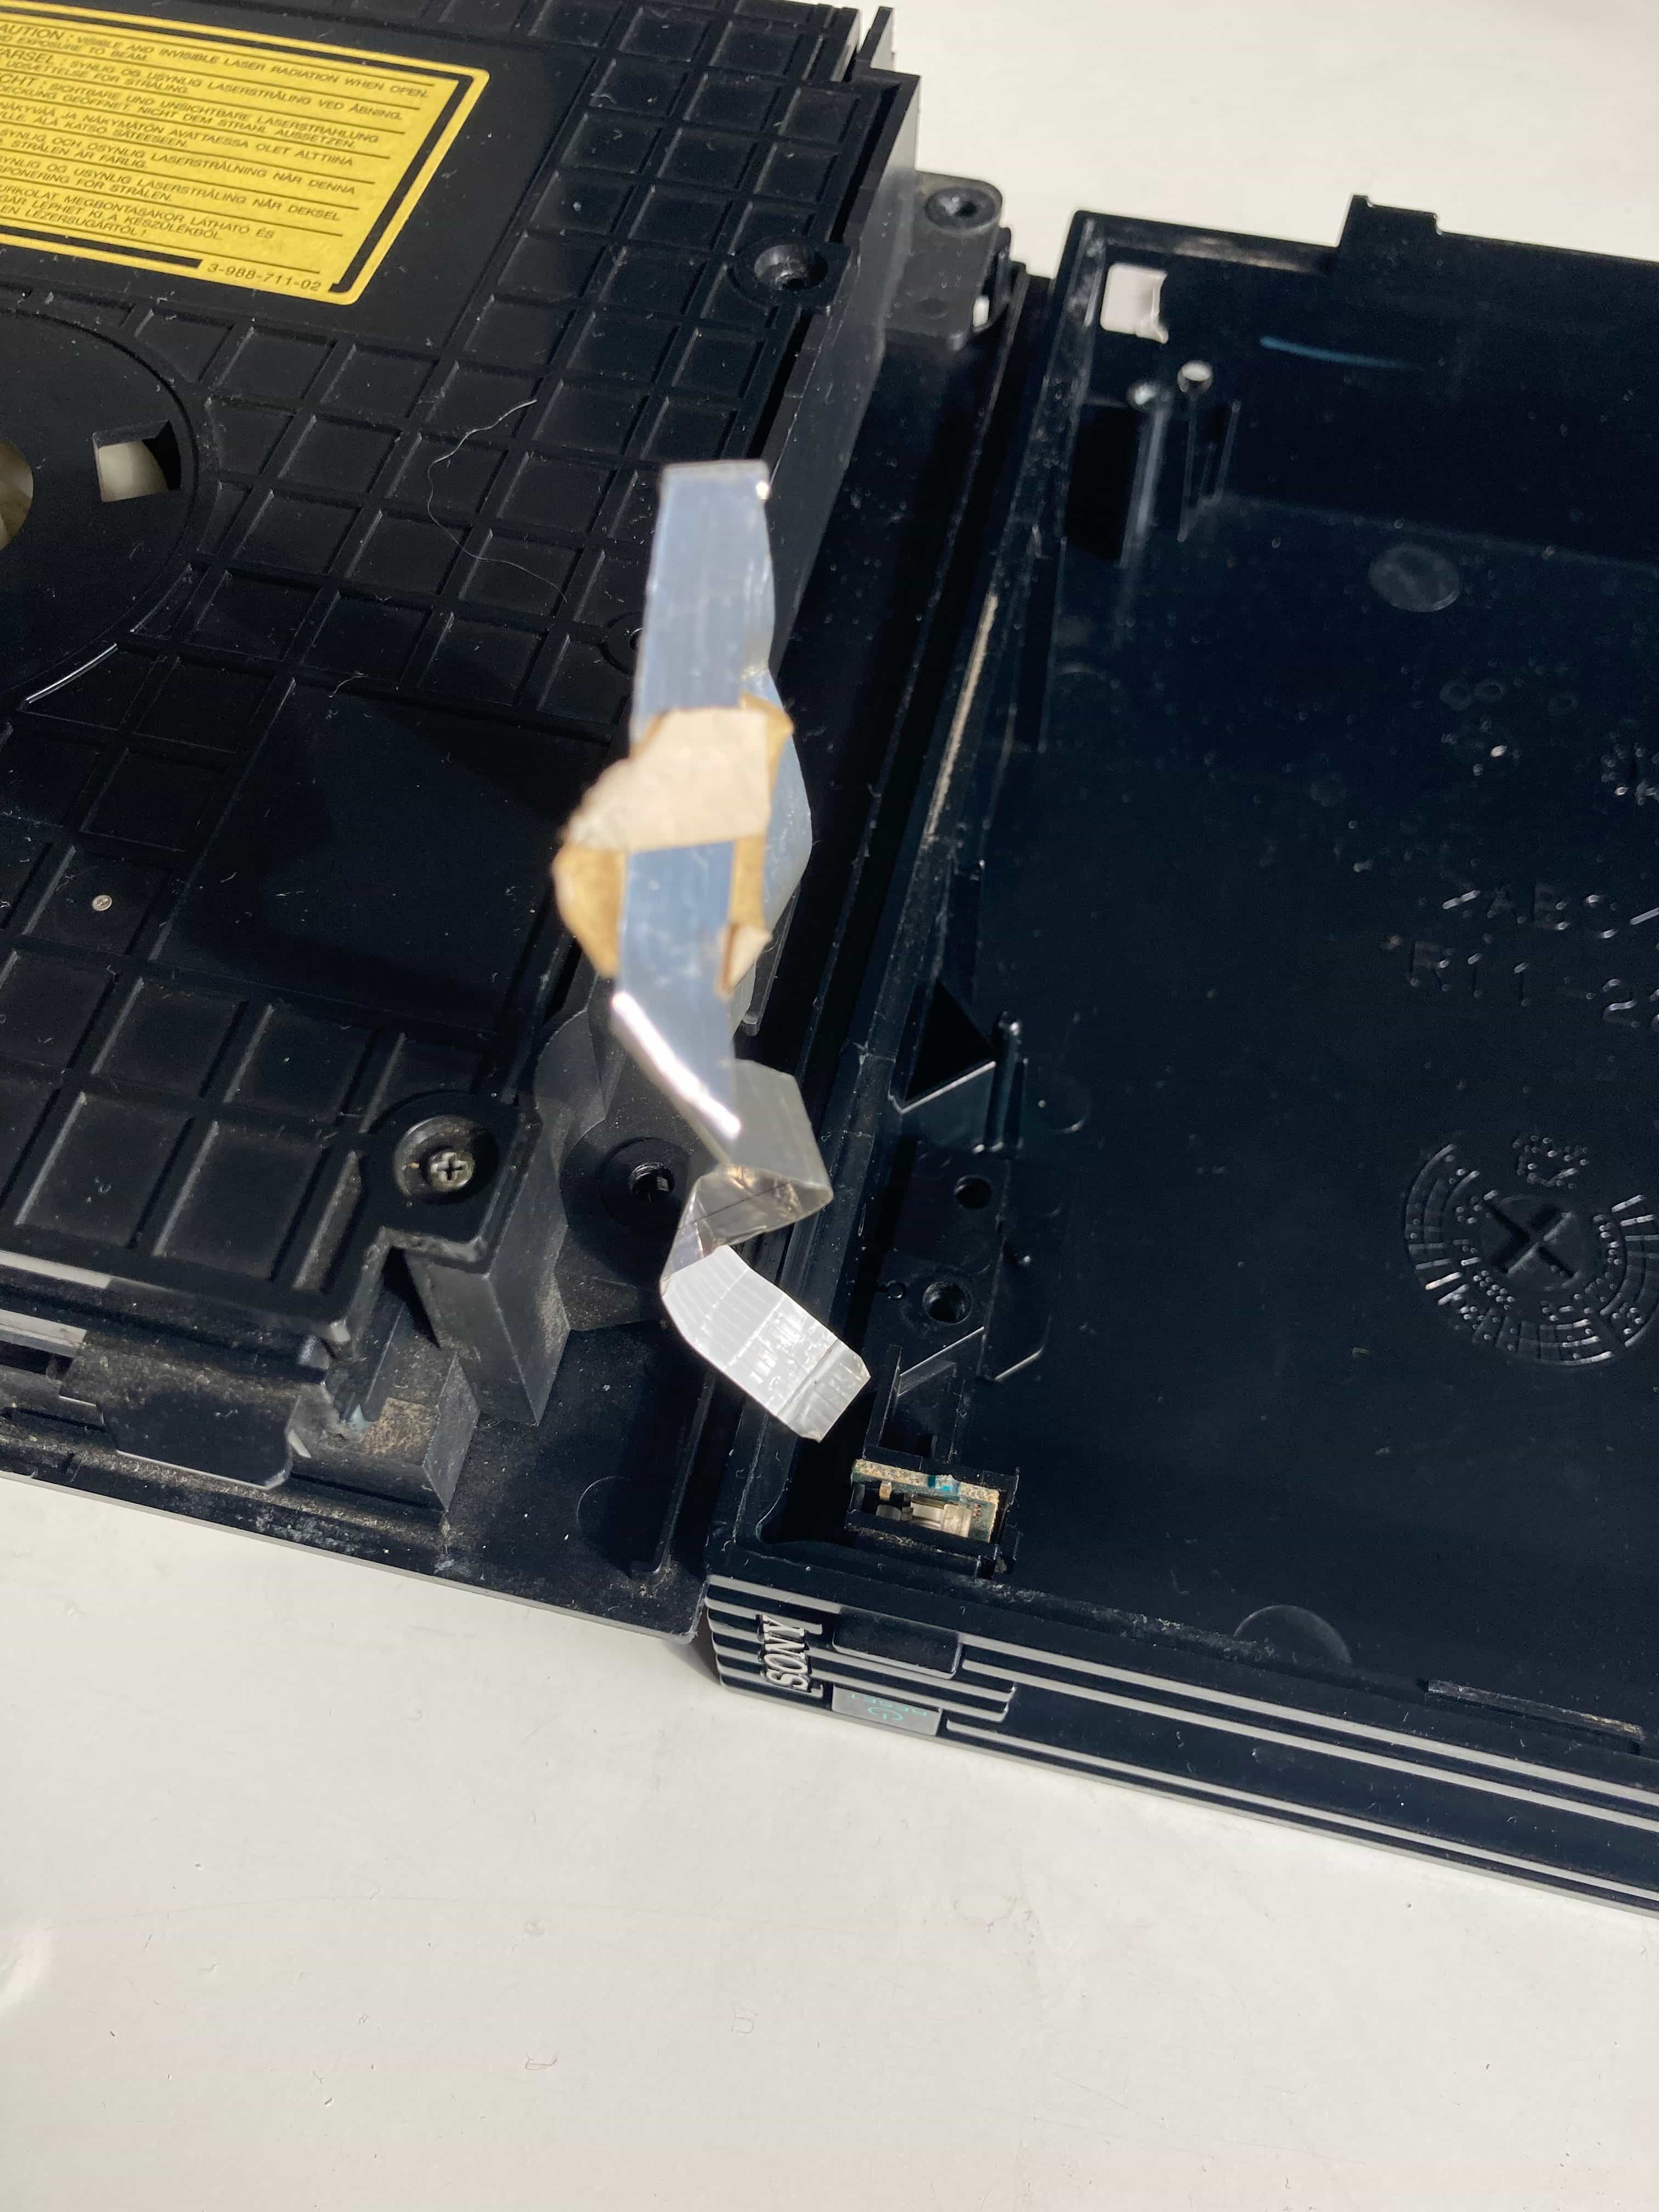
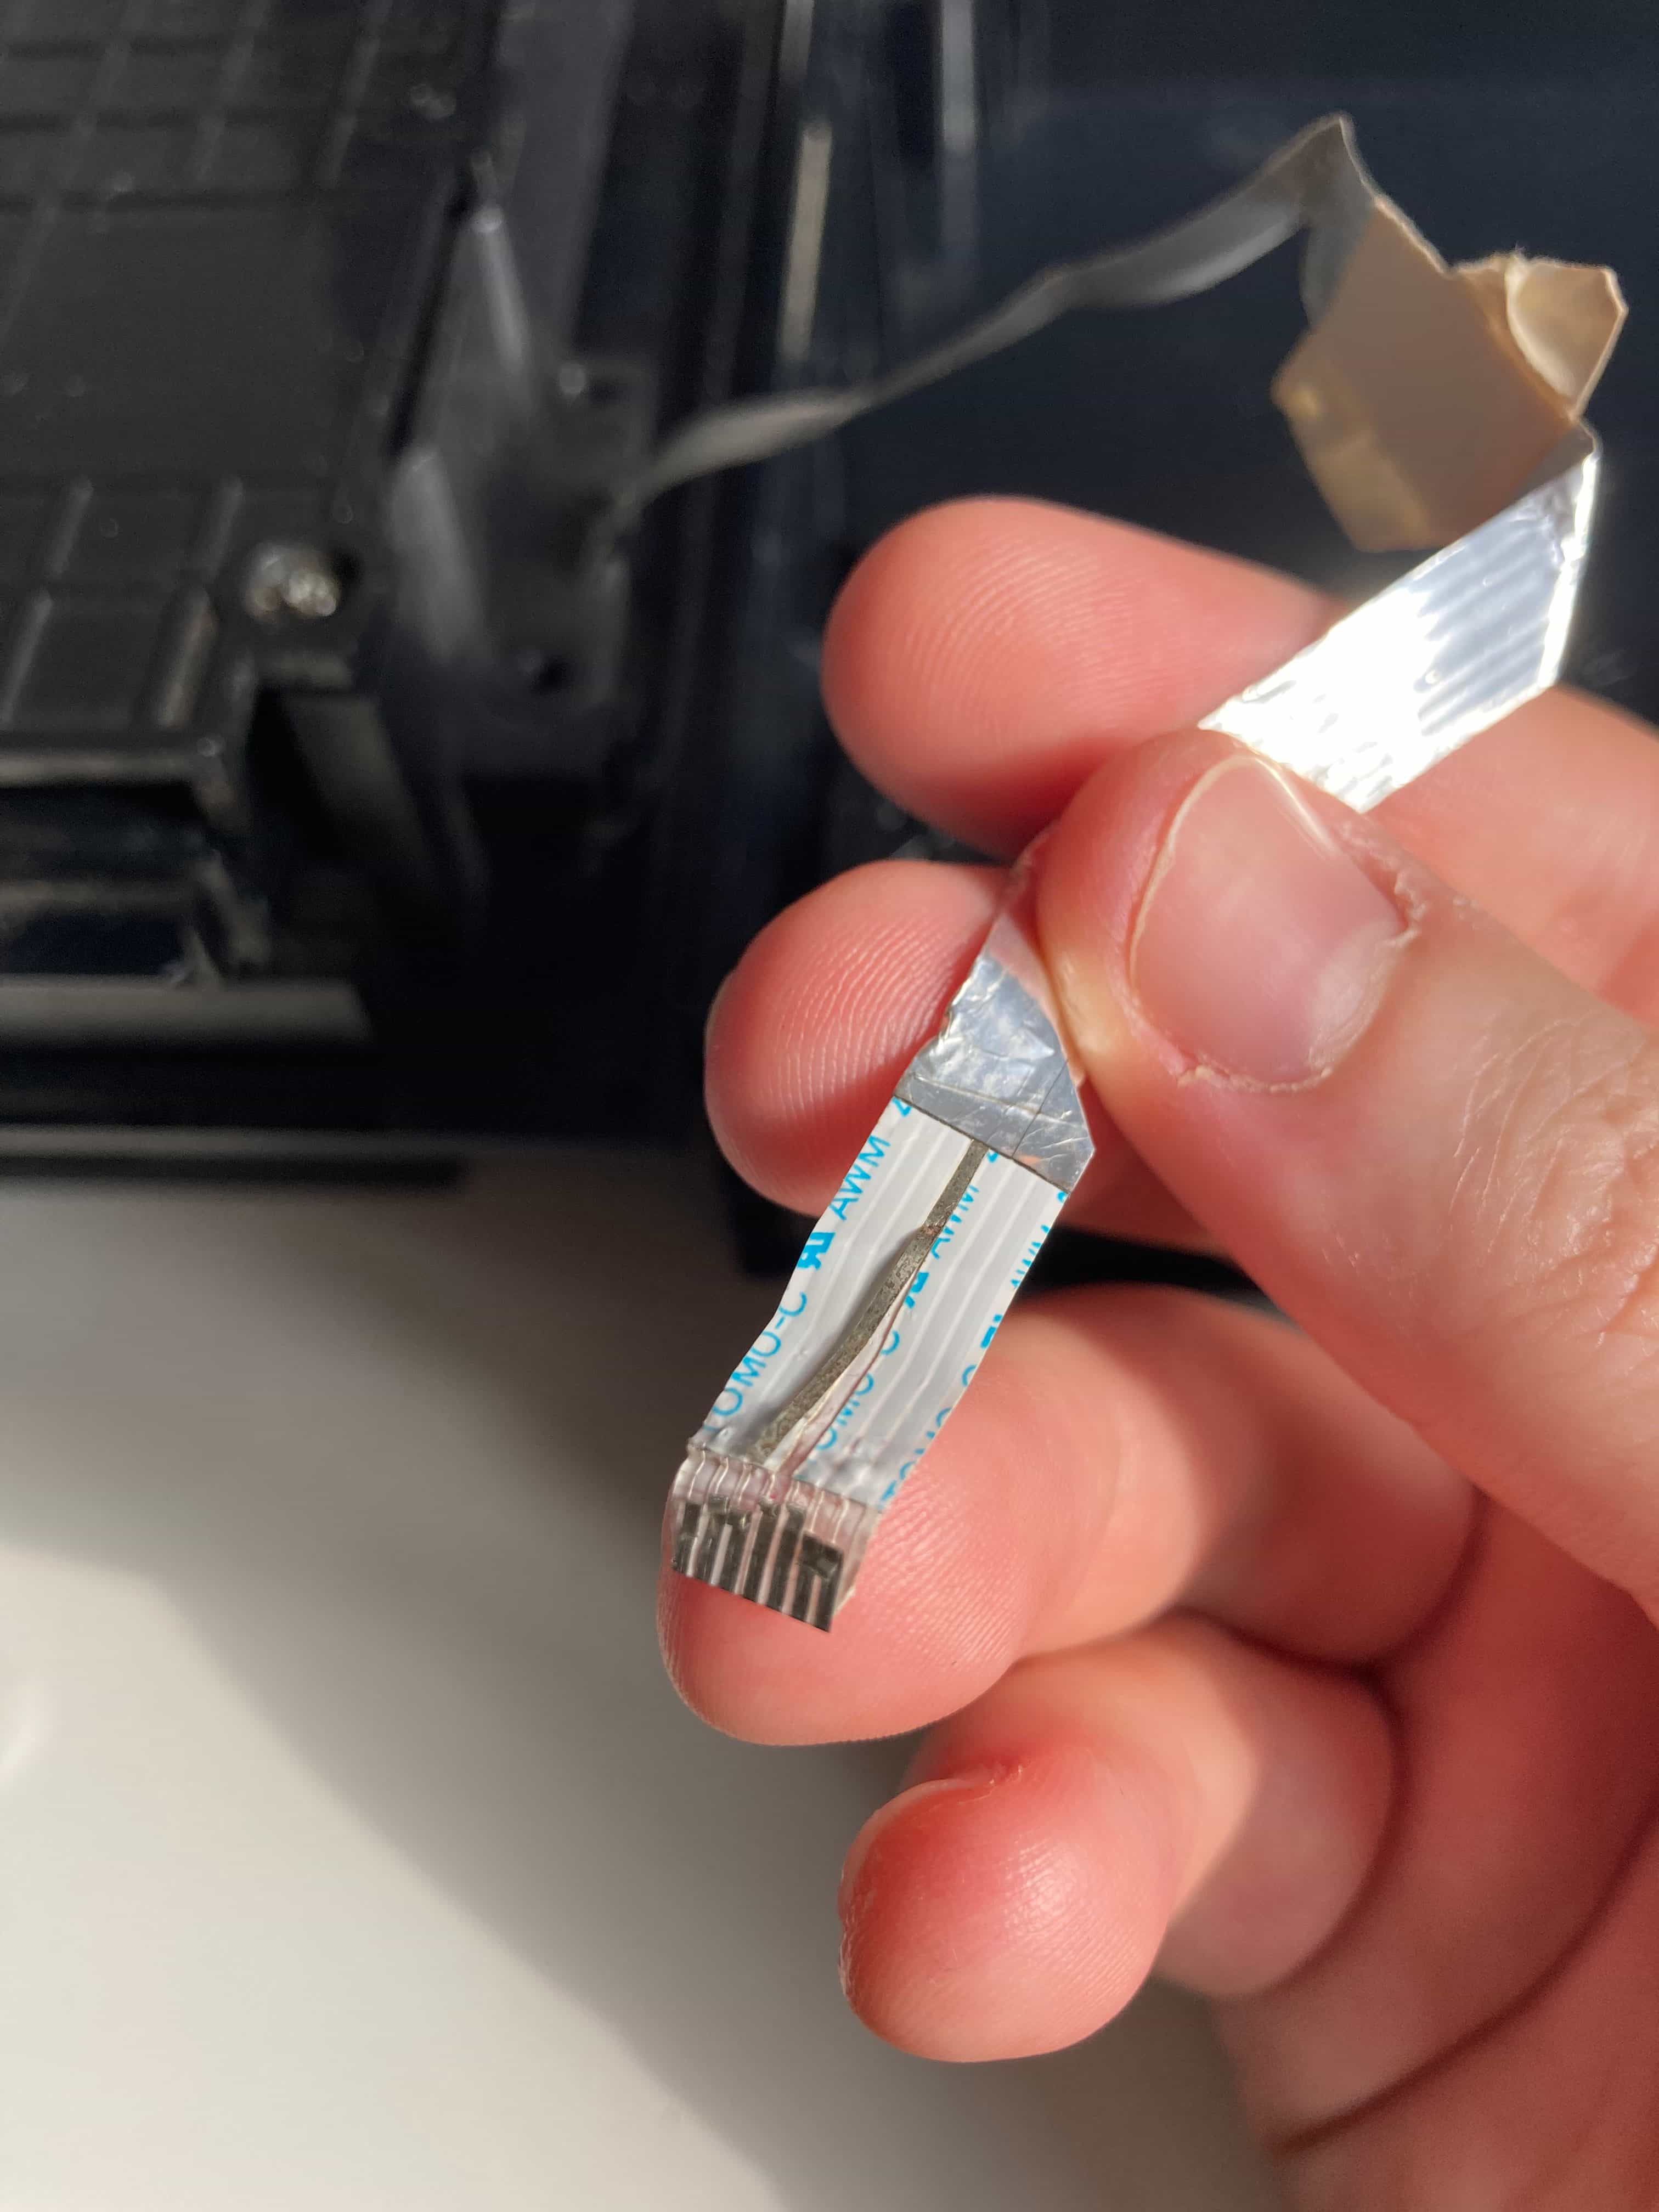
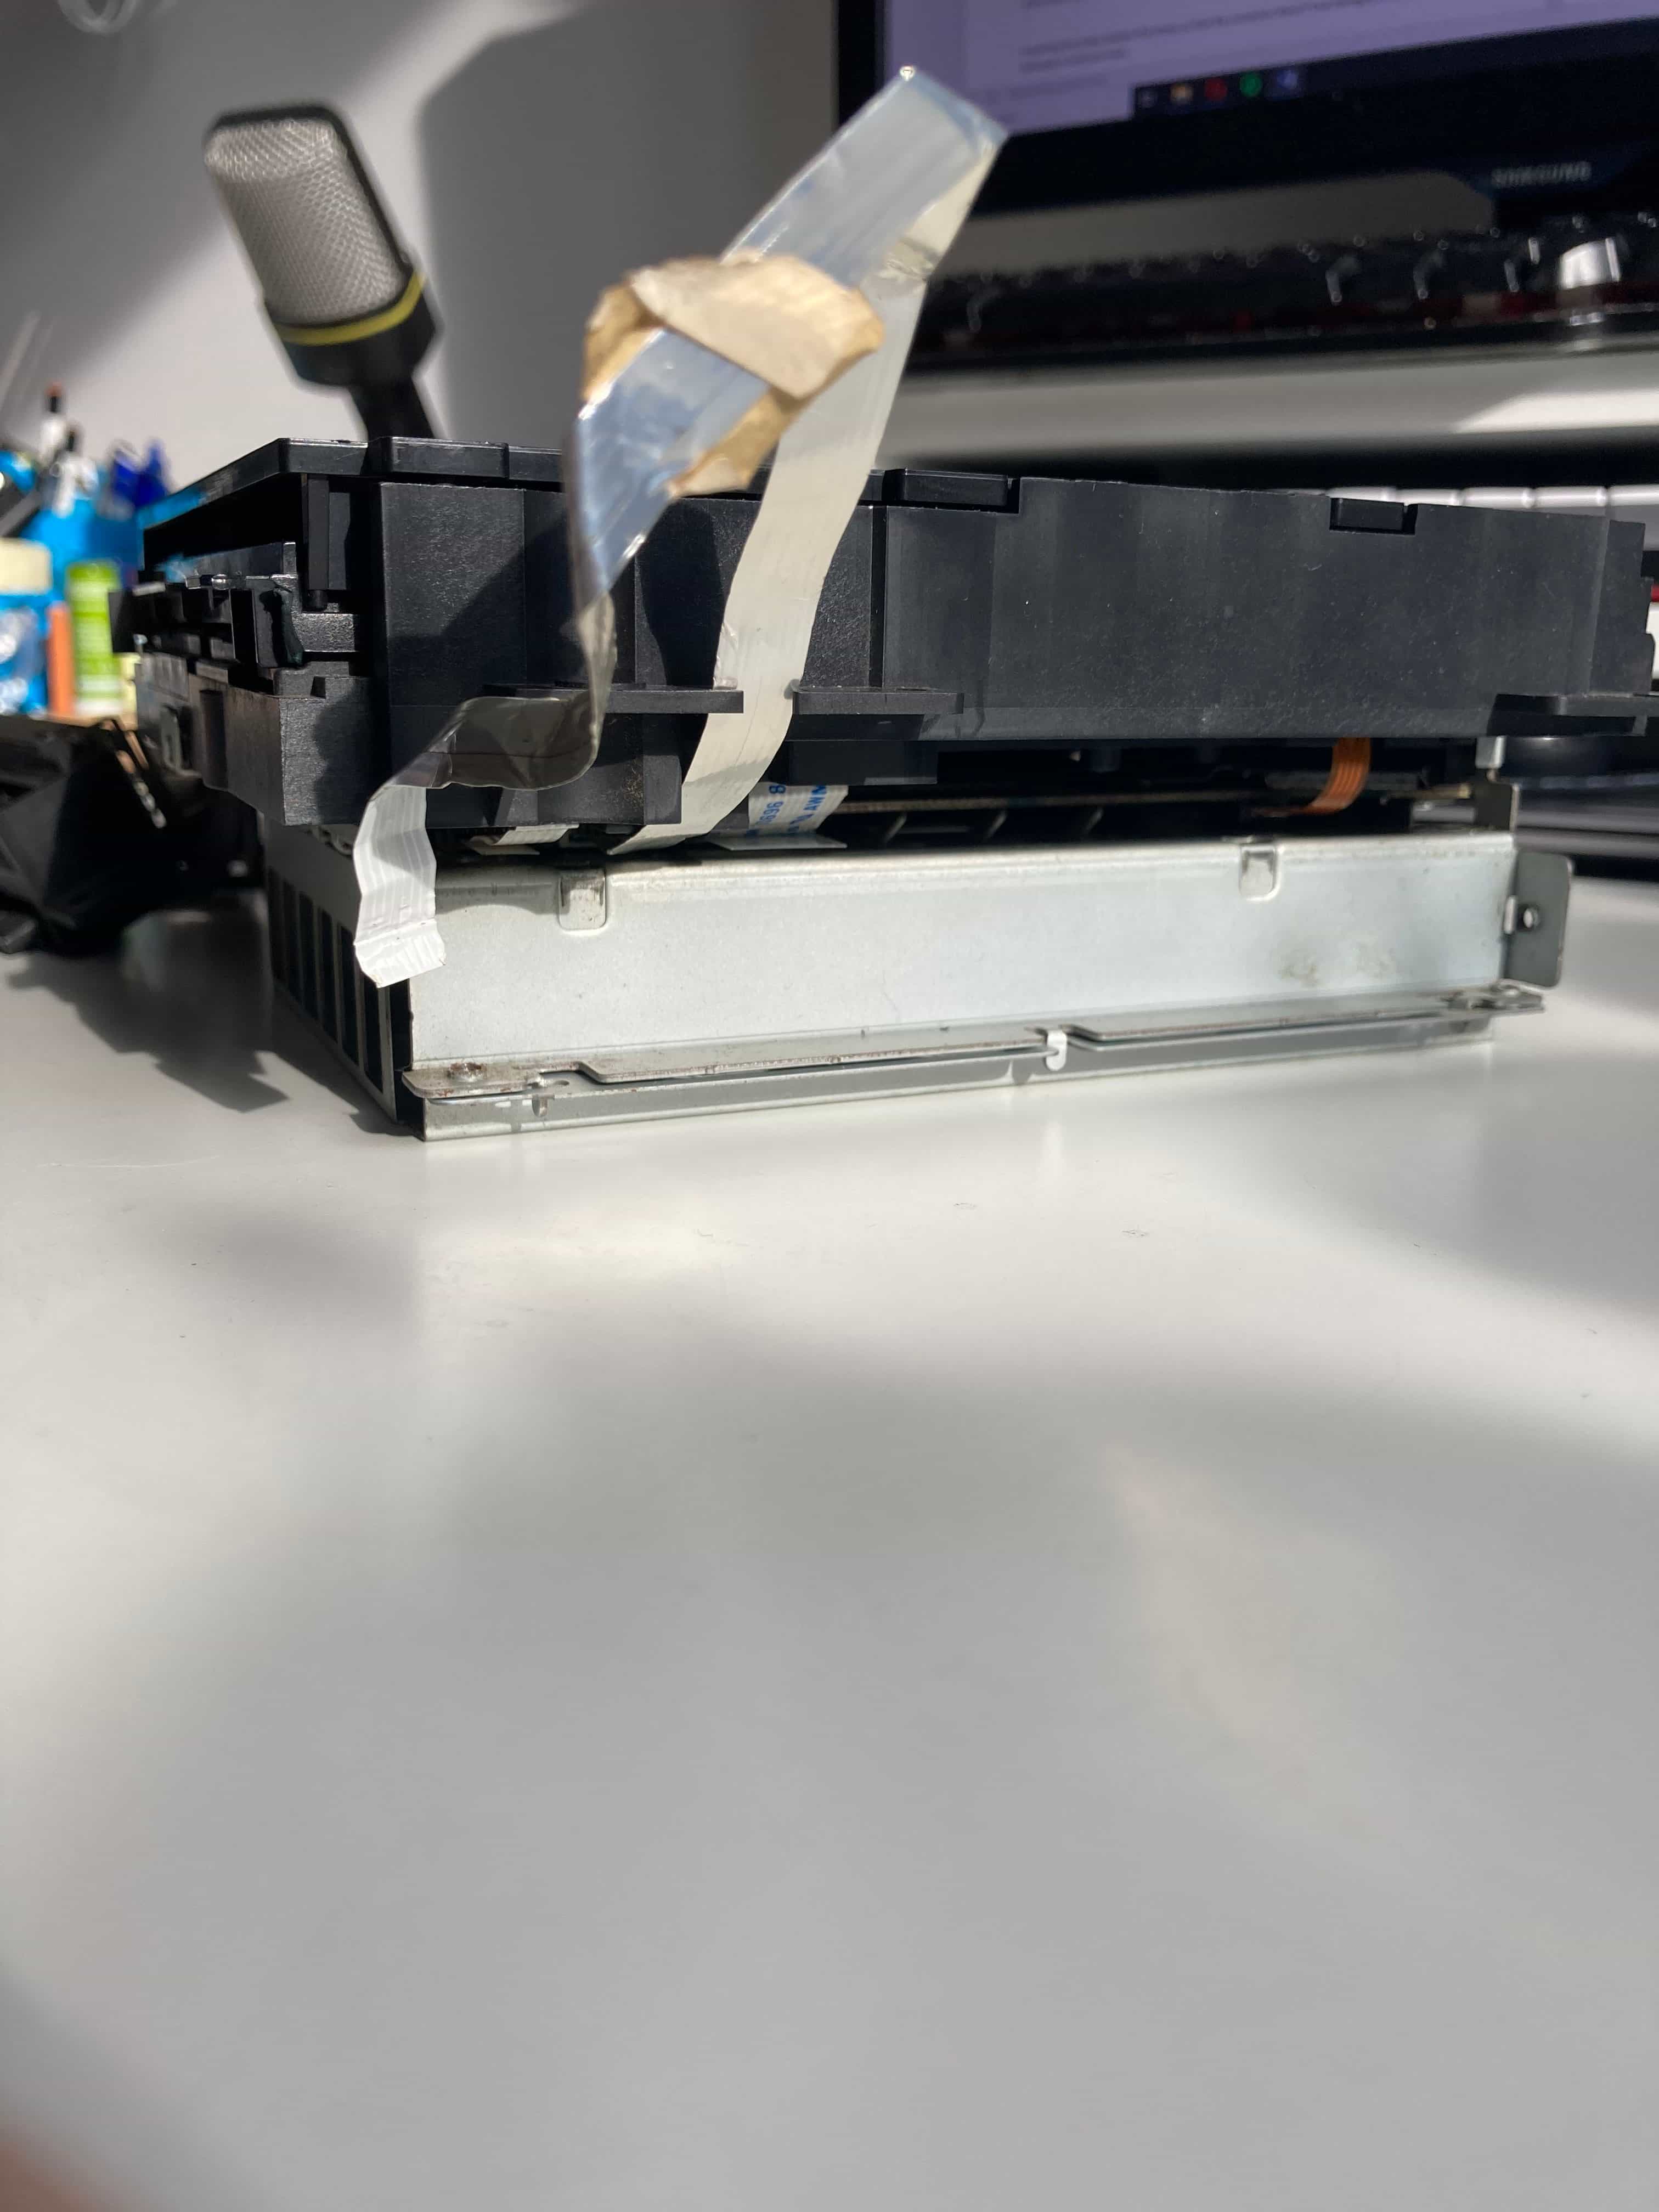
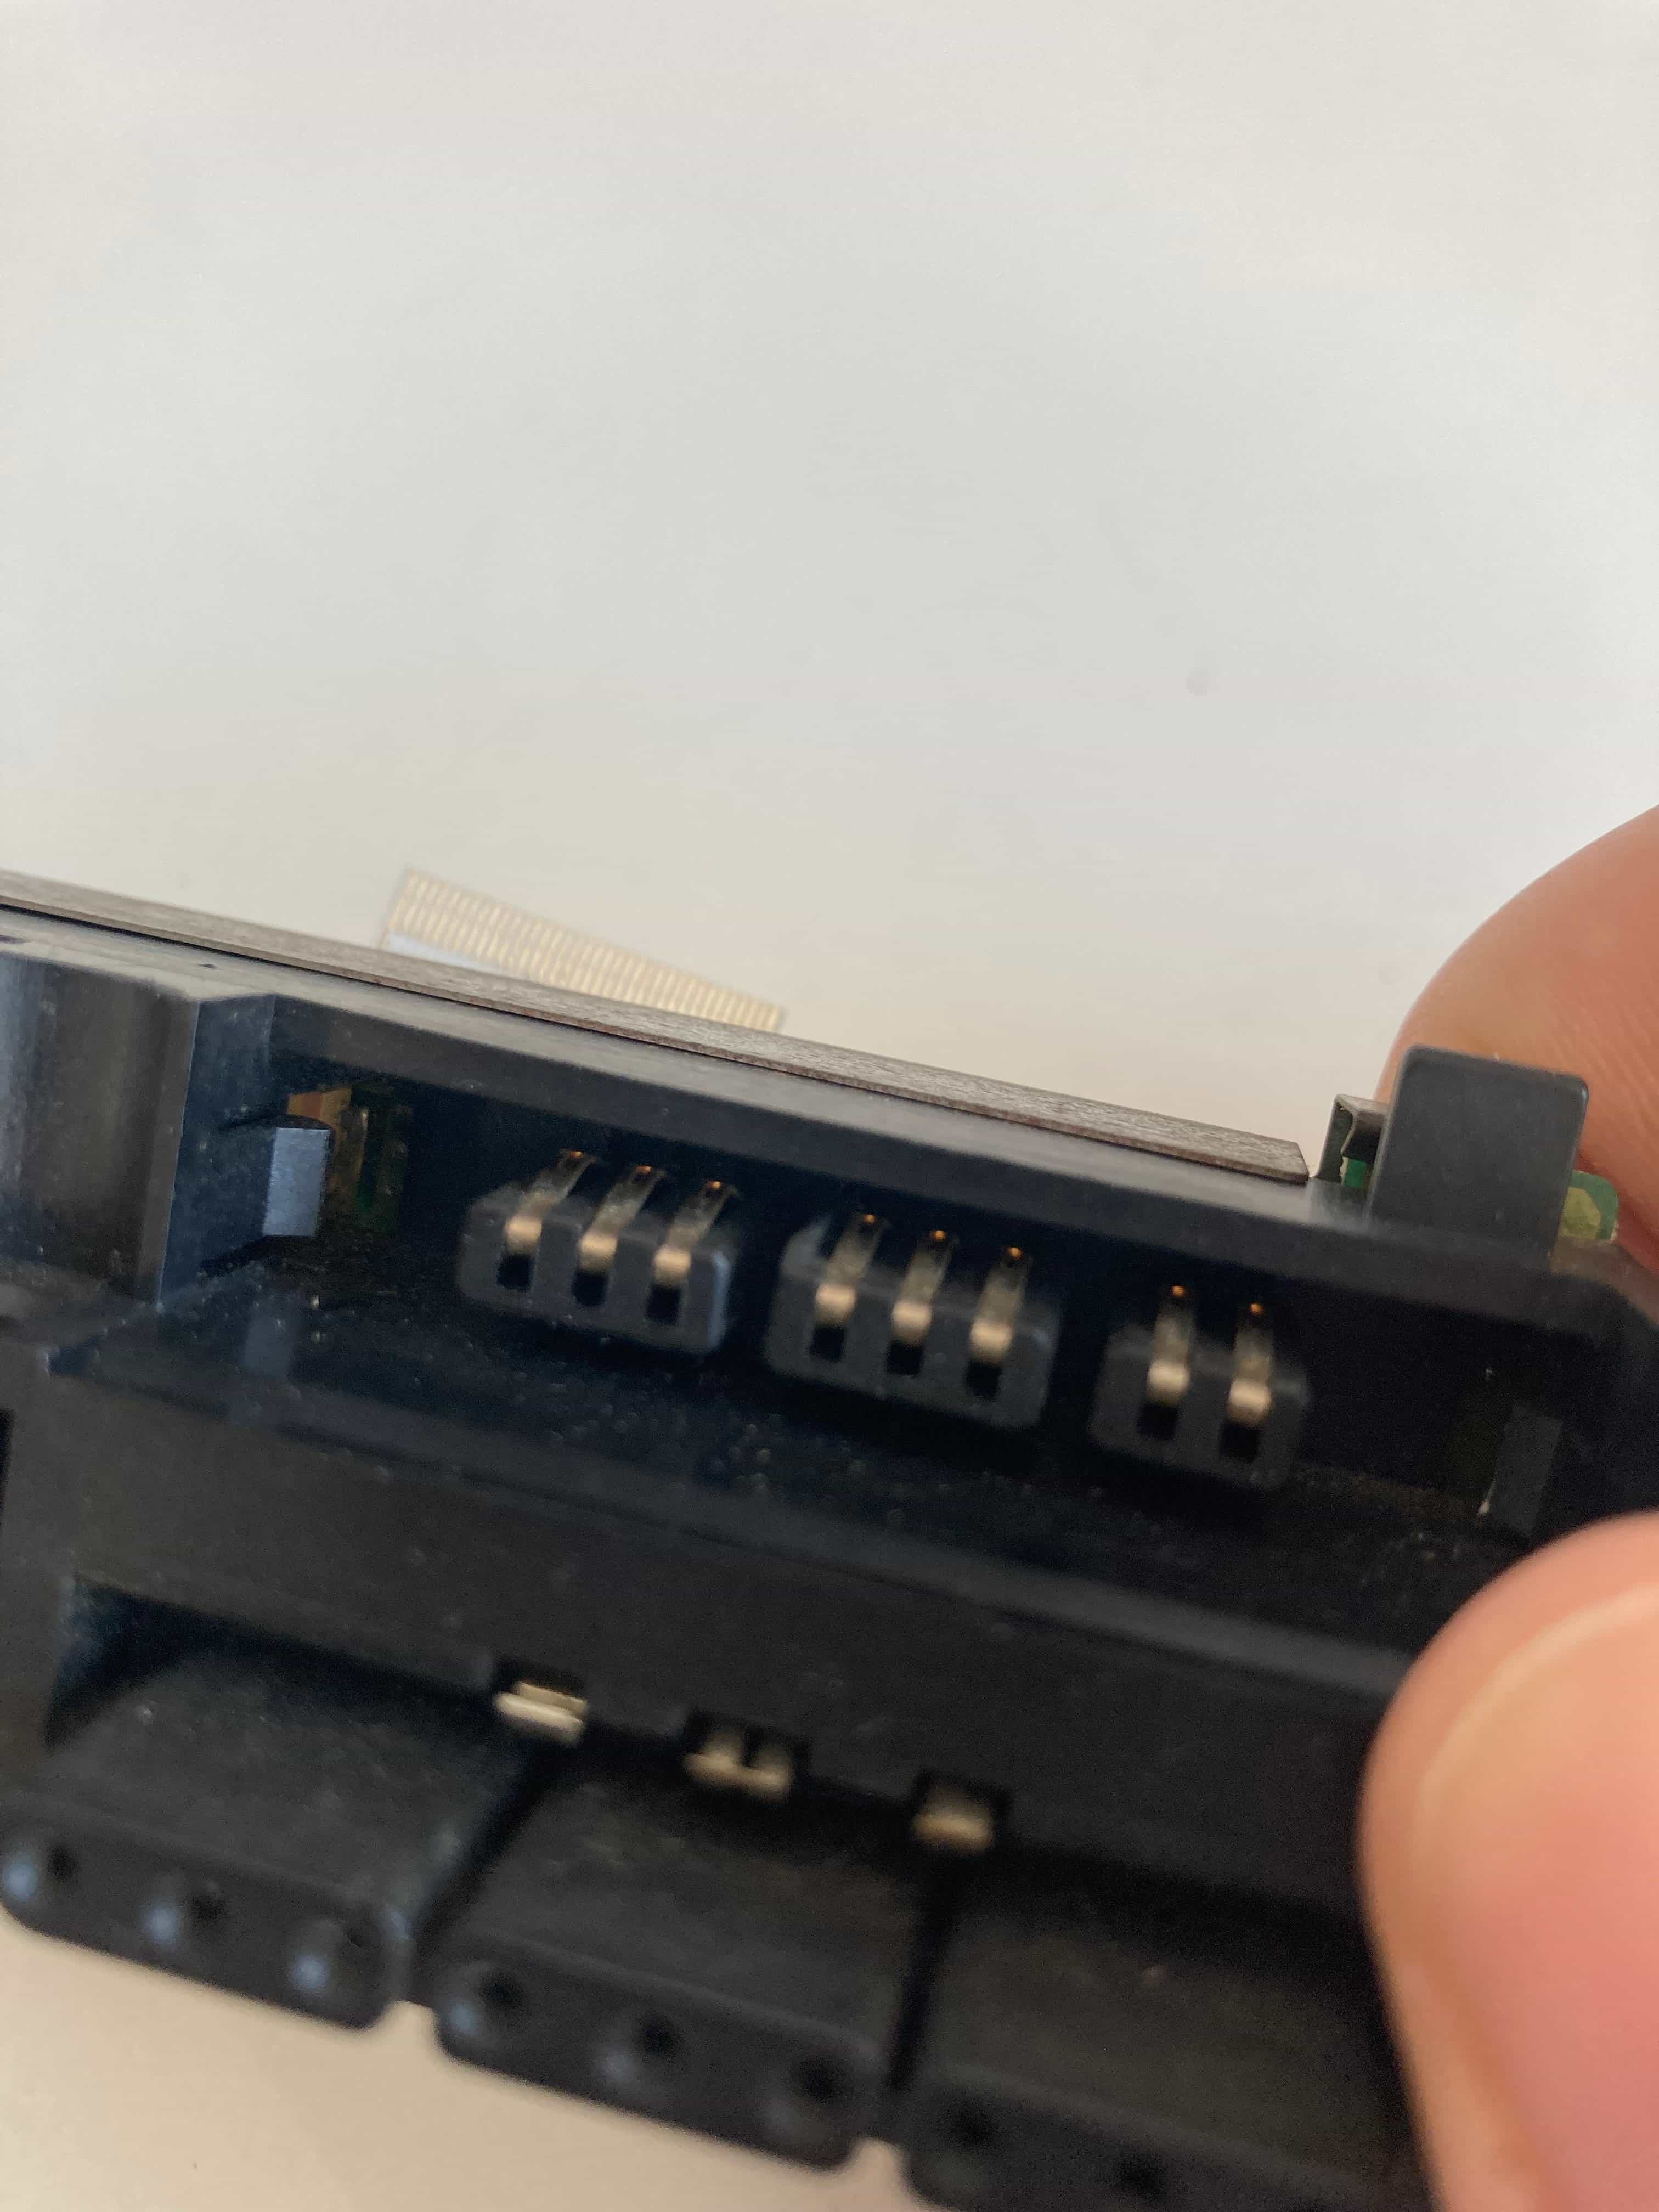
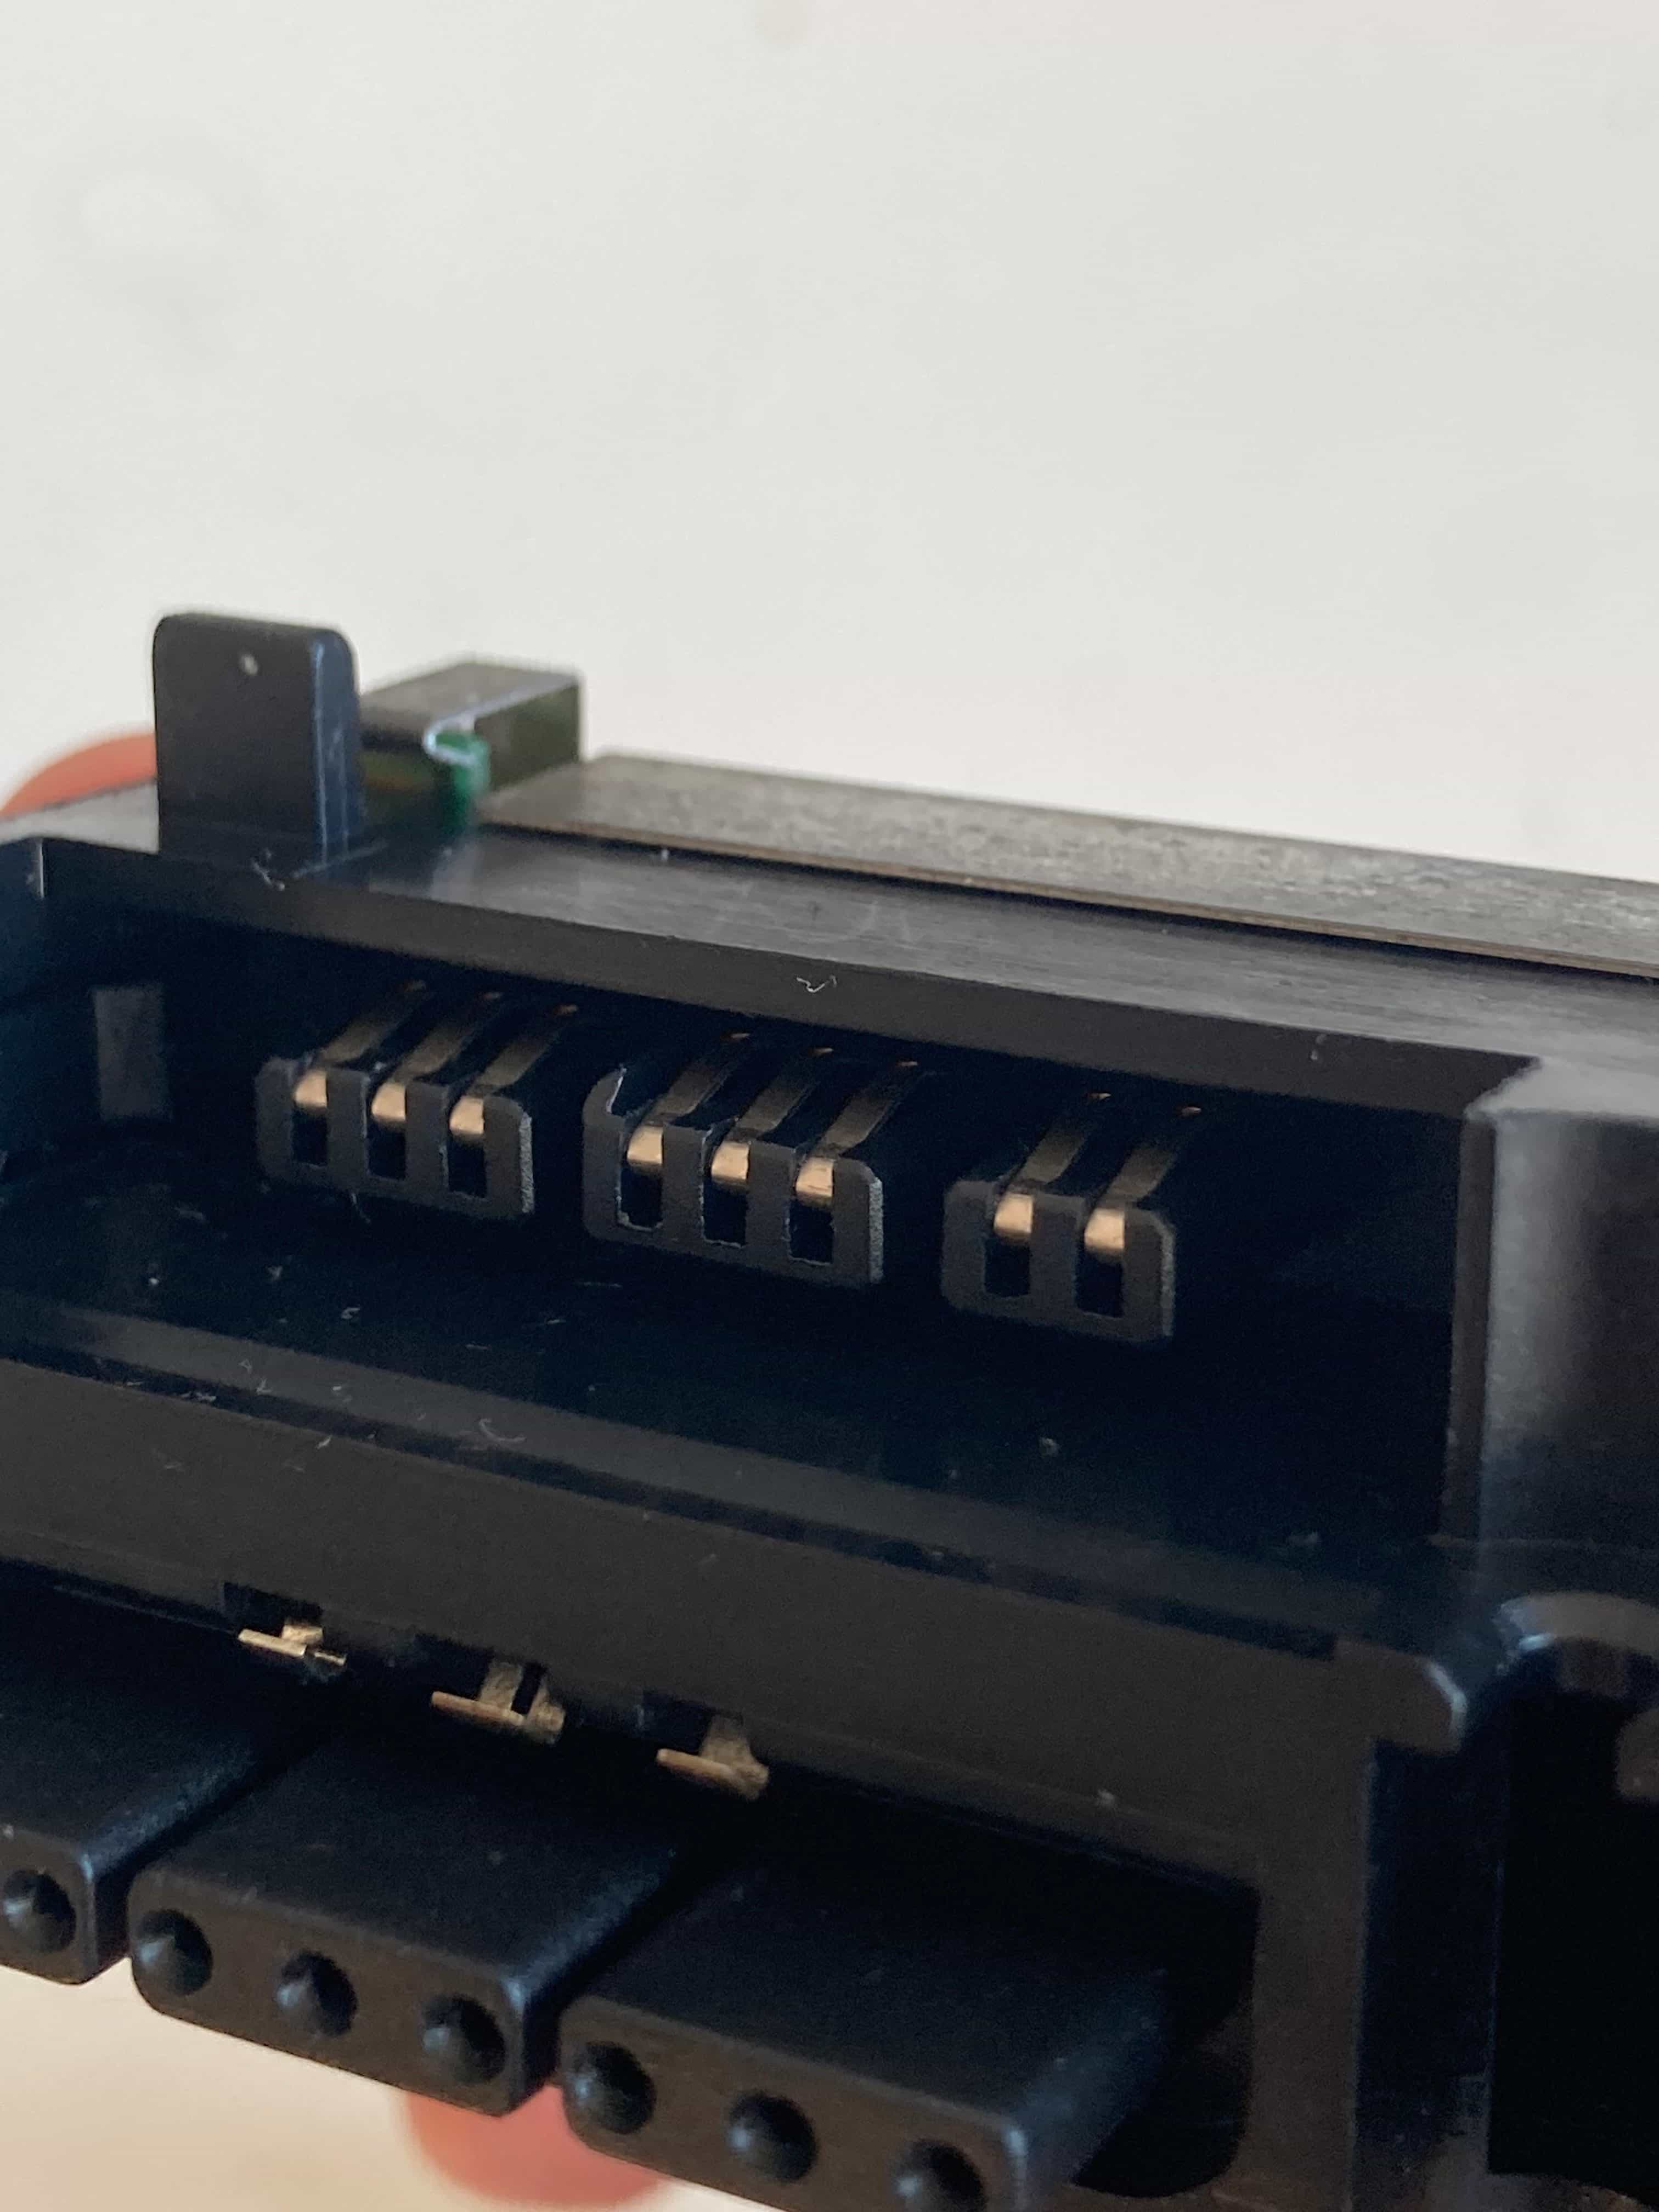
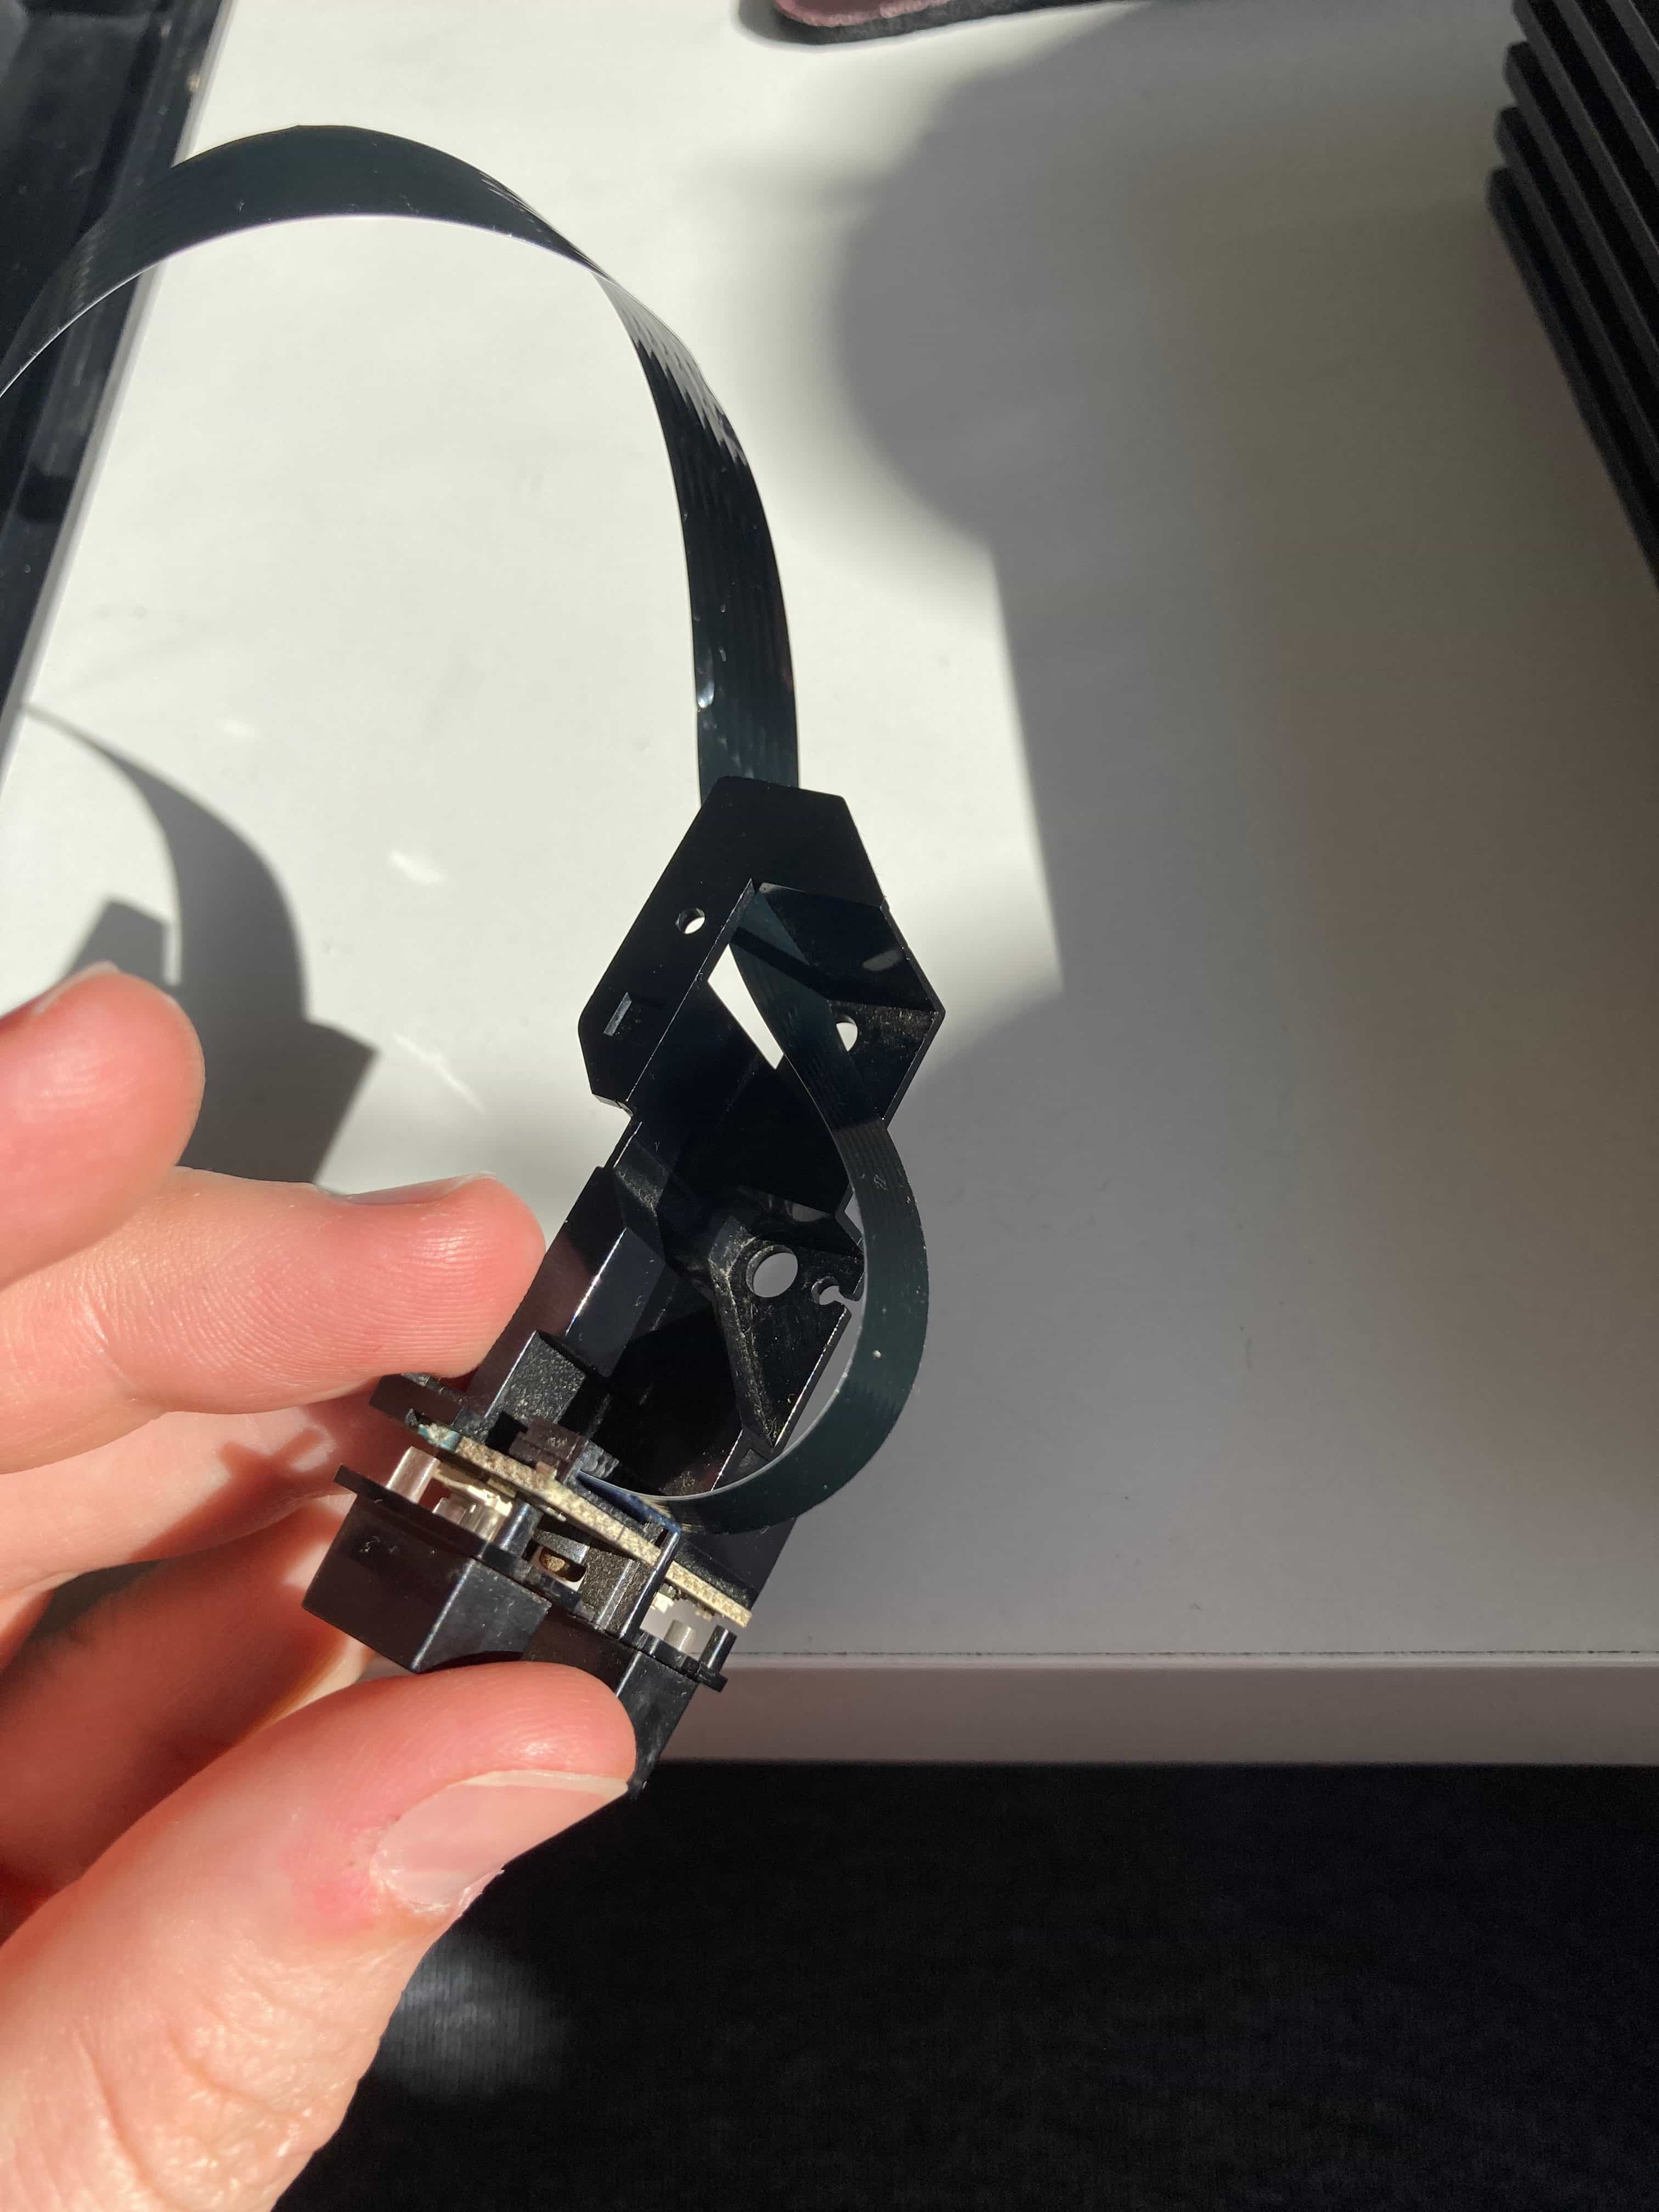
This is the ribbon which connects the power, reset and tray eject PCB with the rest of the console, and every single conductor is torn off. I had never seen anything quite like this in a PS2, and it might well be our culprit.

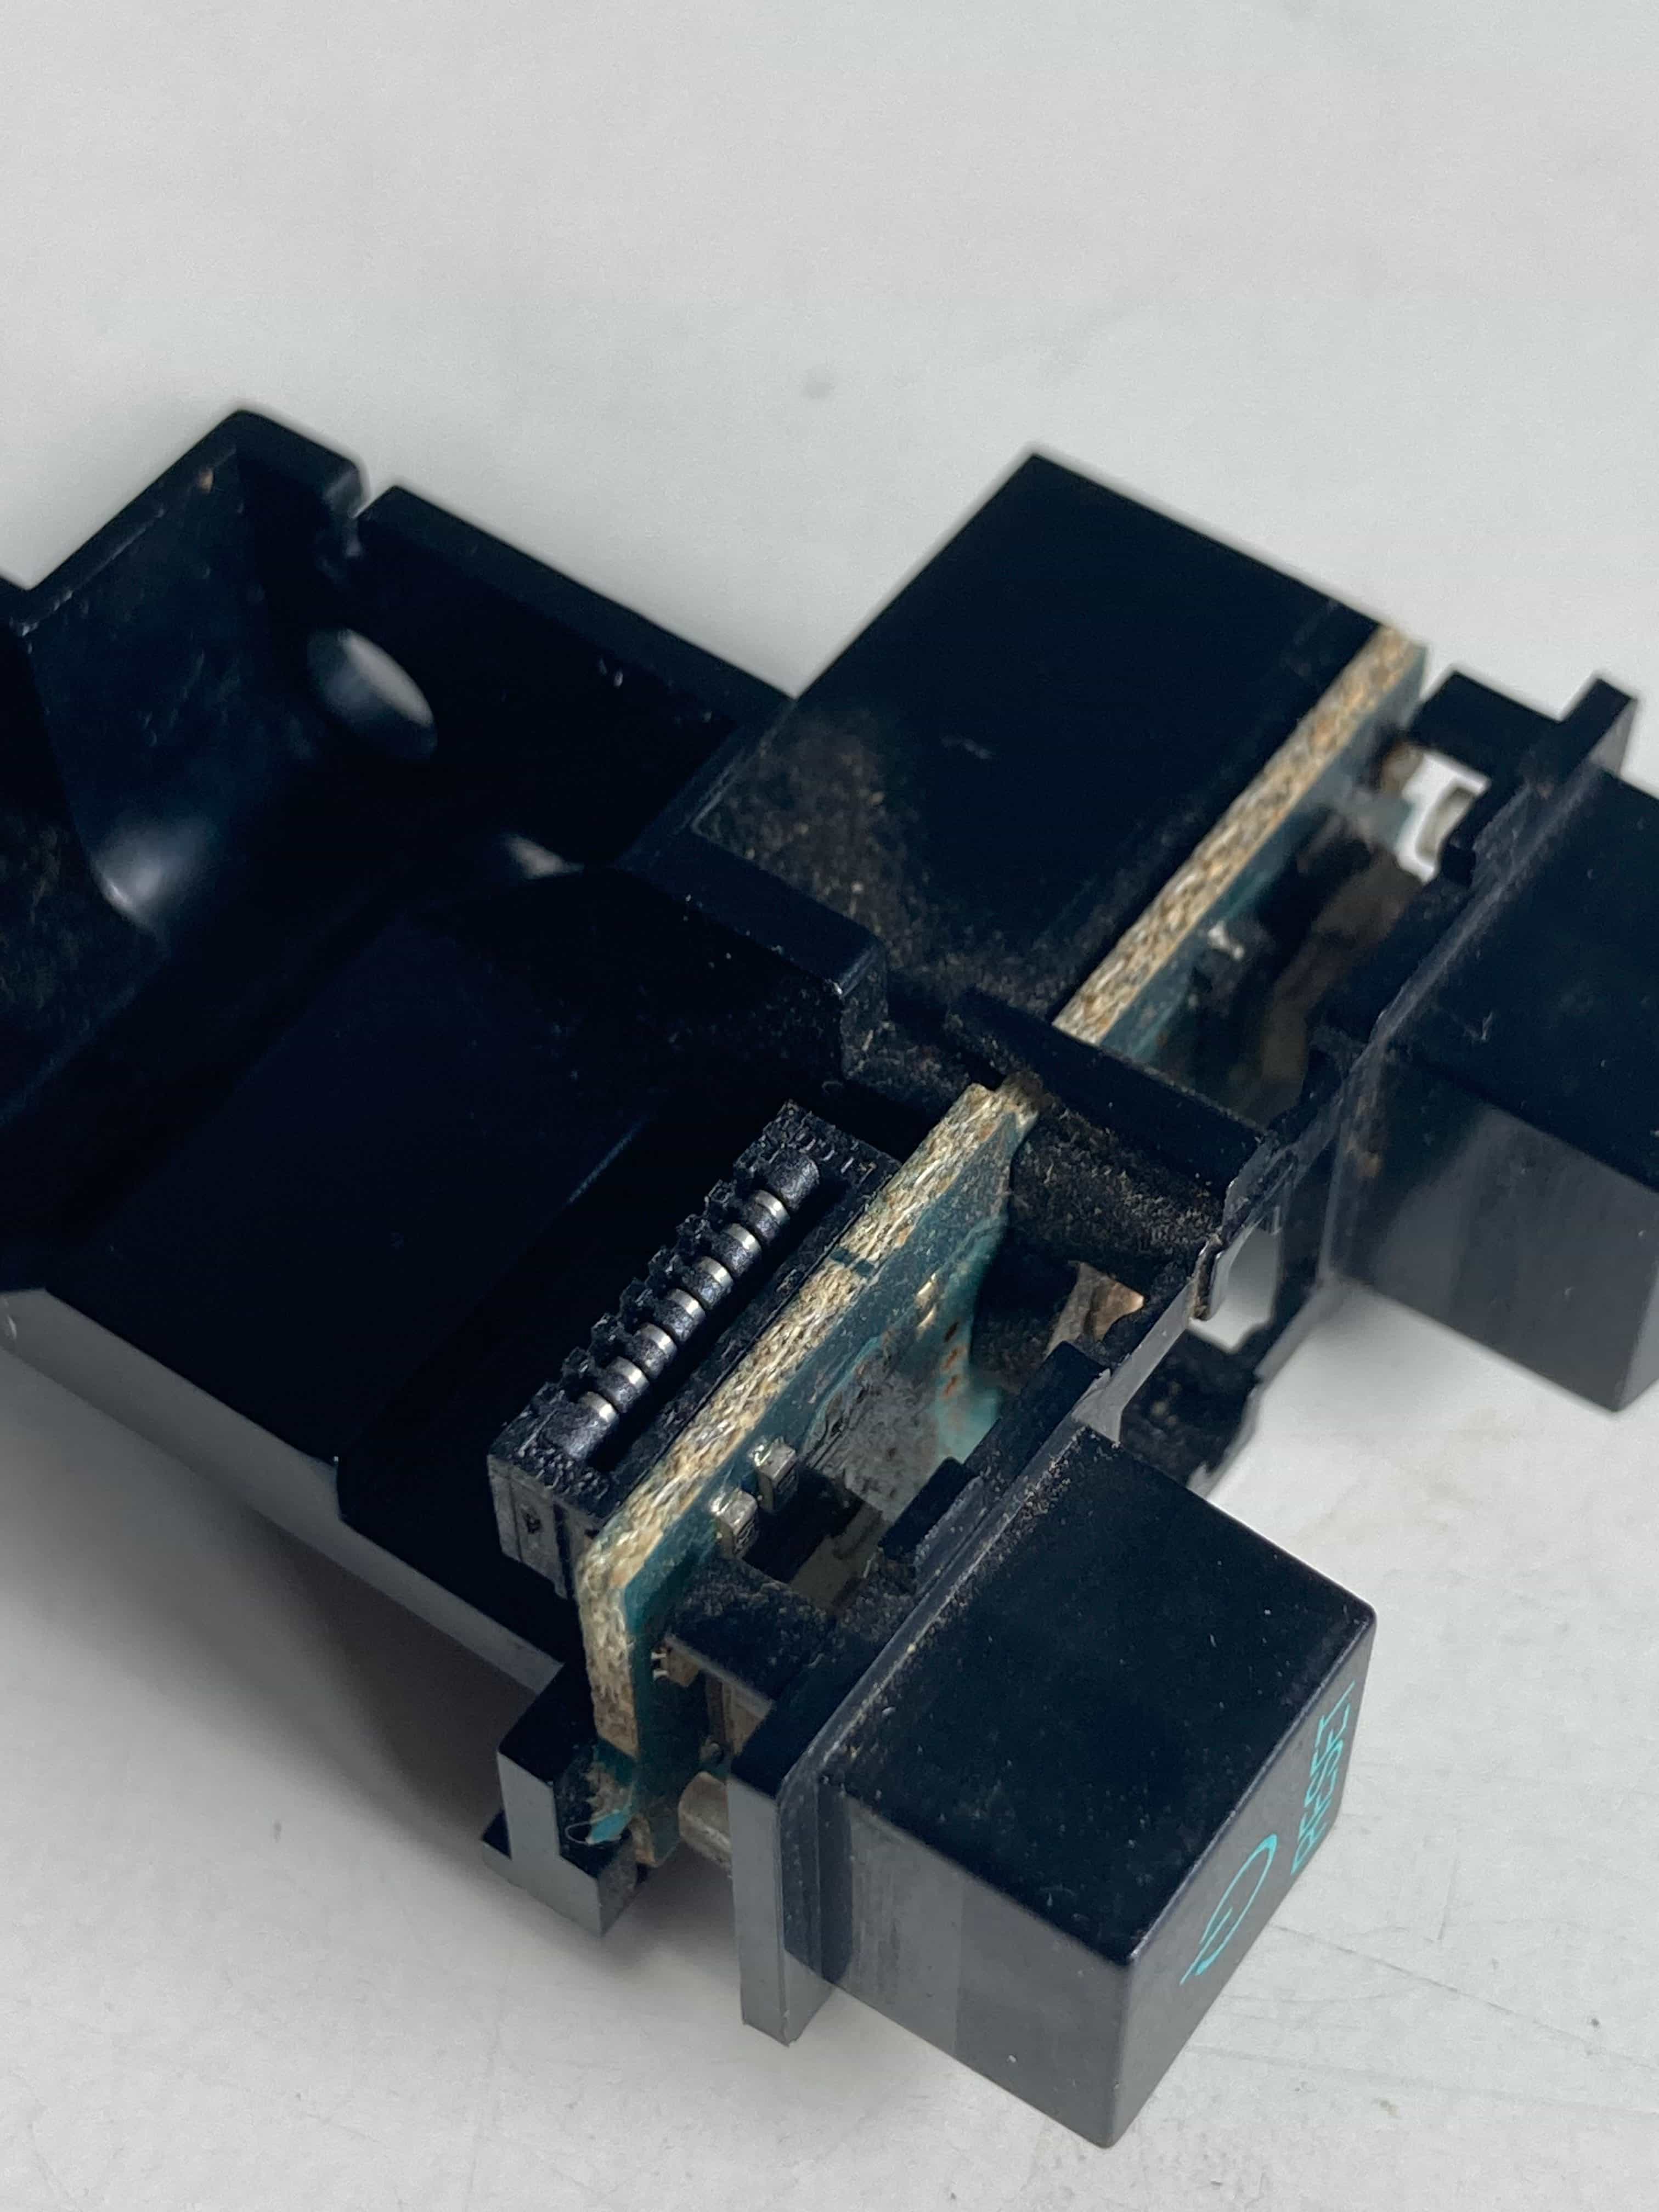
The whole ribbon is incredibly mangled and I am certain that whoever worked on this console before didn’t even bother to learn that it should be wrapped in the receptacle thing in the top shell. Inspecting the power button PCB shows us that the connector doesn’t look damaged in any way, which definitely is welcome news.
(I might add that the pungent smell of cigarettes, old electronics and… dust? or a basement? became even more pronounced. This smell is quite unique – repulsive, but at the same time somewhat intriguing; I compulsively took a few whiffs in attempt to put my olfactory finger on some aromatic element I could recognize but alas, no dice. Not something that I would like to smell every day, however. One for the fragrance buffs - I should send the console to a nez.)
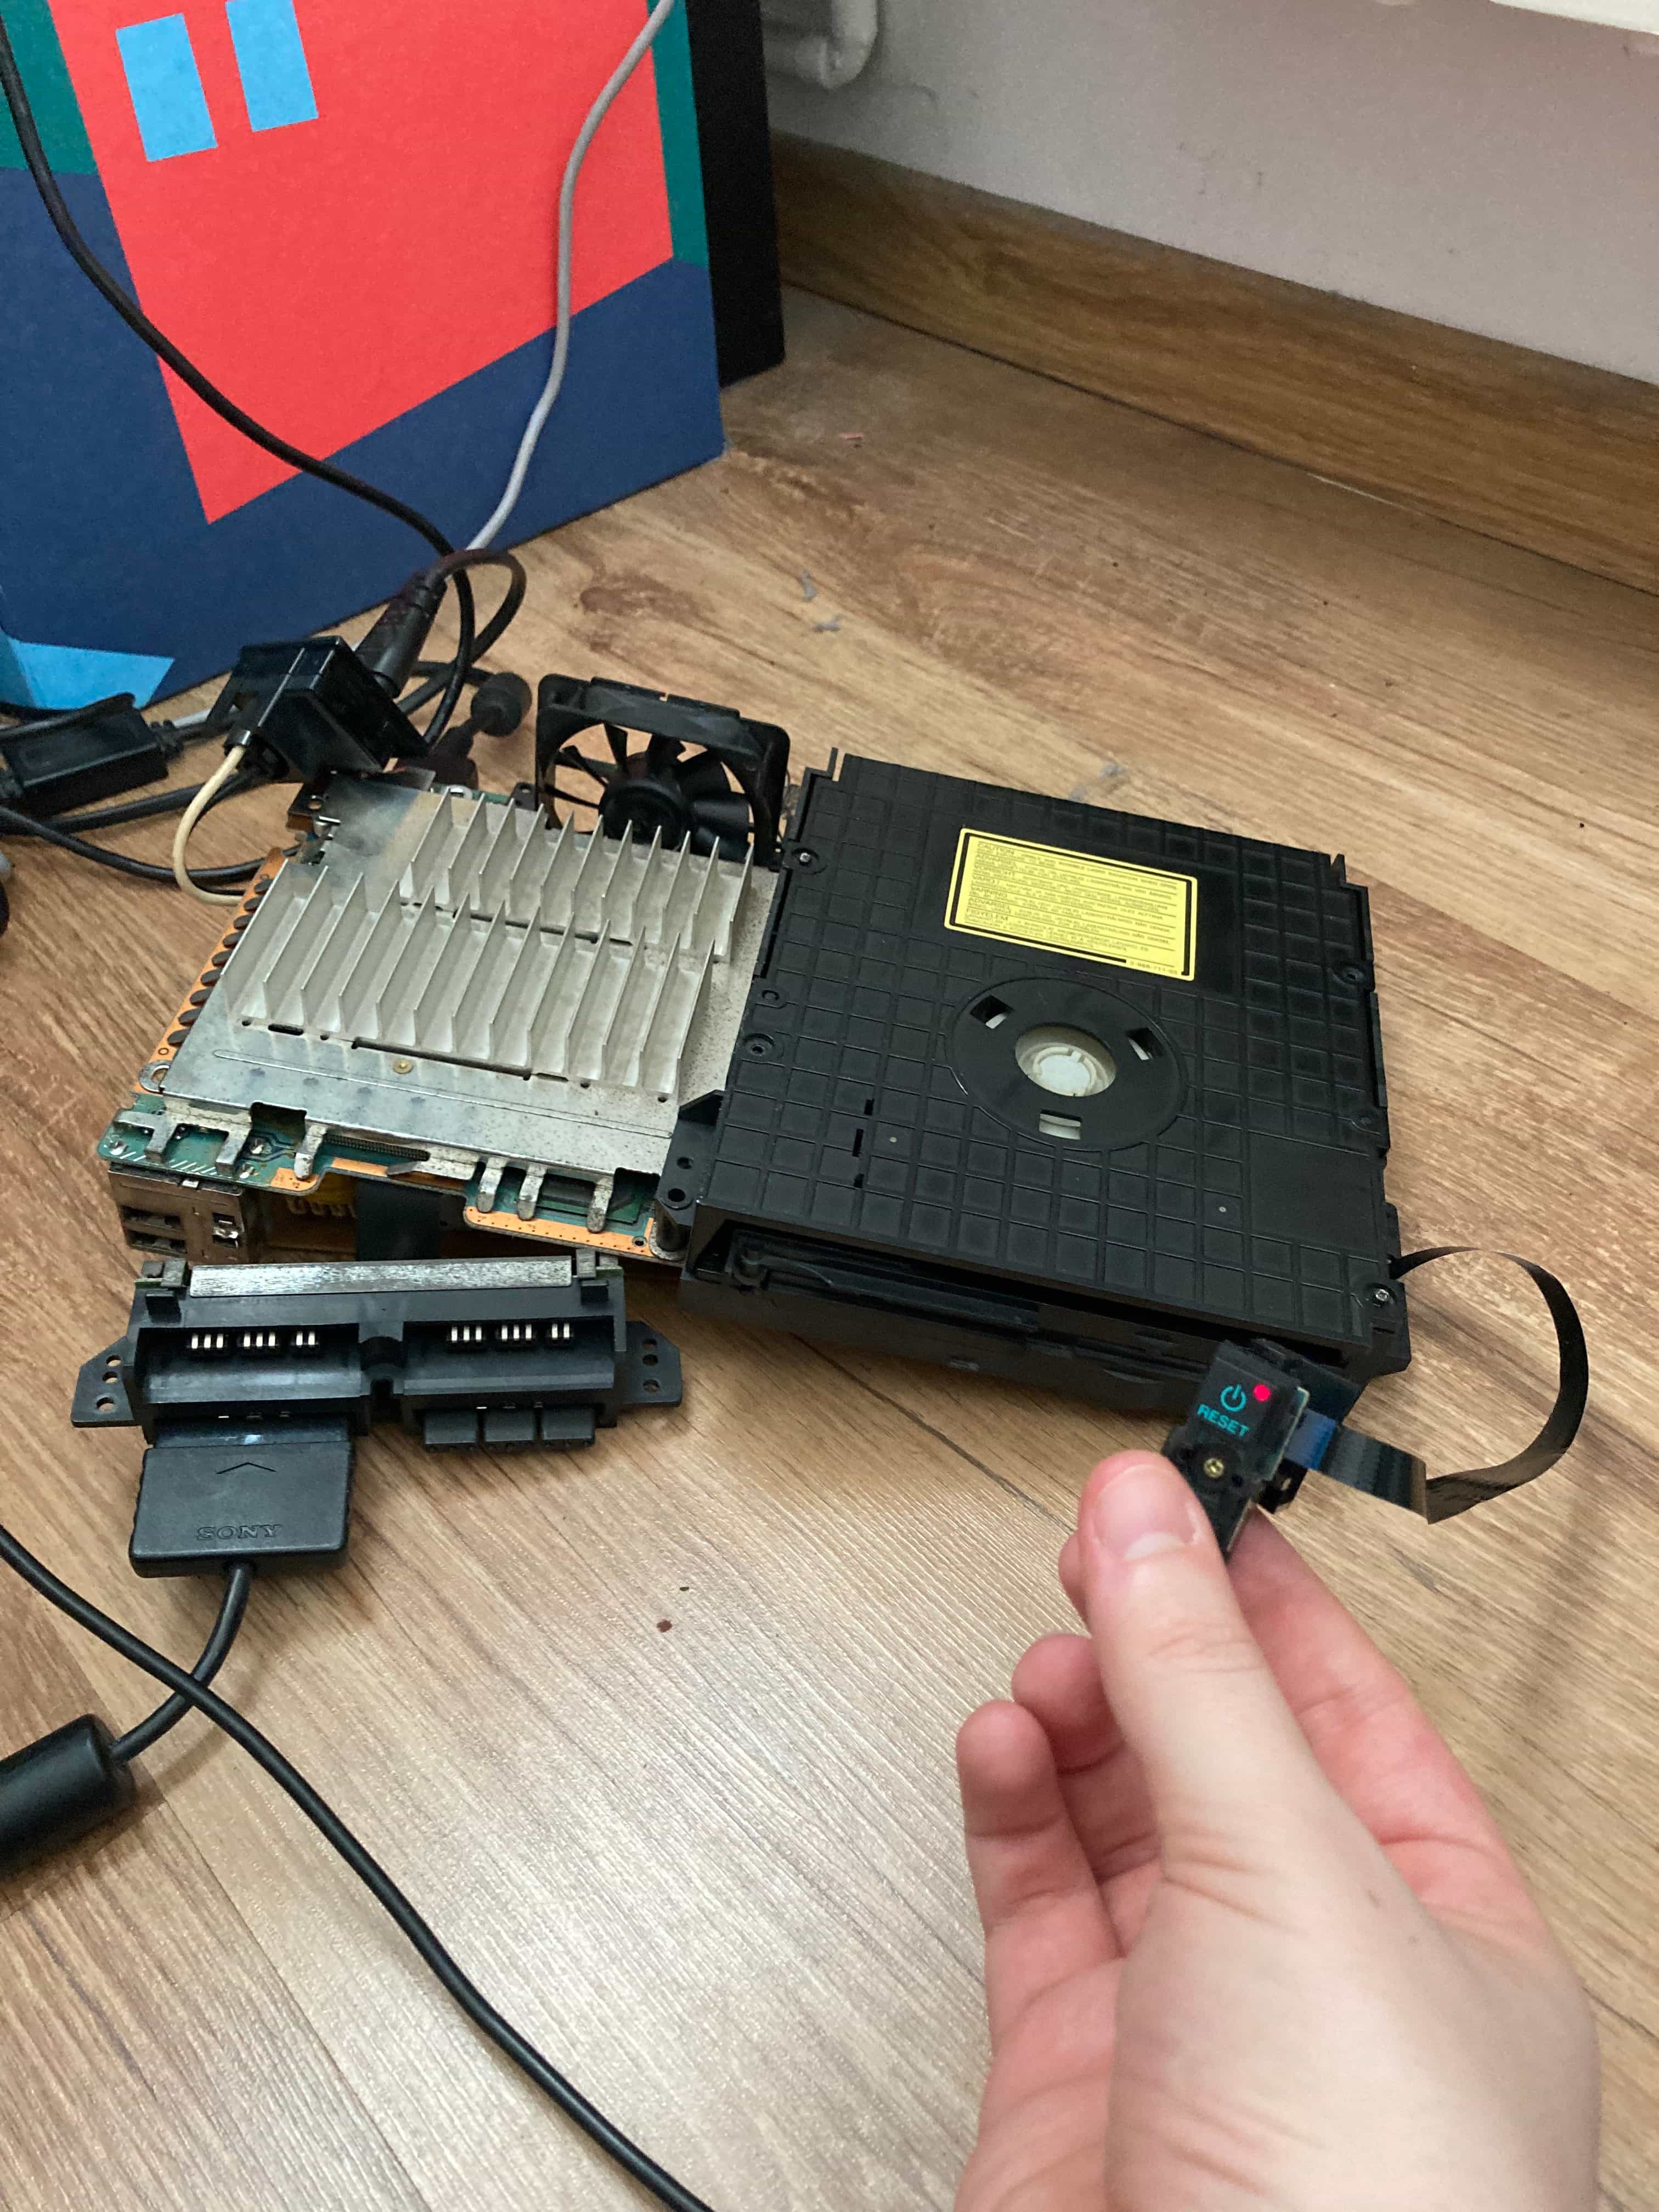
I had to order a replacement ribbon cable as my other PS2s are different models (5000x series); as such, the ribbon cables in my possession have a different amount of pins, as well as the overall length (3xxxx series: 7 pins, about 25cm in length; 5xxxx series: 12 pins, about 7,5cm in length. Always double-check!) In the meantime, I followed with dissassembly. Two screws for the joystick/MagicGate ports, two screws for the fan & power switch assembly (one was missing, of course) and we can separate the insides from the bottom shell.
Et voila! And the sunshine decided to come out for a bit :)
Not much to see here – dust, mostly, with a sprinkle of oxidation. The fan spins roughly, stutters and whirrs, and the DVD drive cover is missing two screws too...
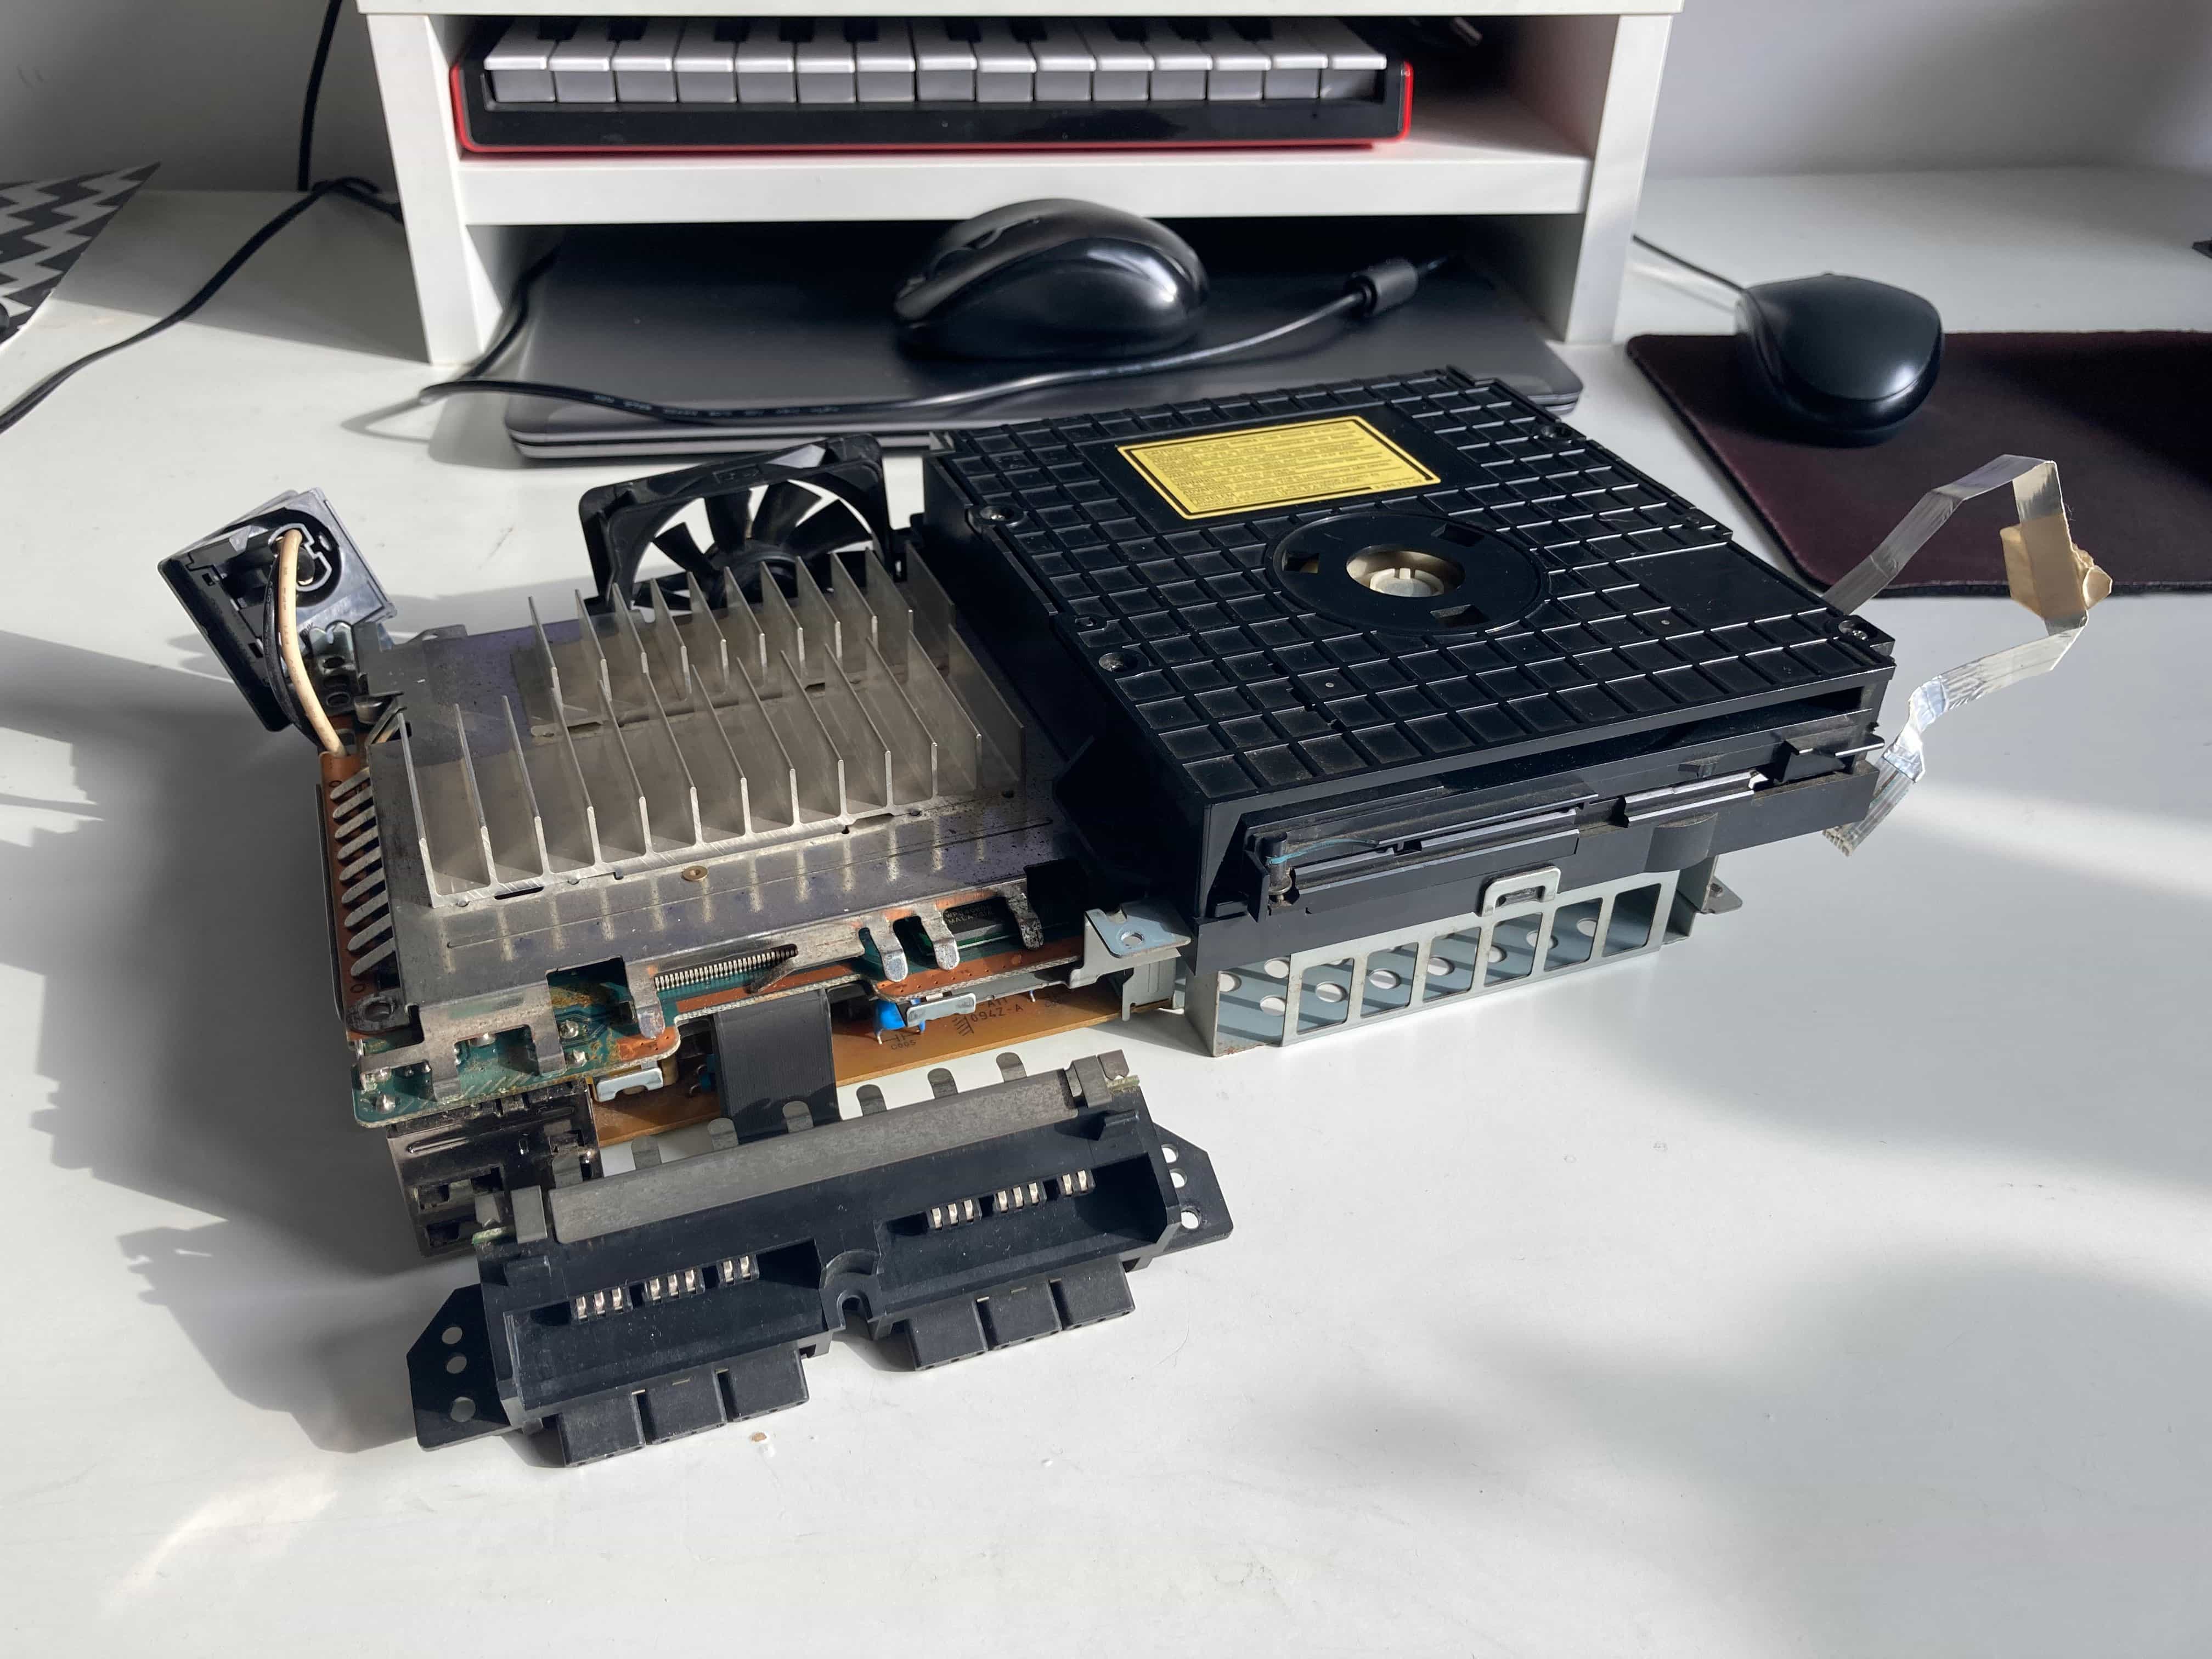
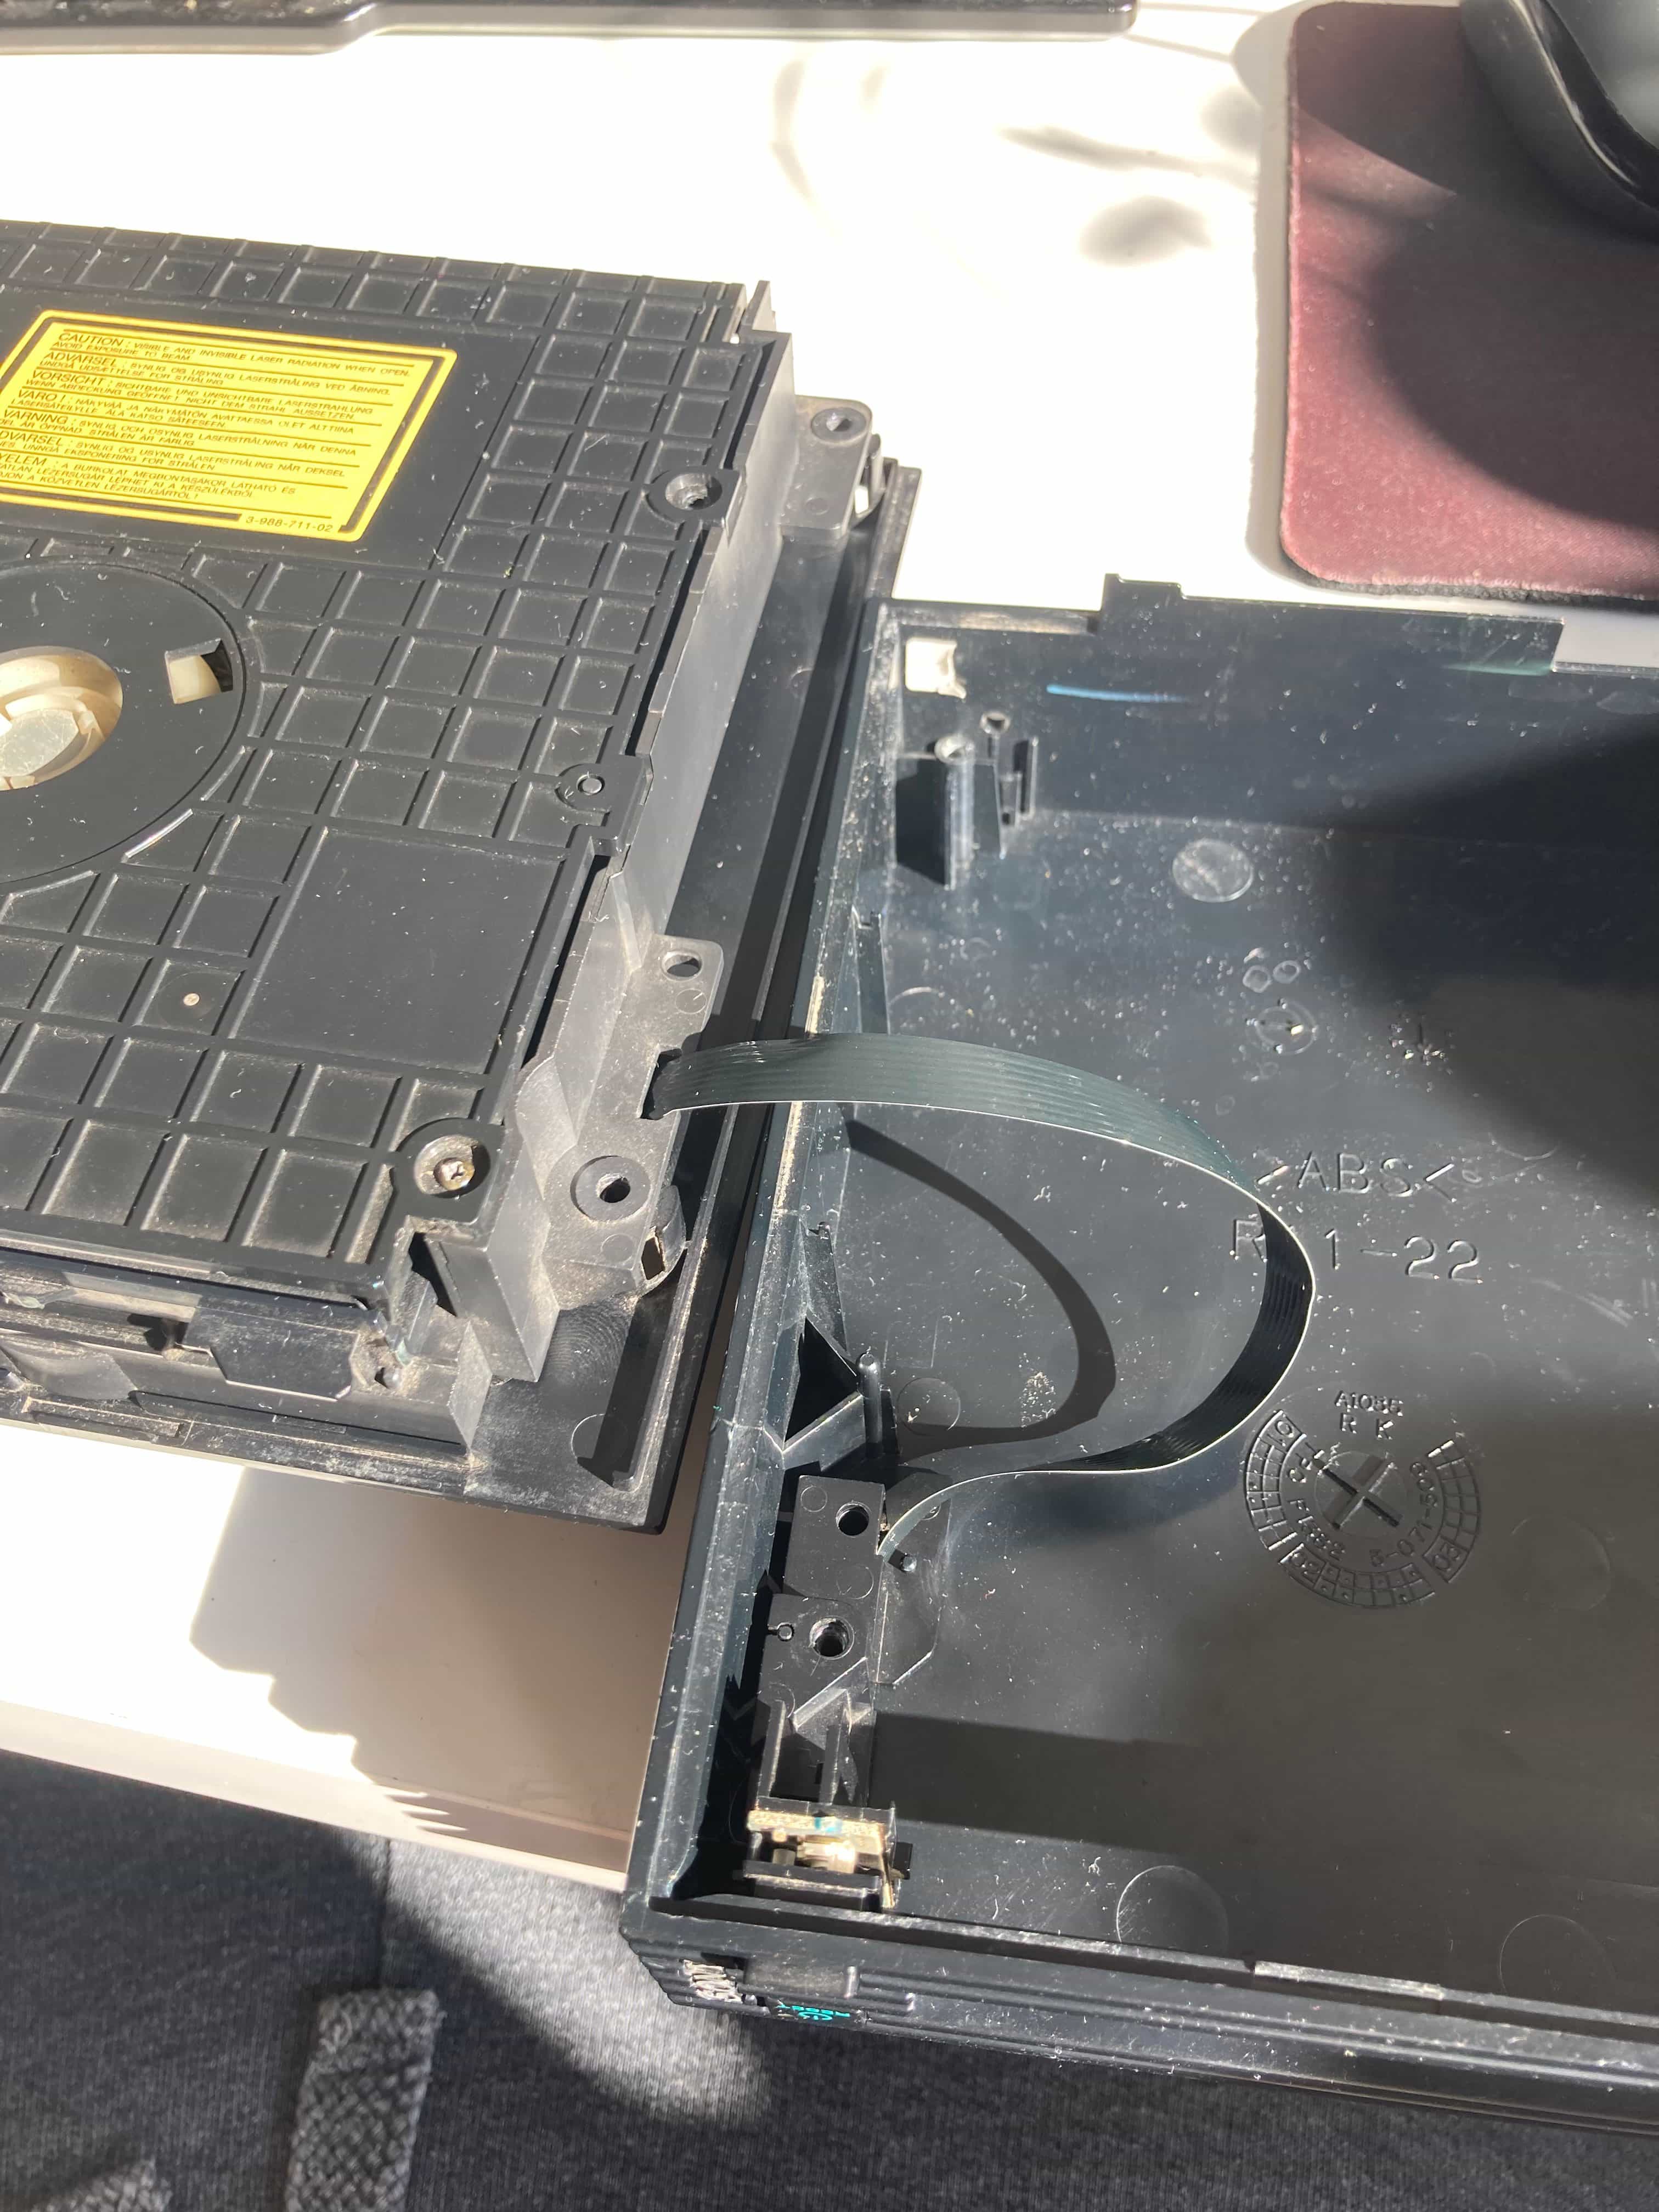
To get to the ribbon, we need to take out the laser assembly. It’d be wise to take out the lower chassis as well – it might give us better access to the ribbon, which has to be forcefully inserted – and I don’t want to bend it to hell while fidgeting with it in a tight space. On another note, the state of the screw holes suggests that this console had been opened several times before I laid my hands on it.
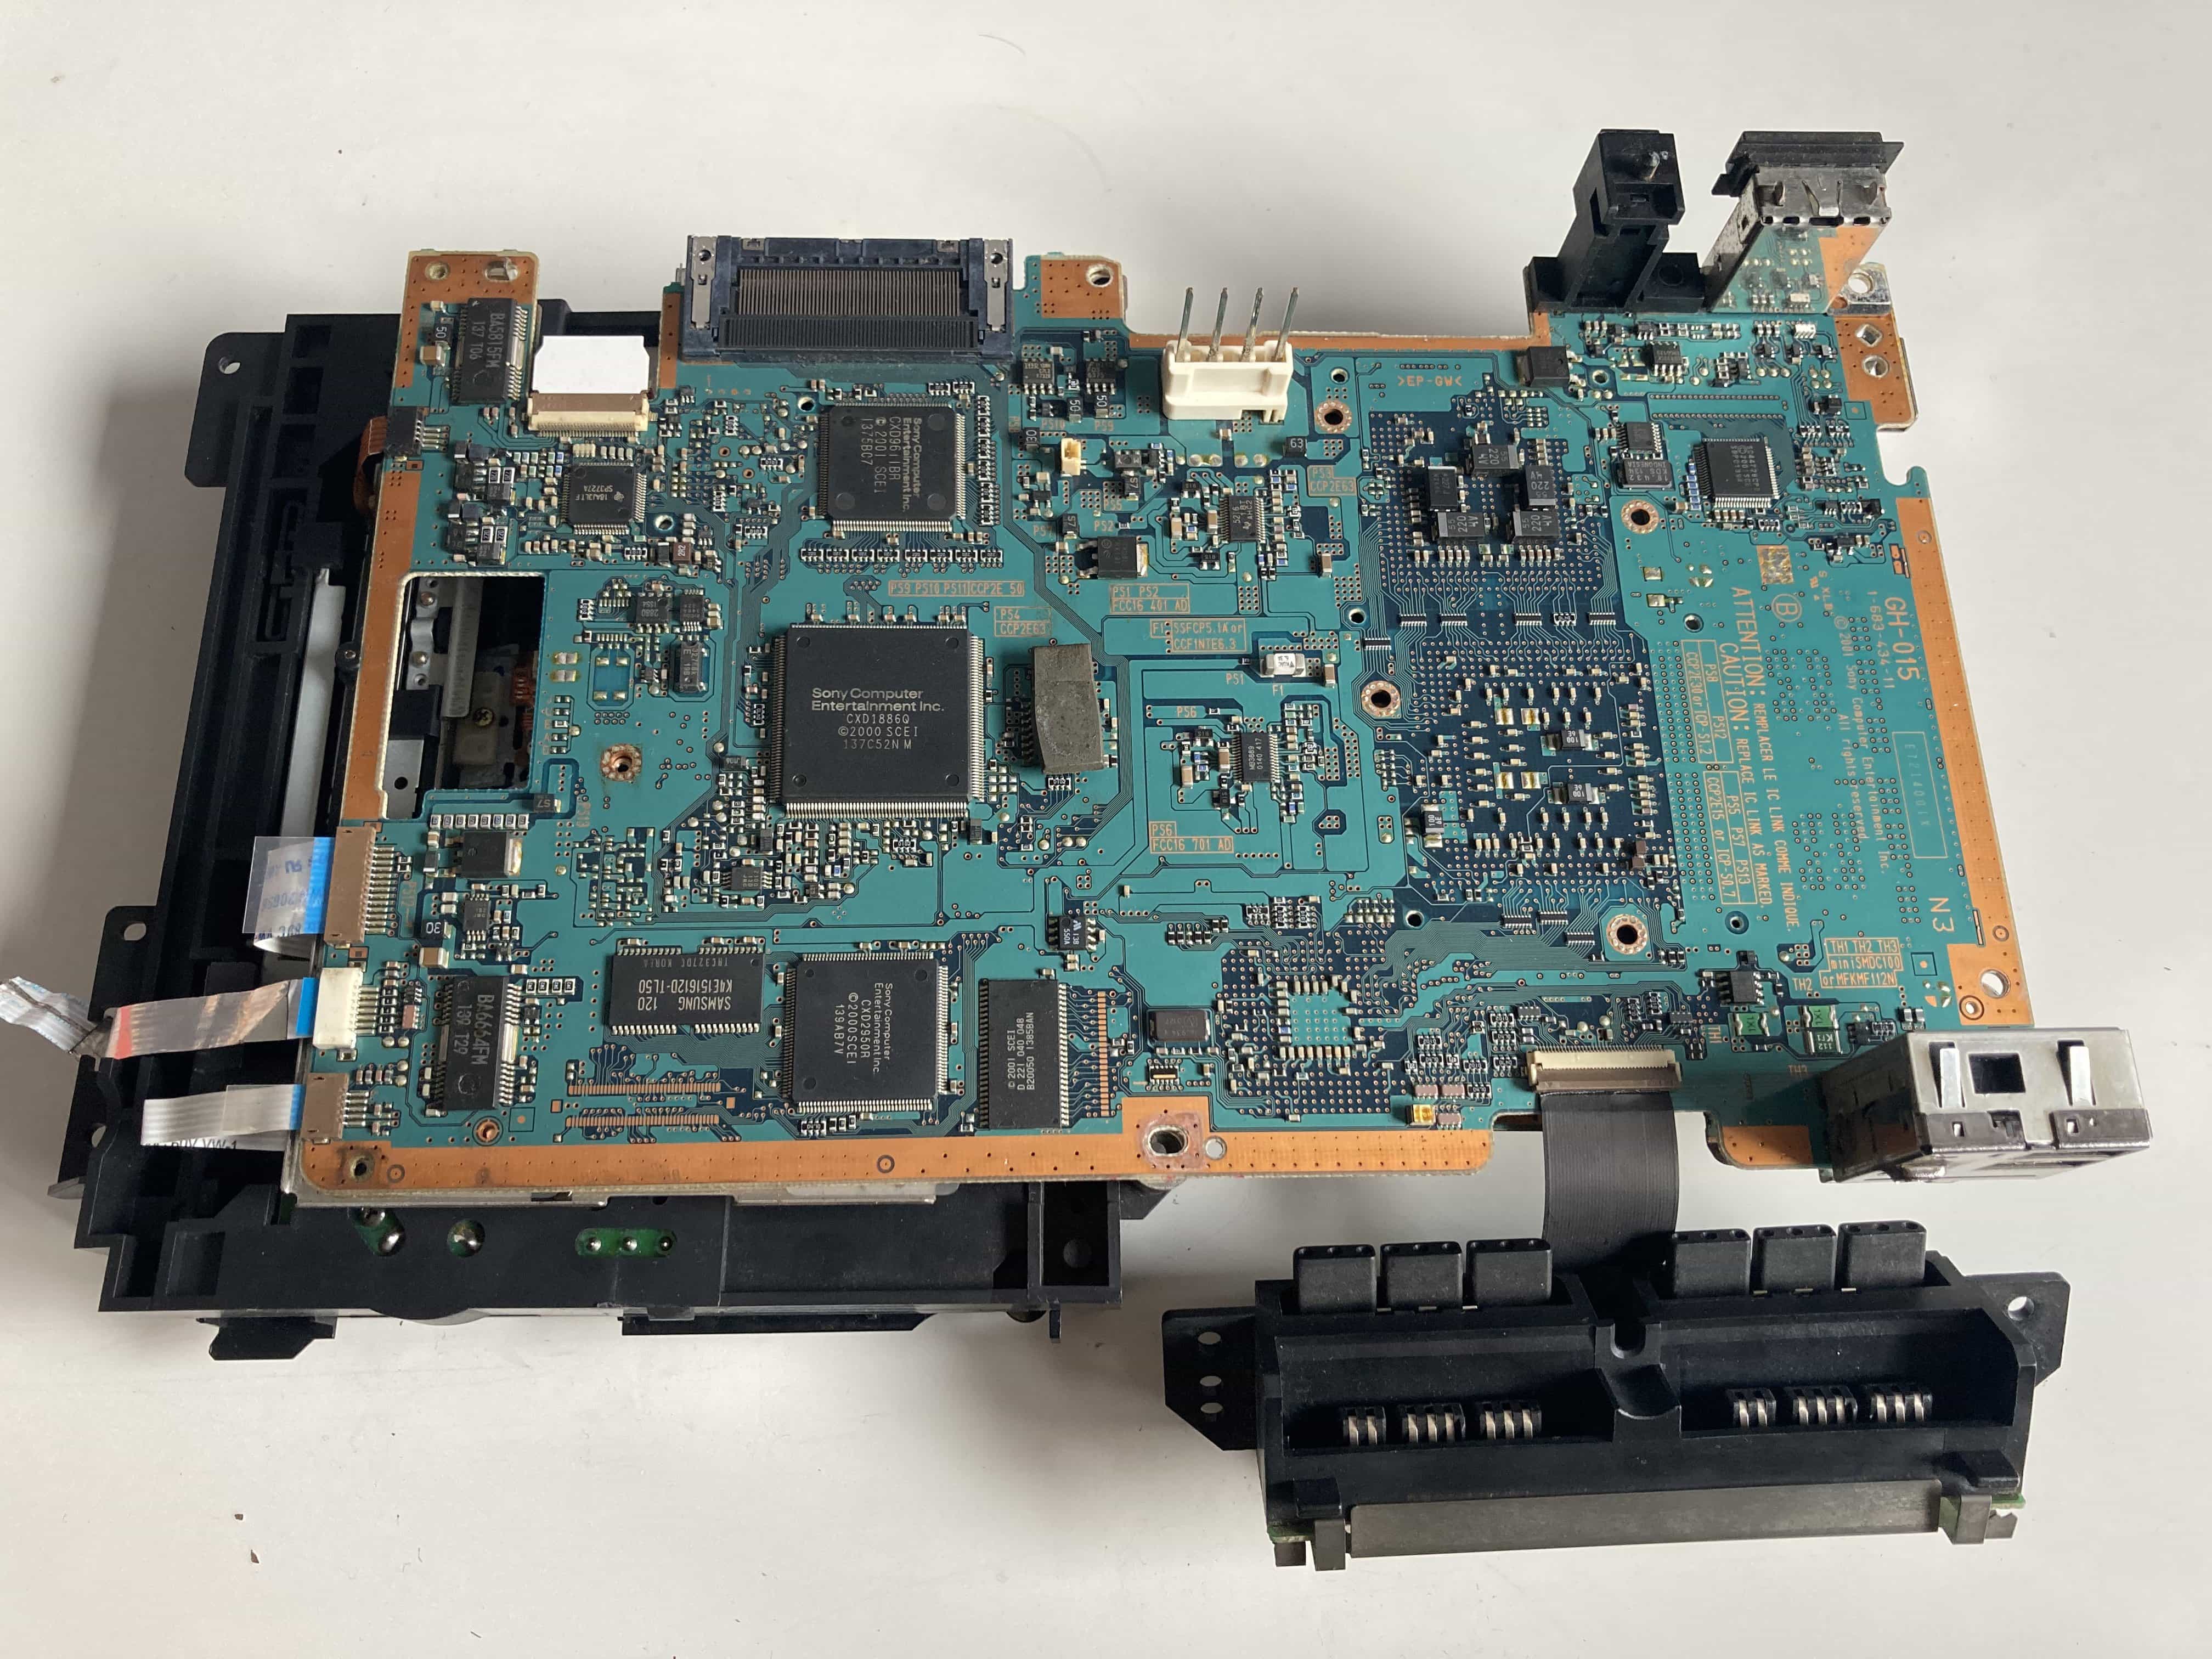
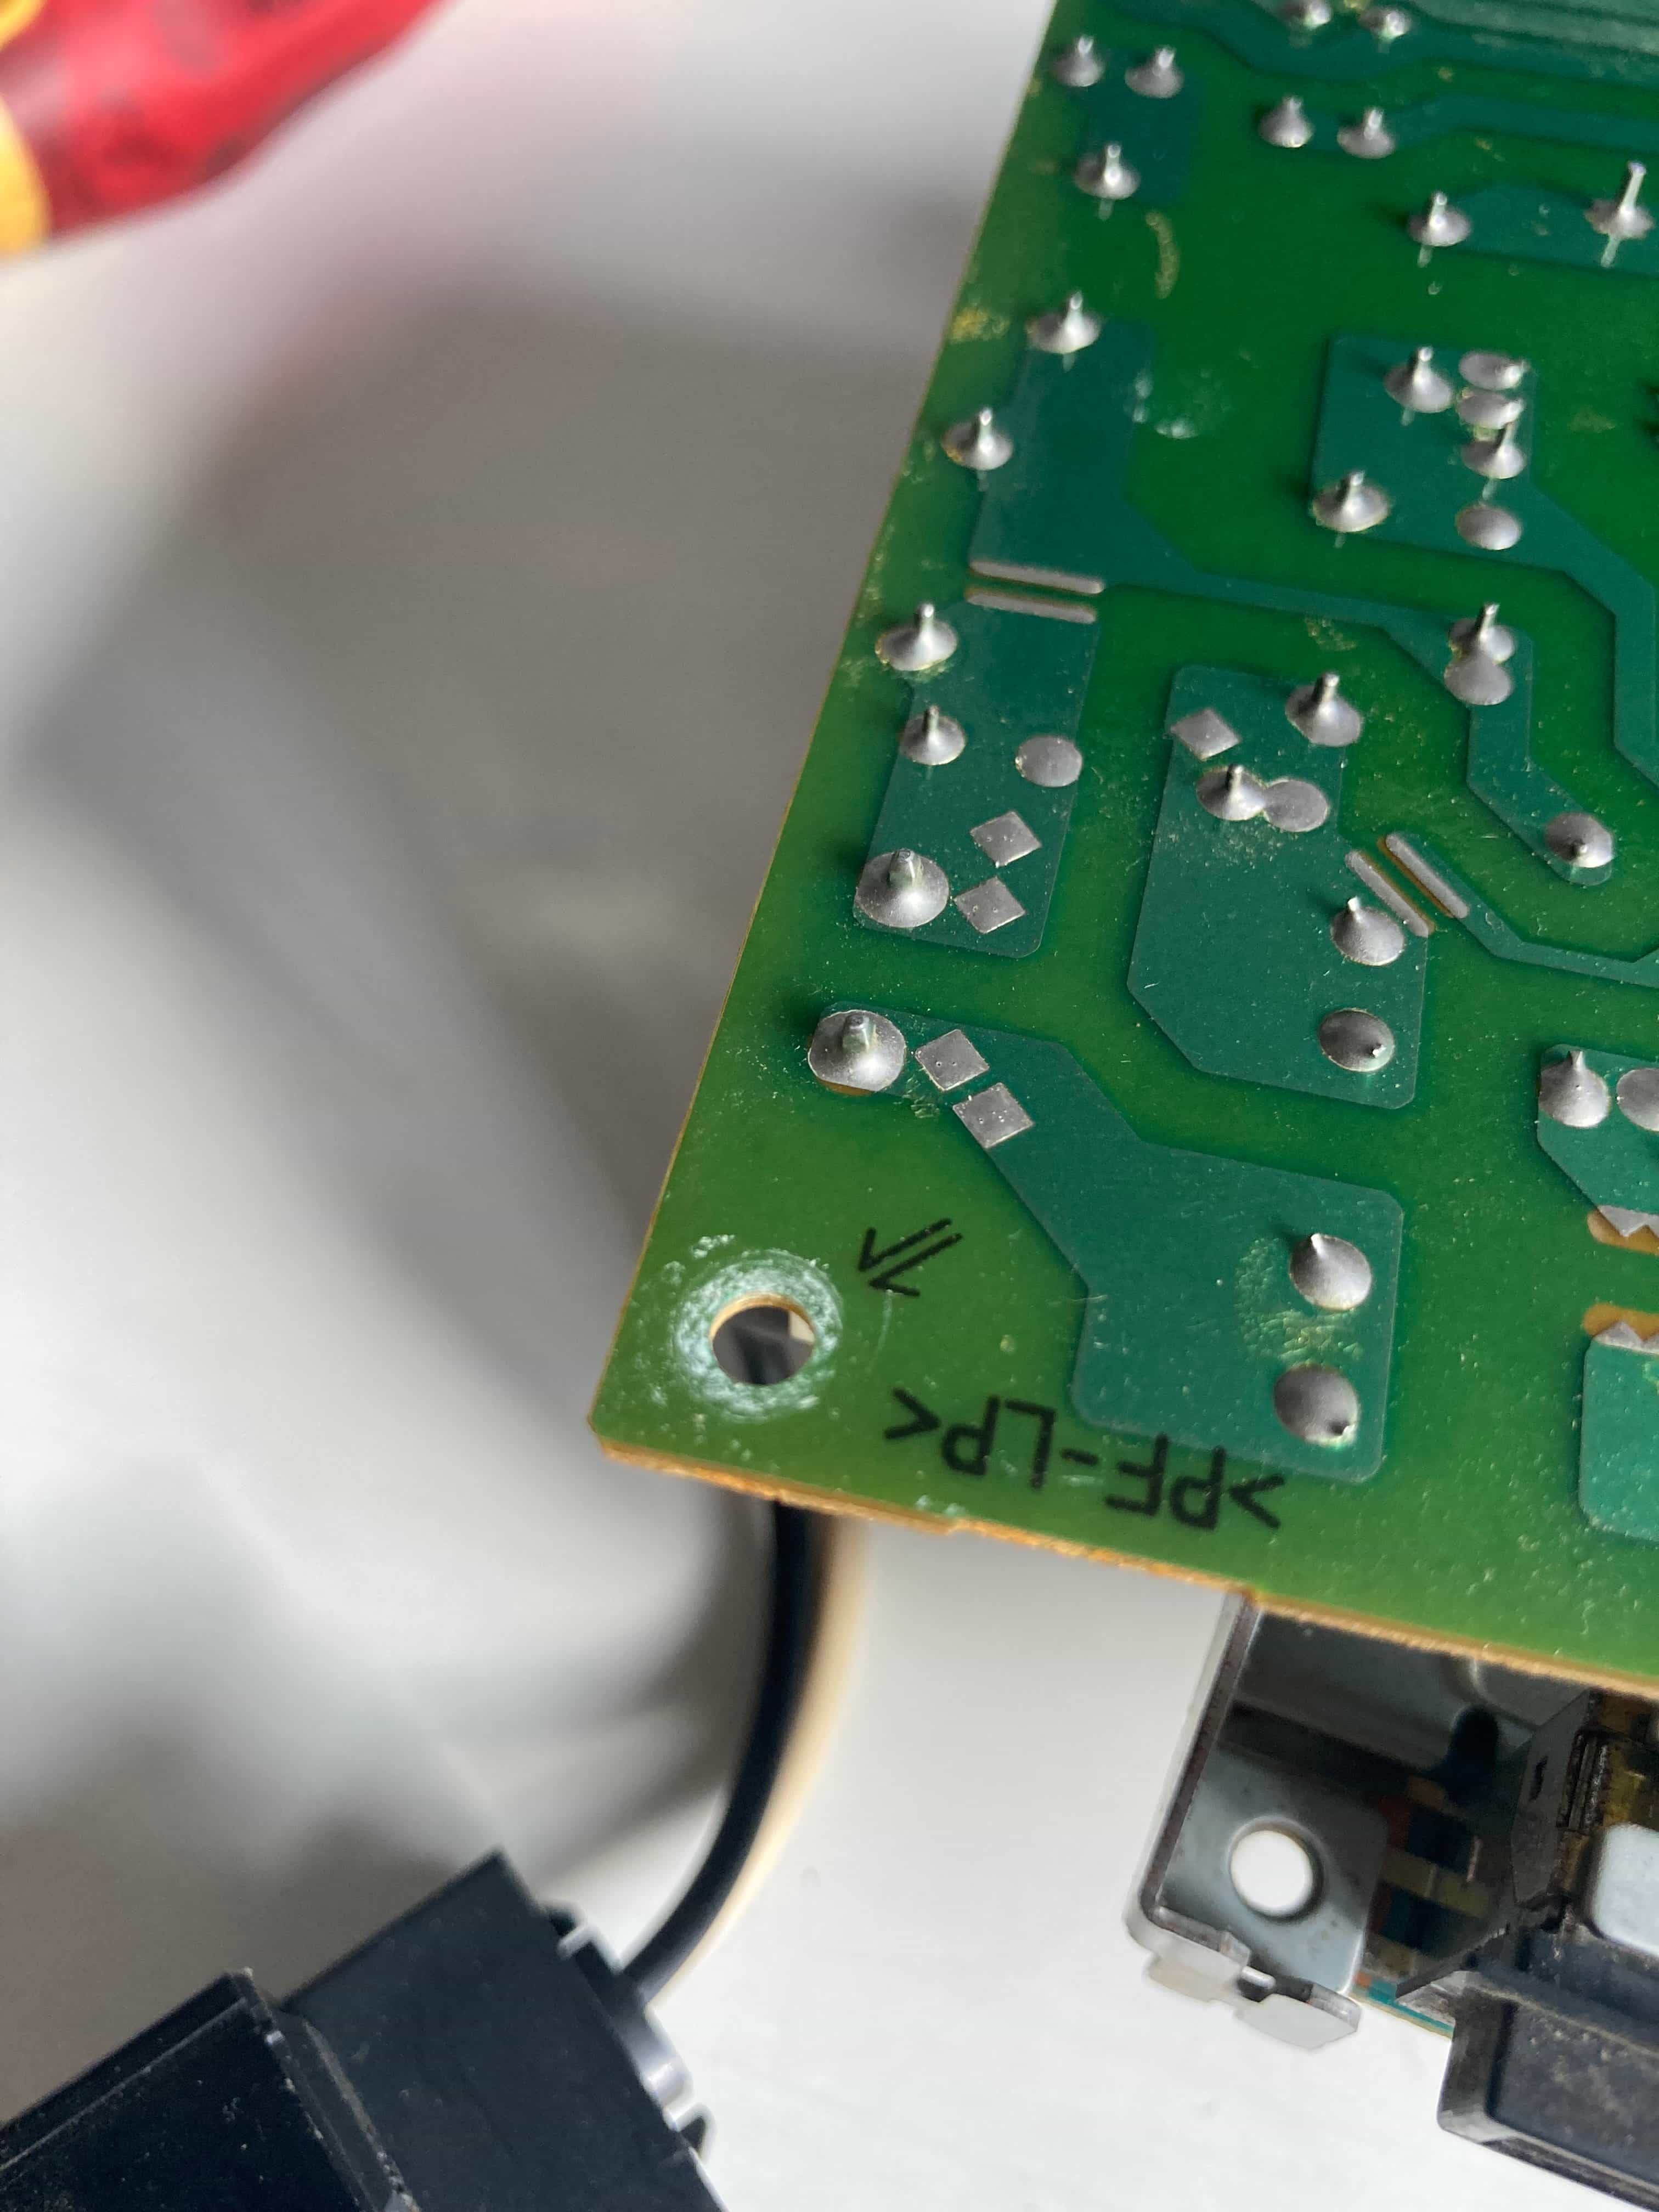
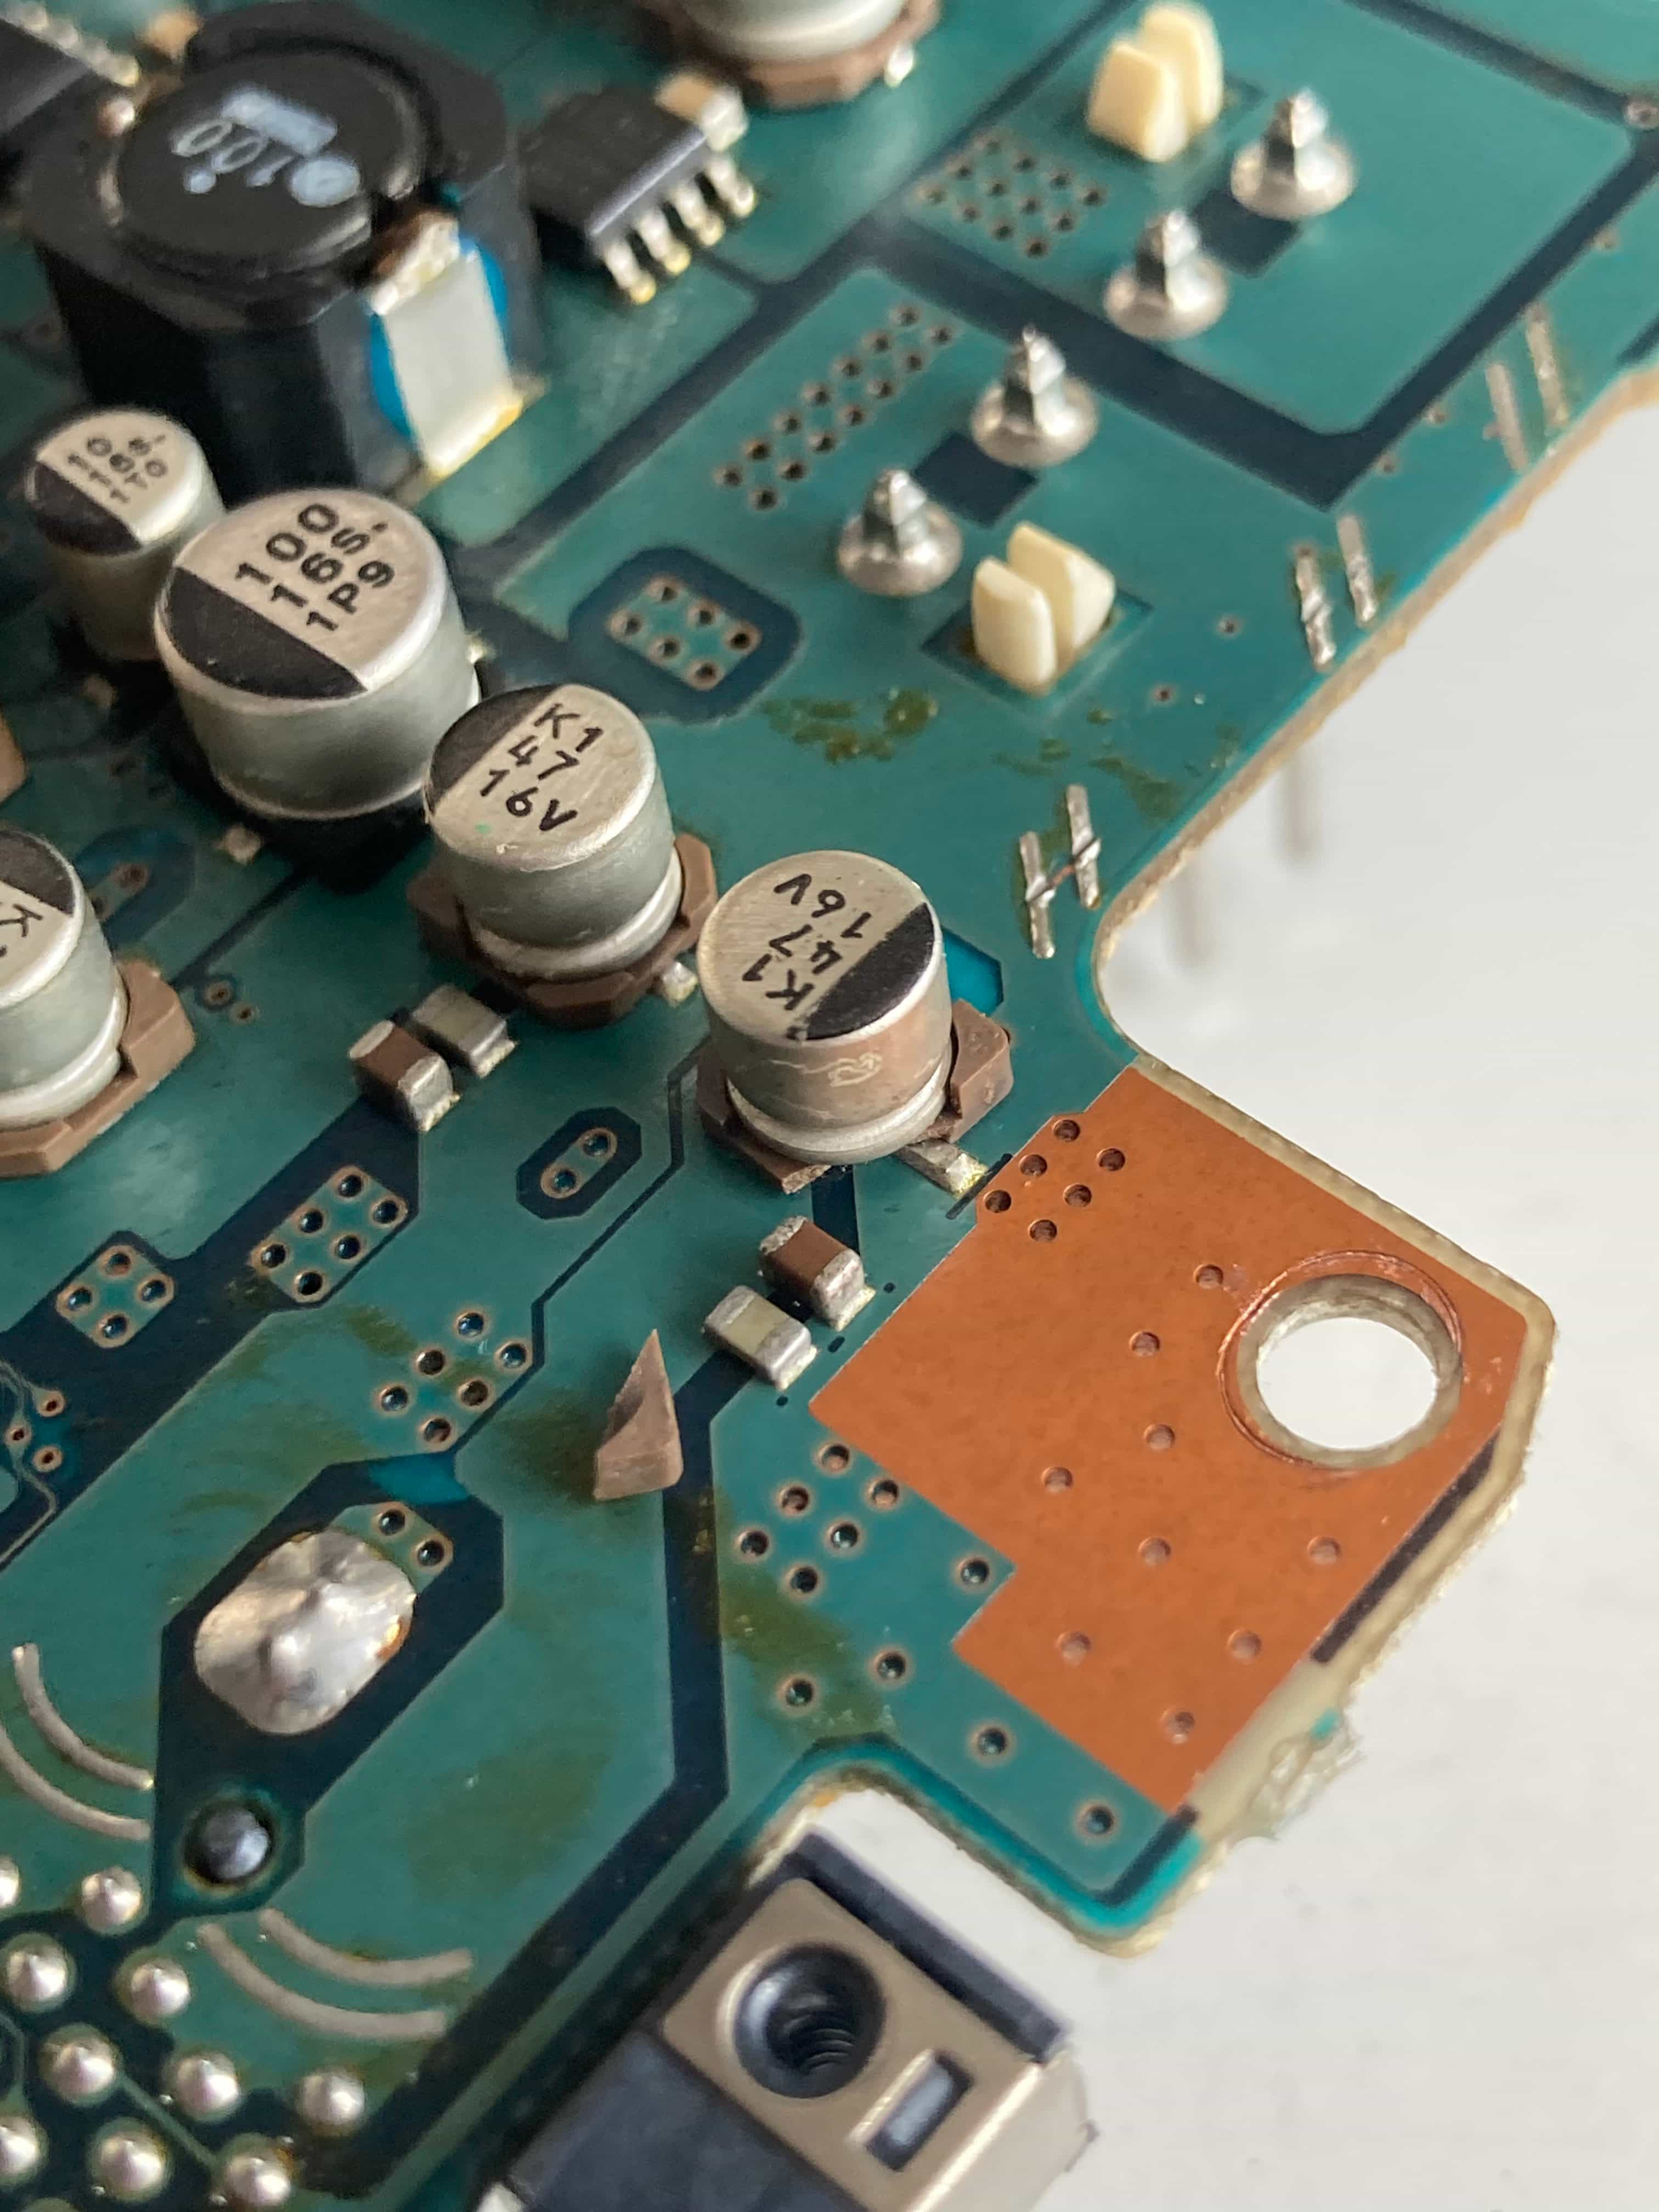
Would you look at that! No signs of any mods, and the whole motherboard looks spotless!
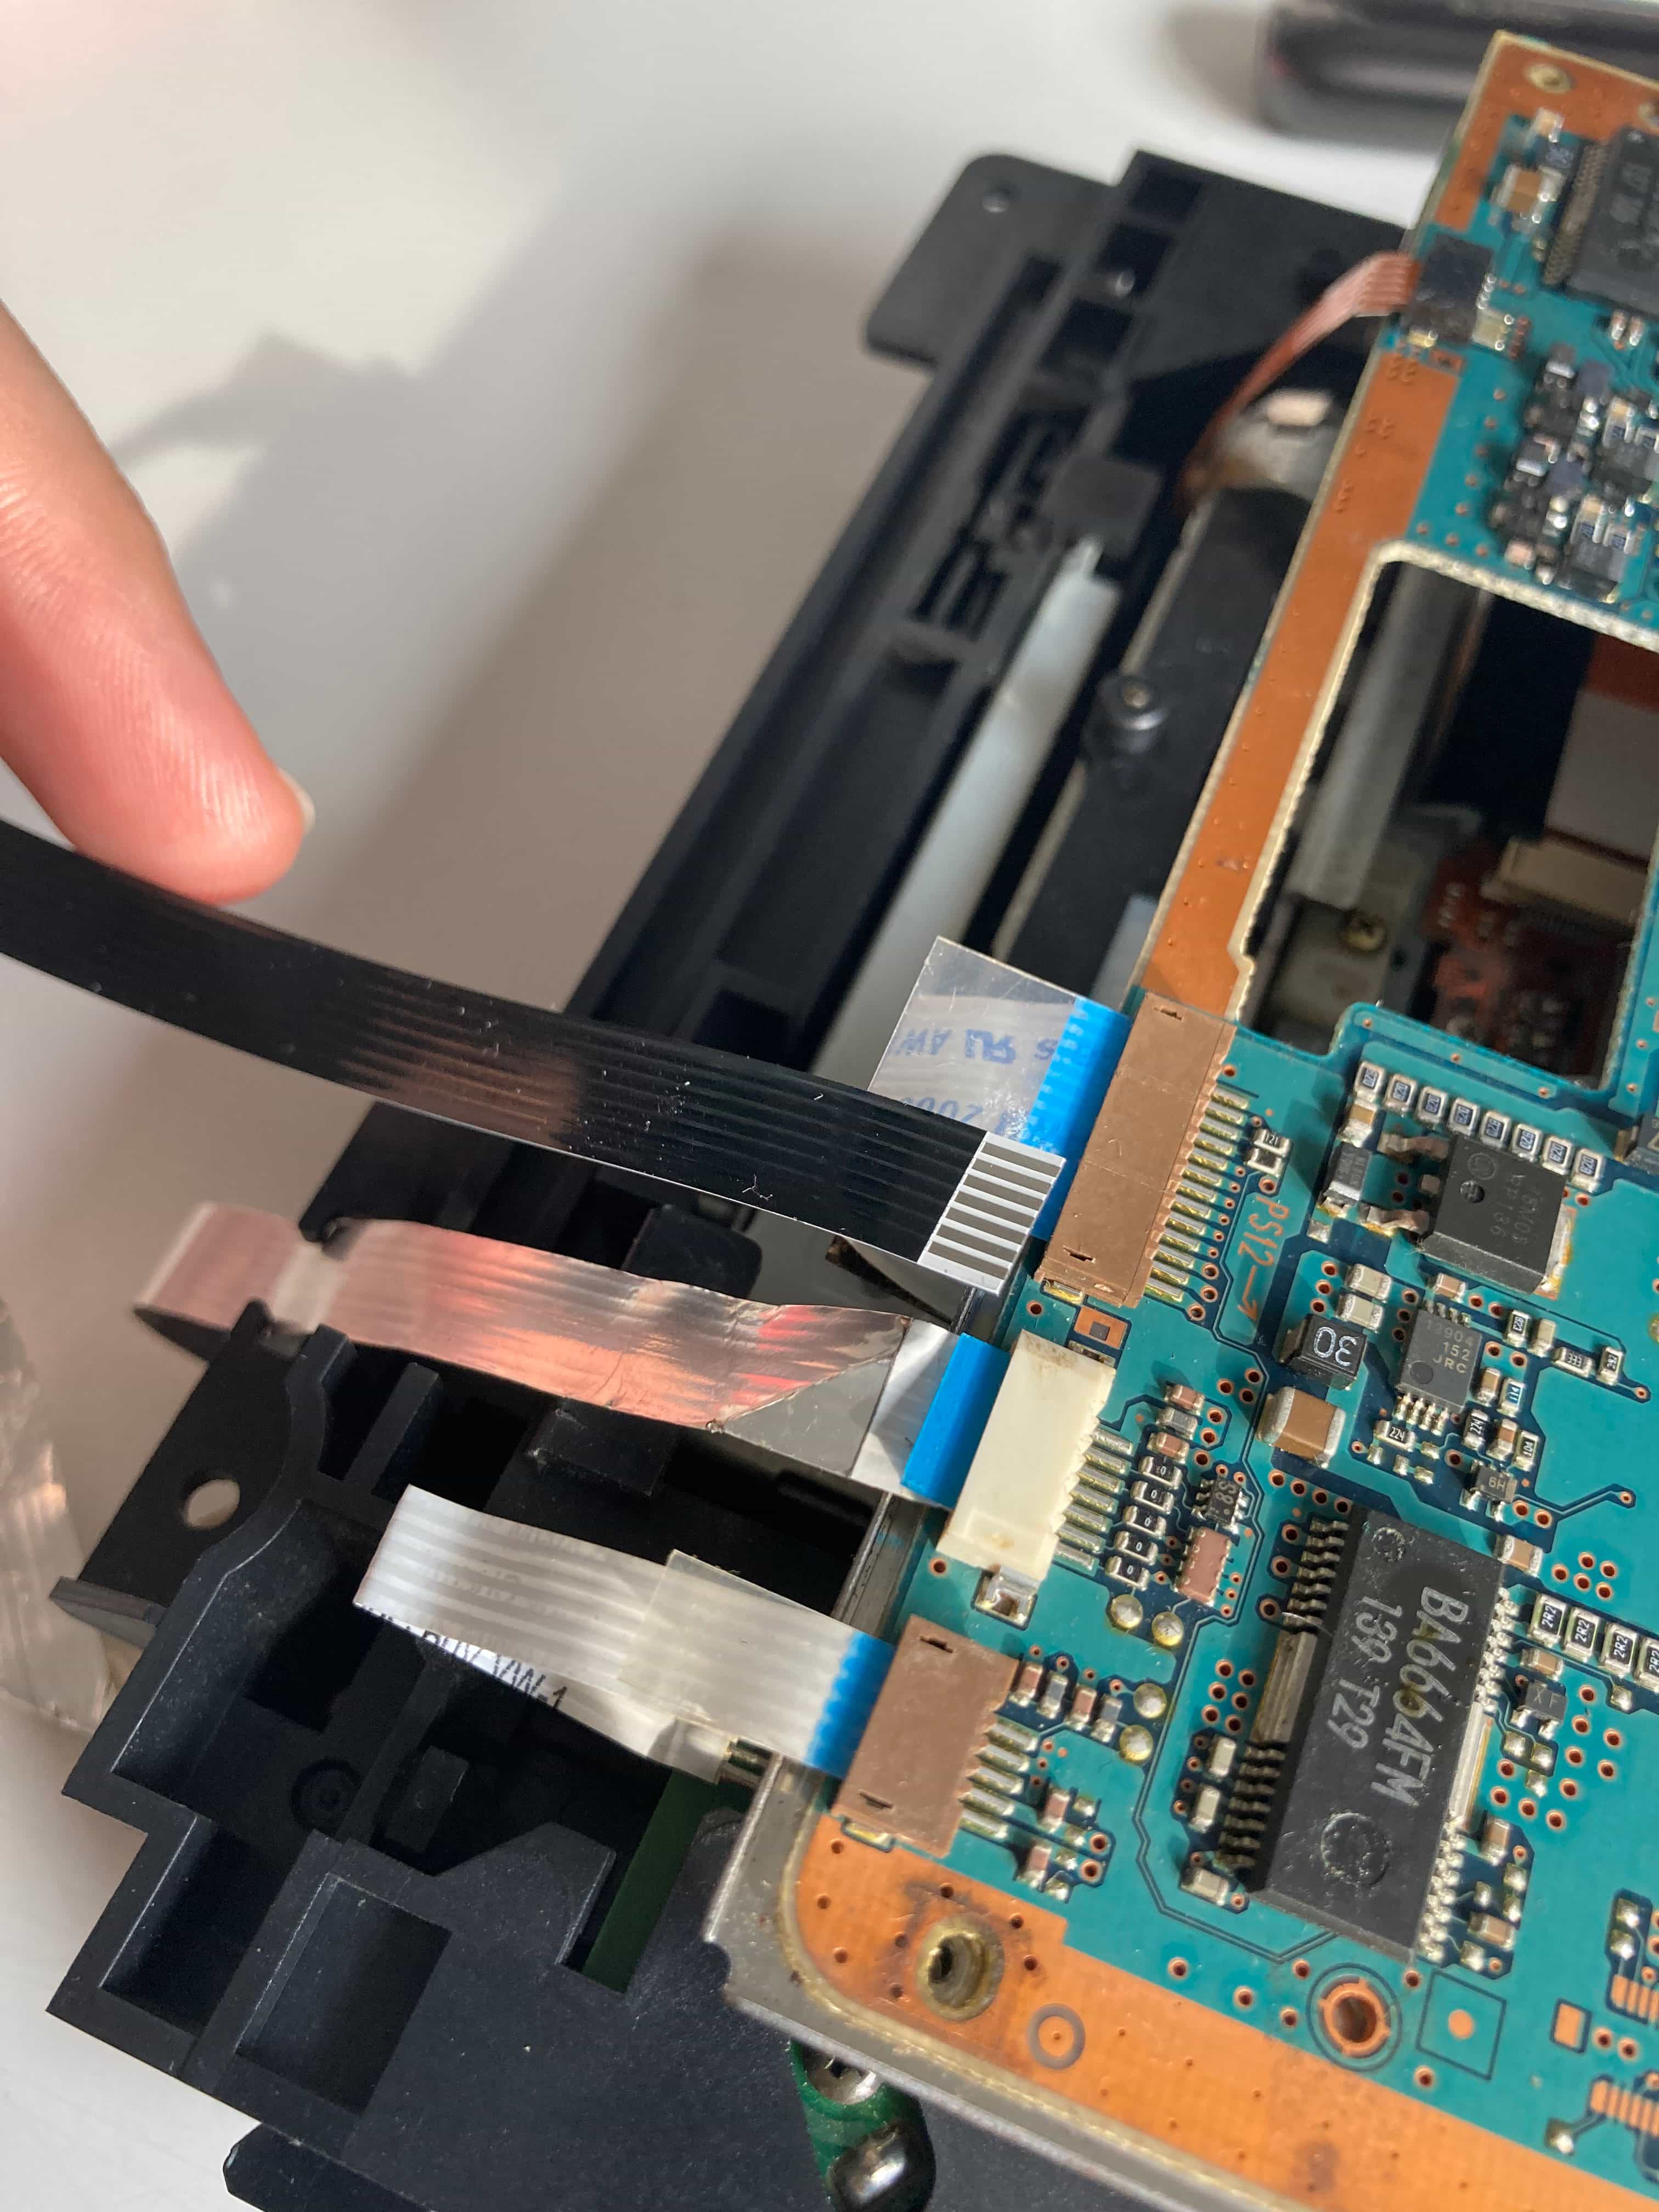
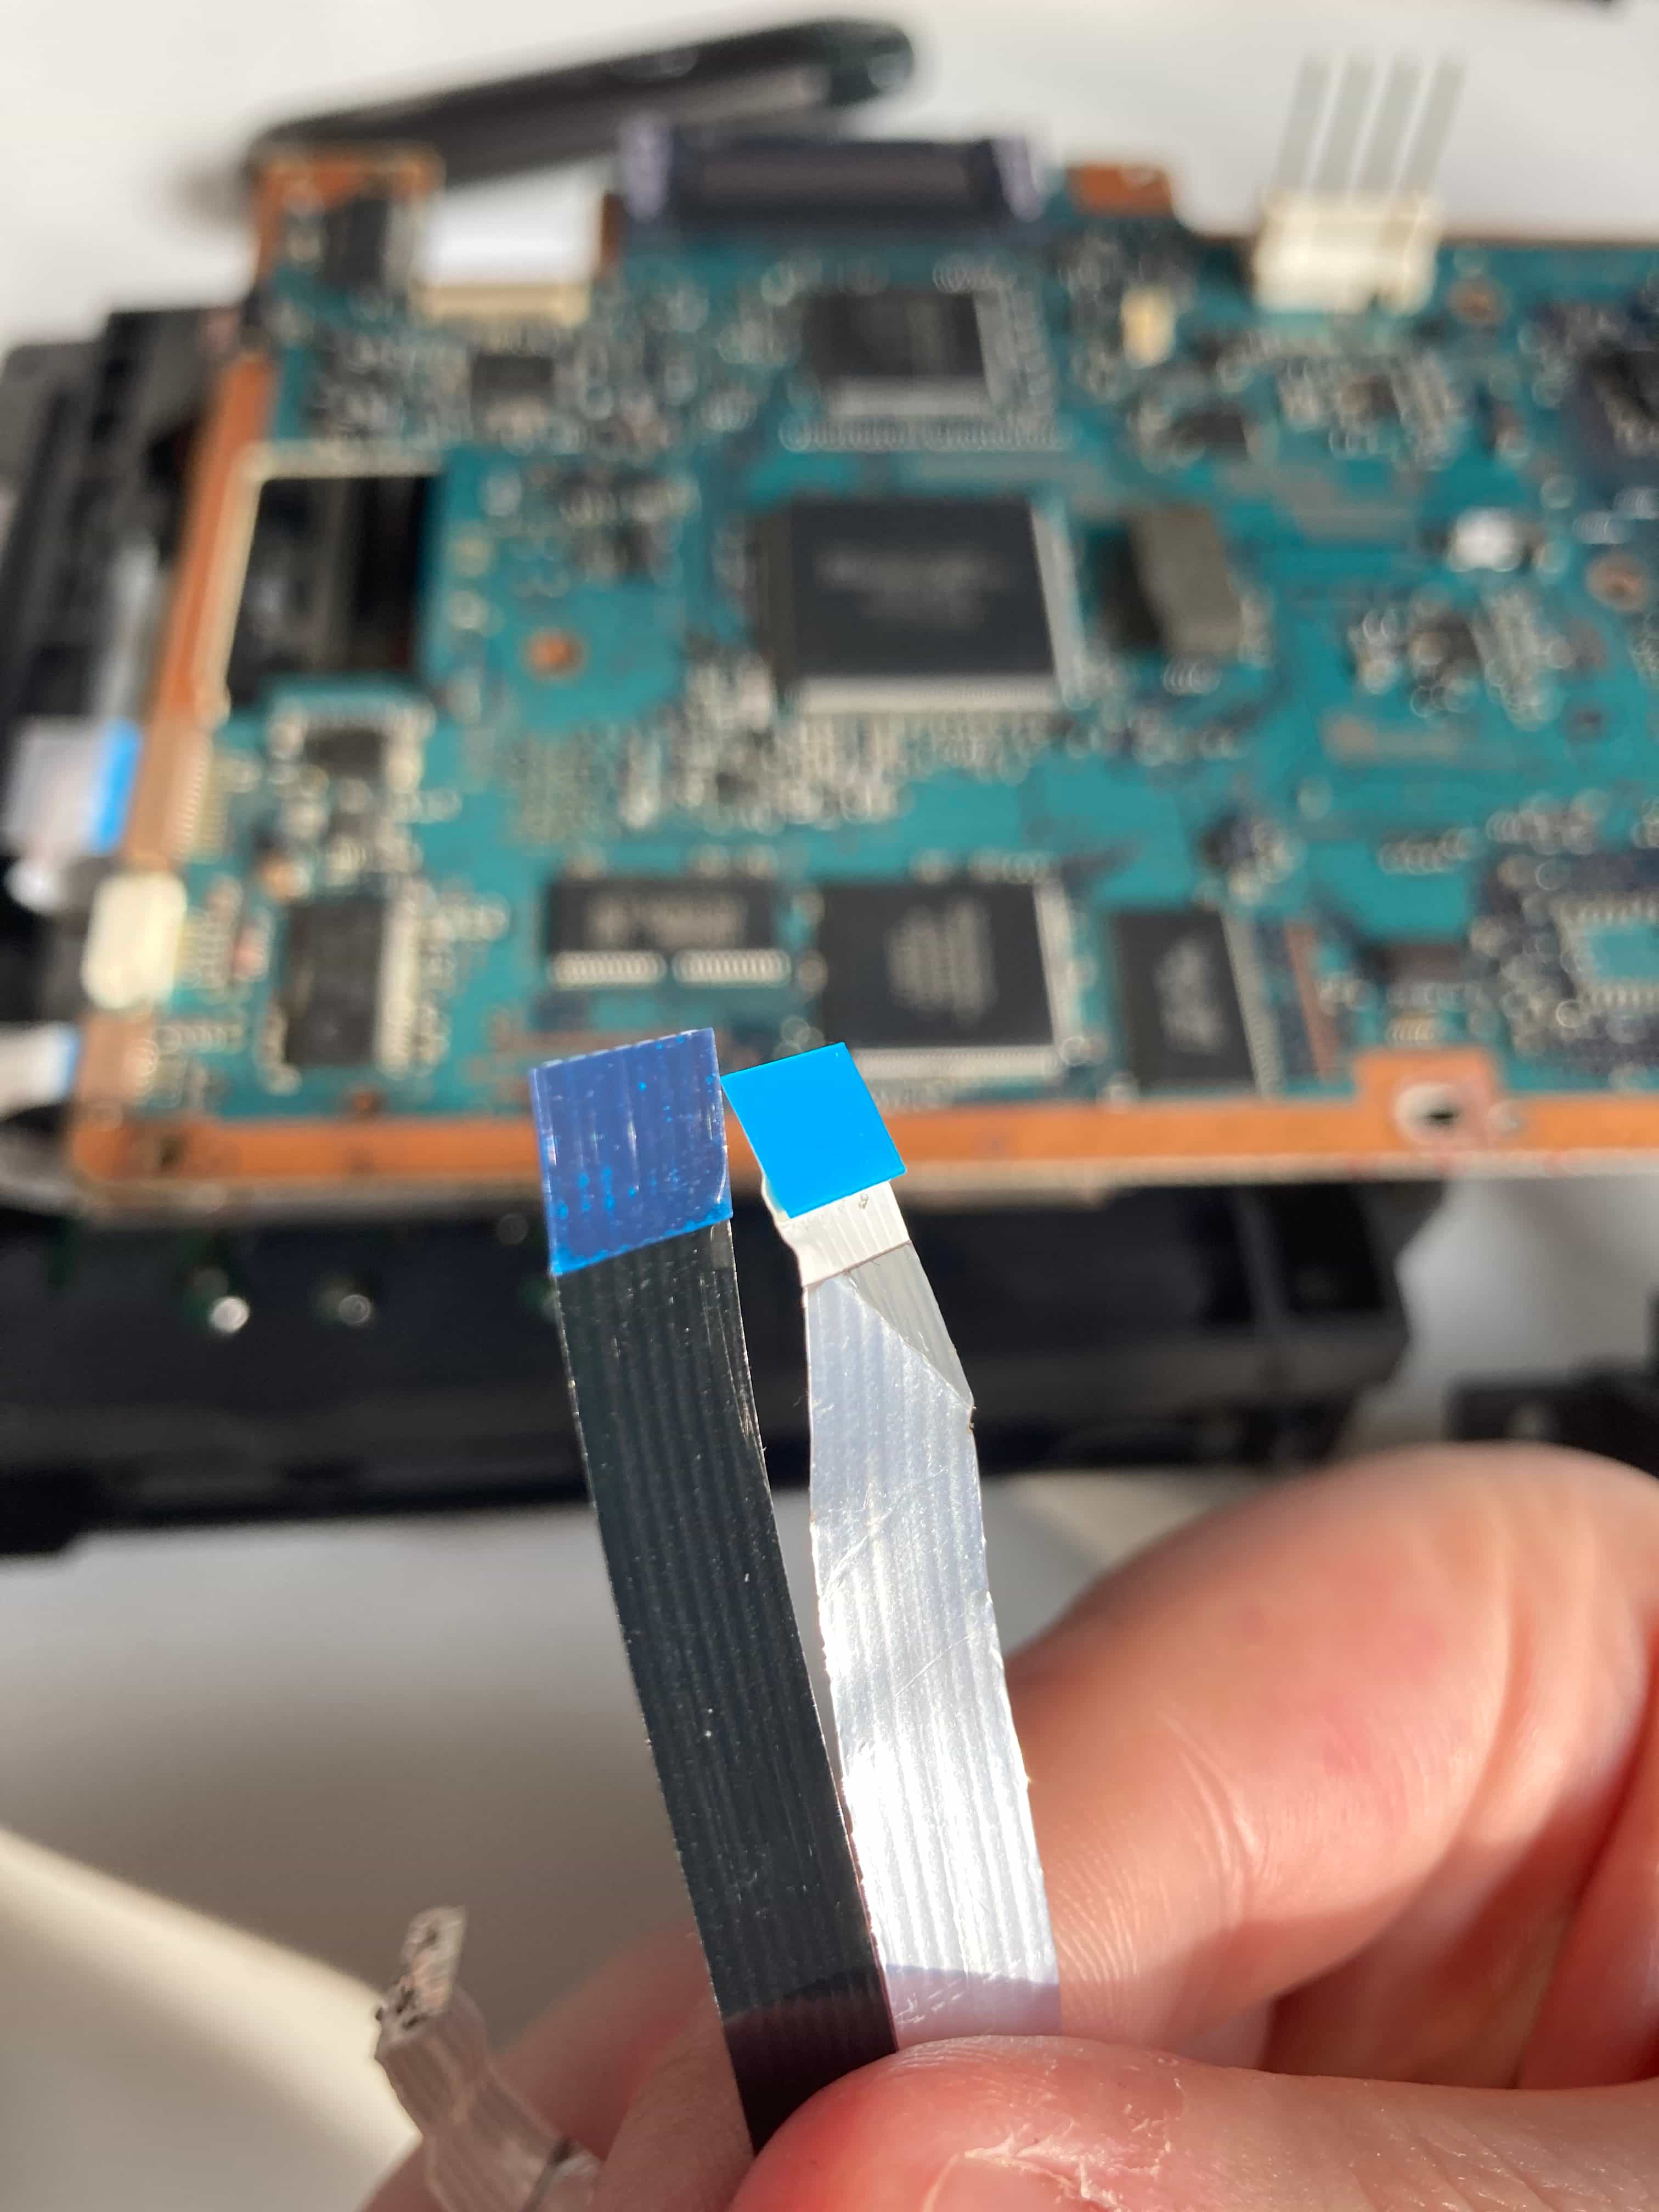
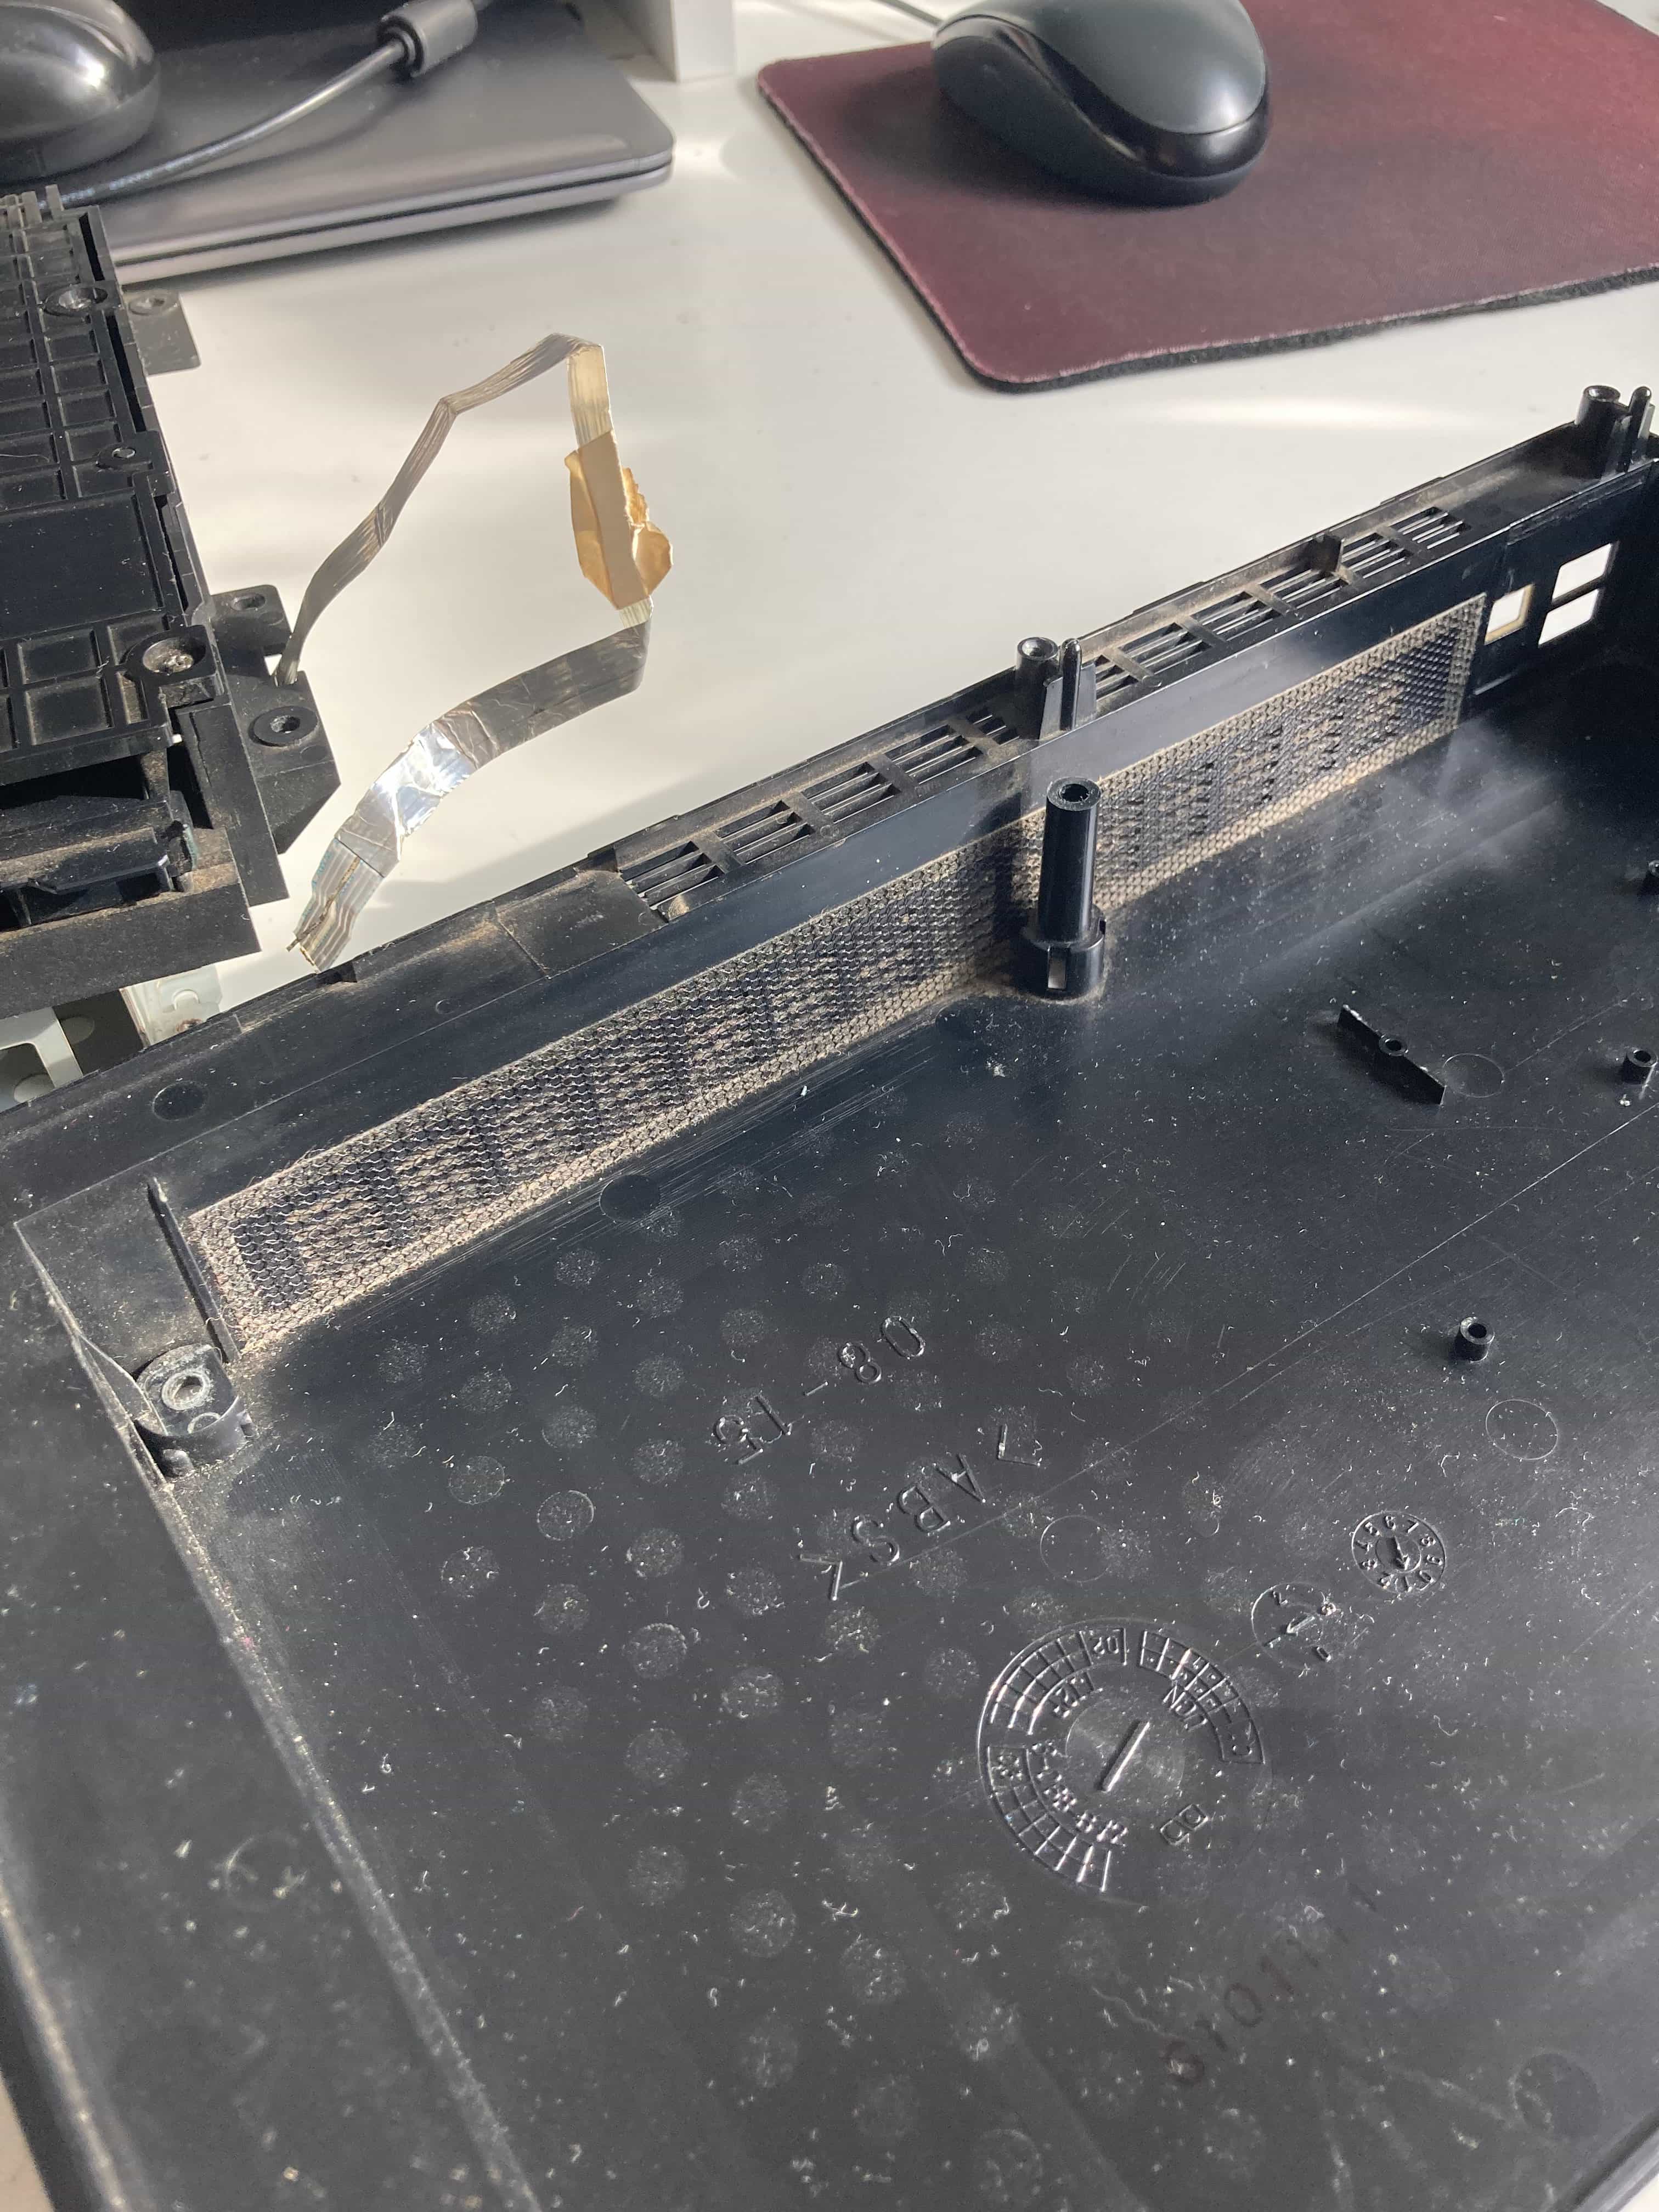
The replacement ribbon(top, left). It doesn’t have a pull tab, which is a shame – I mean it does, but it’s not exactly pullable… I ordered it online and didn’t bat an eye. Plug it in and let’s give the console a shot again.
Note that I’m testing it “bare bones”, without the grounding chassis. I did it very quickly just to see if it powers on, not much more. That said I would advise against doing such stuff – one misplaced finger and you can get shocked, as well as a plethora of other things could go wrong here.
Never ever ever do what I did. I did in fact get zapped by some fraction of an inch touching something conductive (despite being most careful). It didn’t hurt, it reminded me of those chewing gum shock joke toys (guess I haven’t had my nerves whipped by current in a long time), but mind you, the console accepts mains voltage (110-120V/220-240V) so one finger slip, one wayward second, and I could have had a nasty surprise. “Whatever, I fixed <number> of electronics stuff, it’s fine!” Complacency kills.

And it works, it seems! Except for the fan – the fan is absolutely blatantly loud. It runs like it would when the PS2 has a hard drive (when a HDD is inserted, the fan spins at a higher RPM to cool the HDD down as well) along with the usual whines and whizzes that would be expected from an old fan with dust and dry bearings.
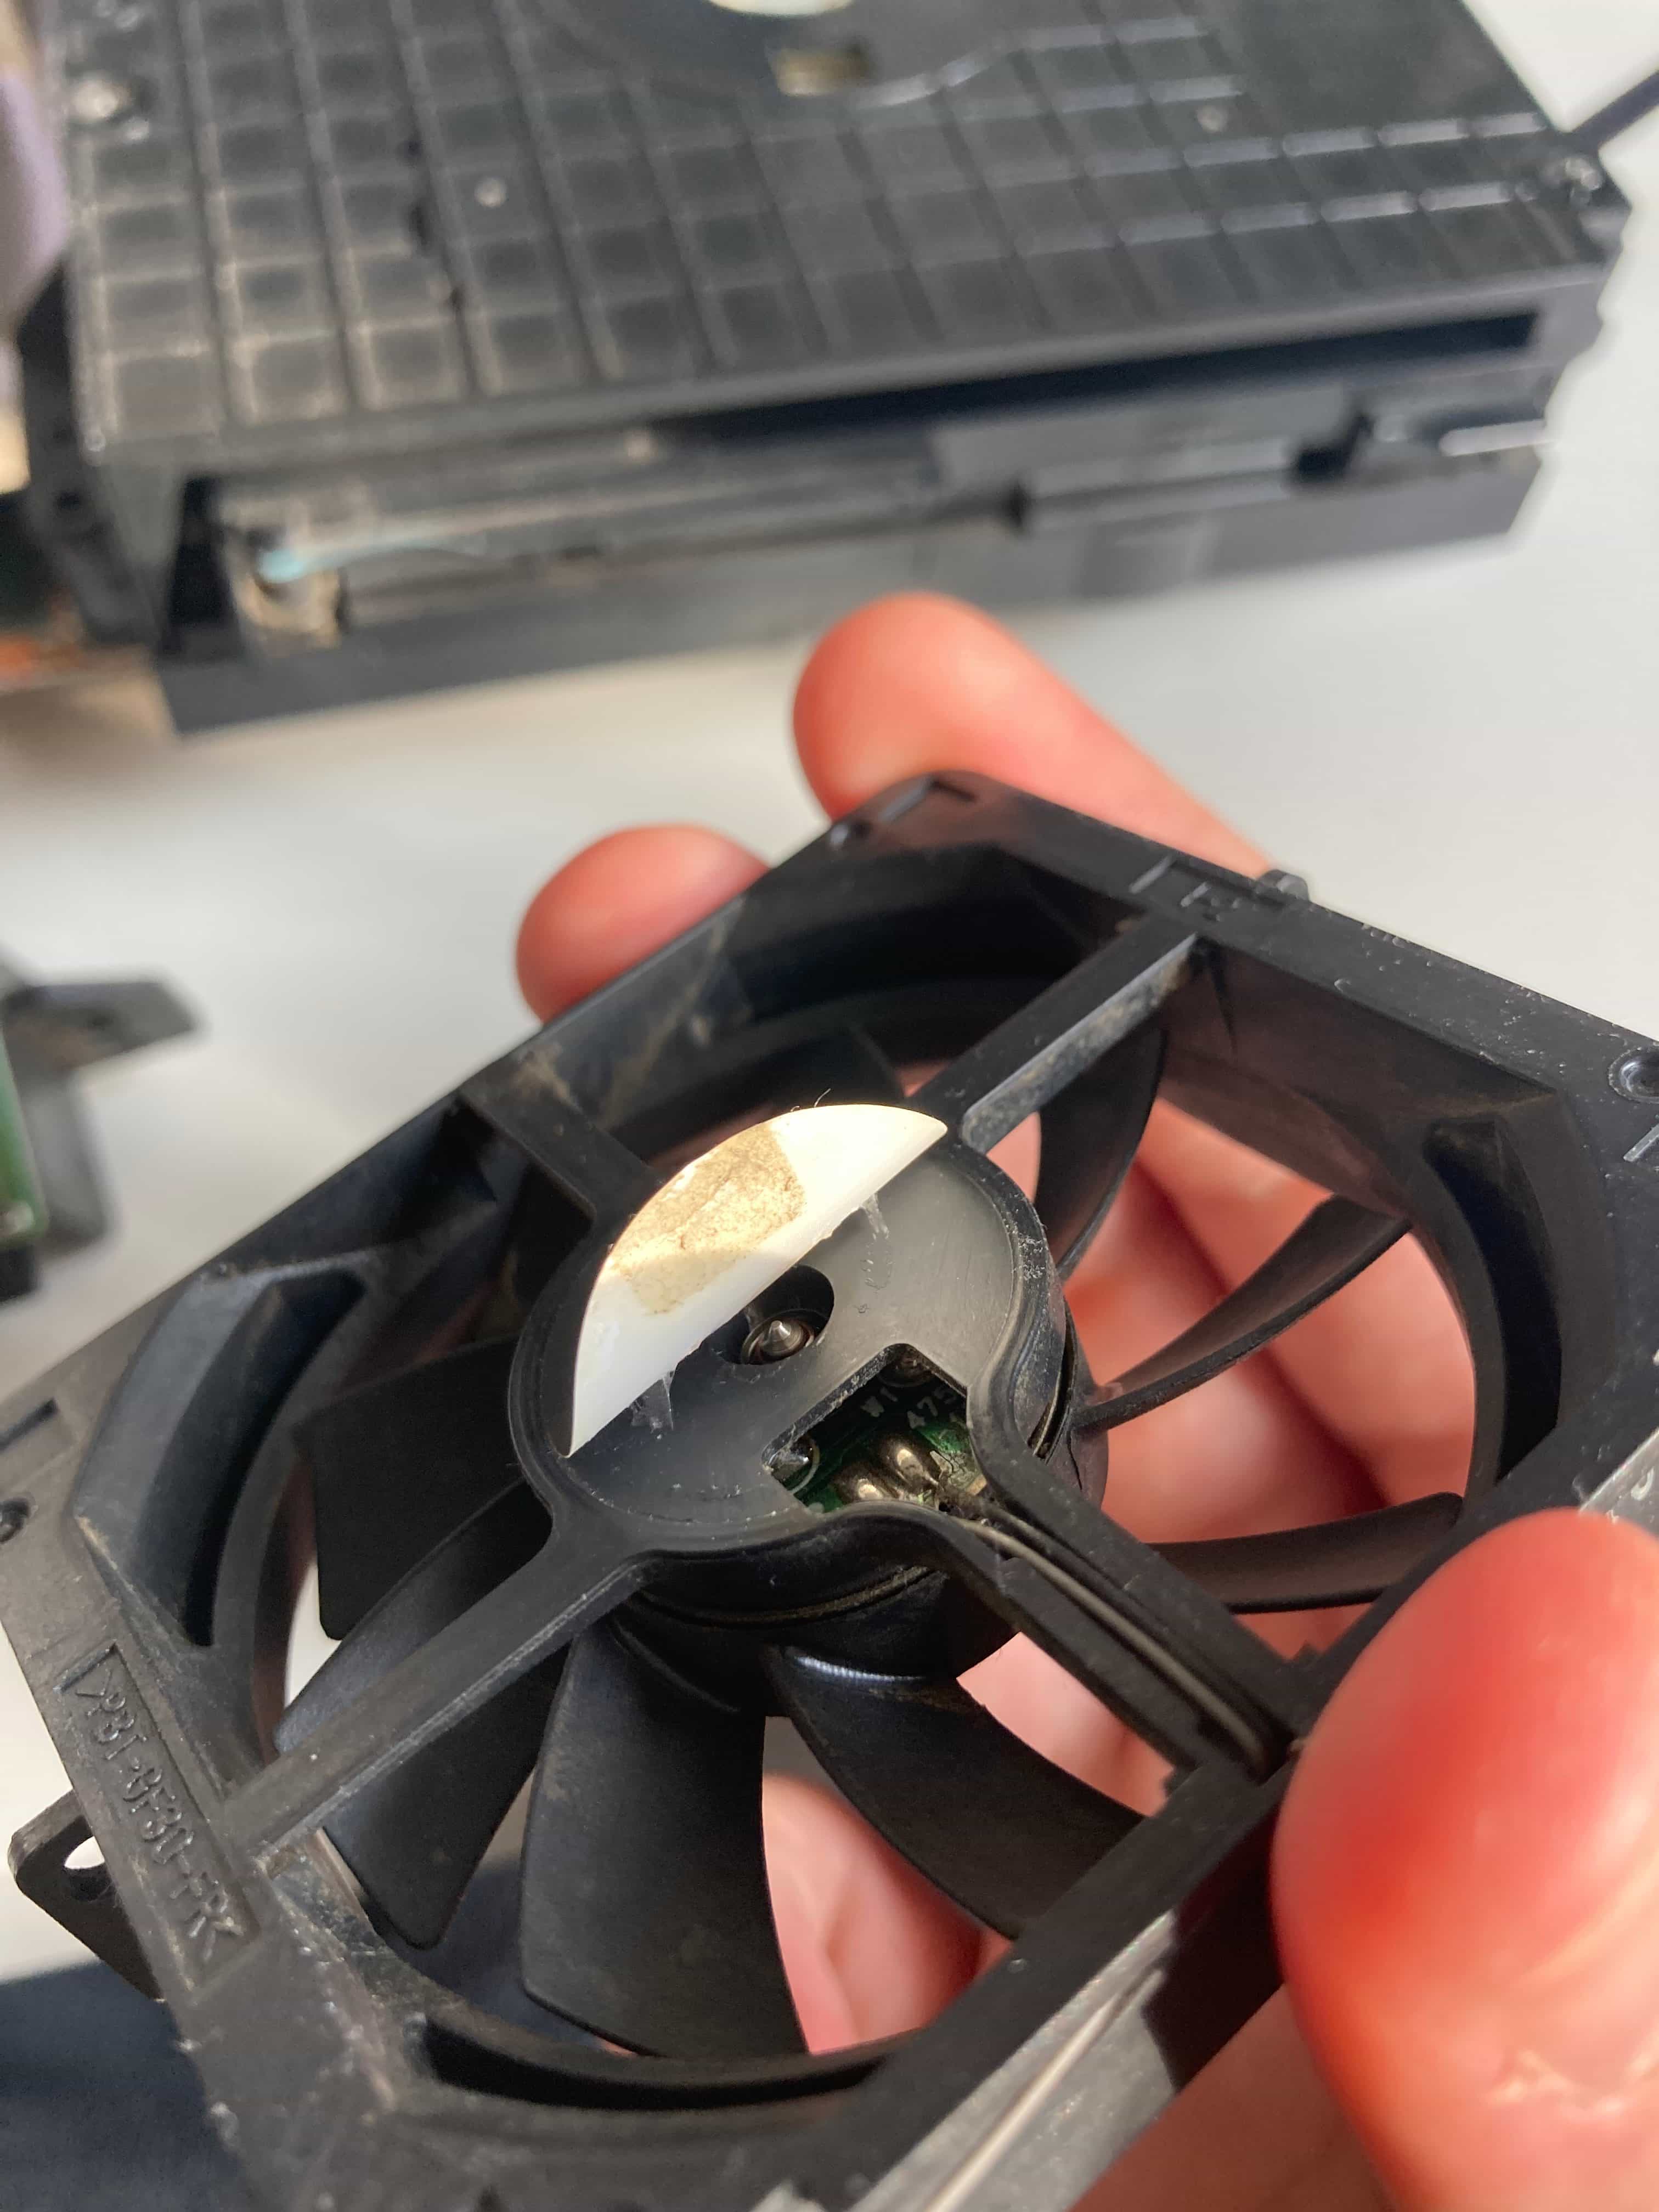
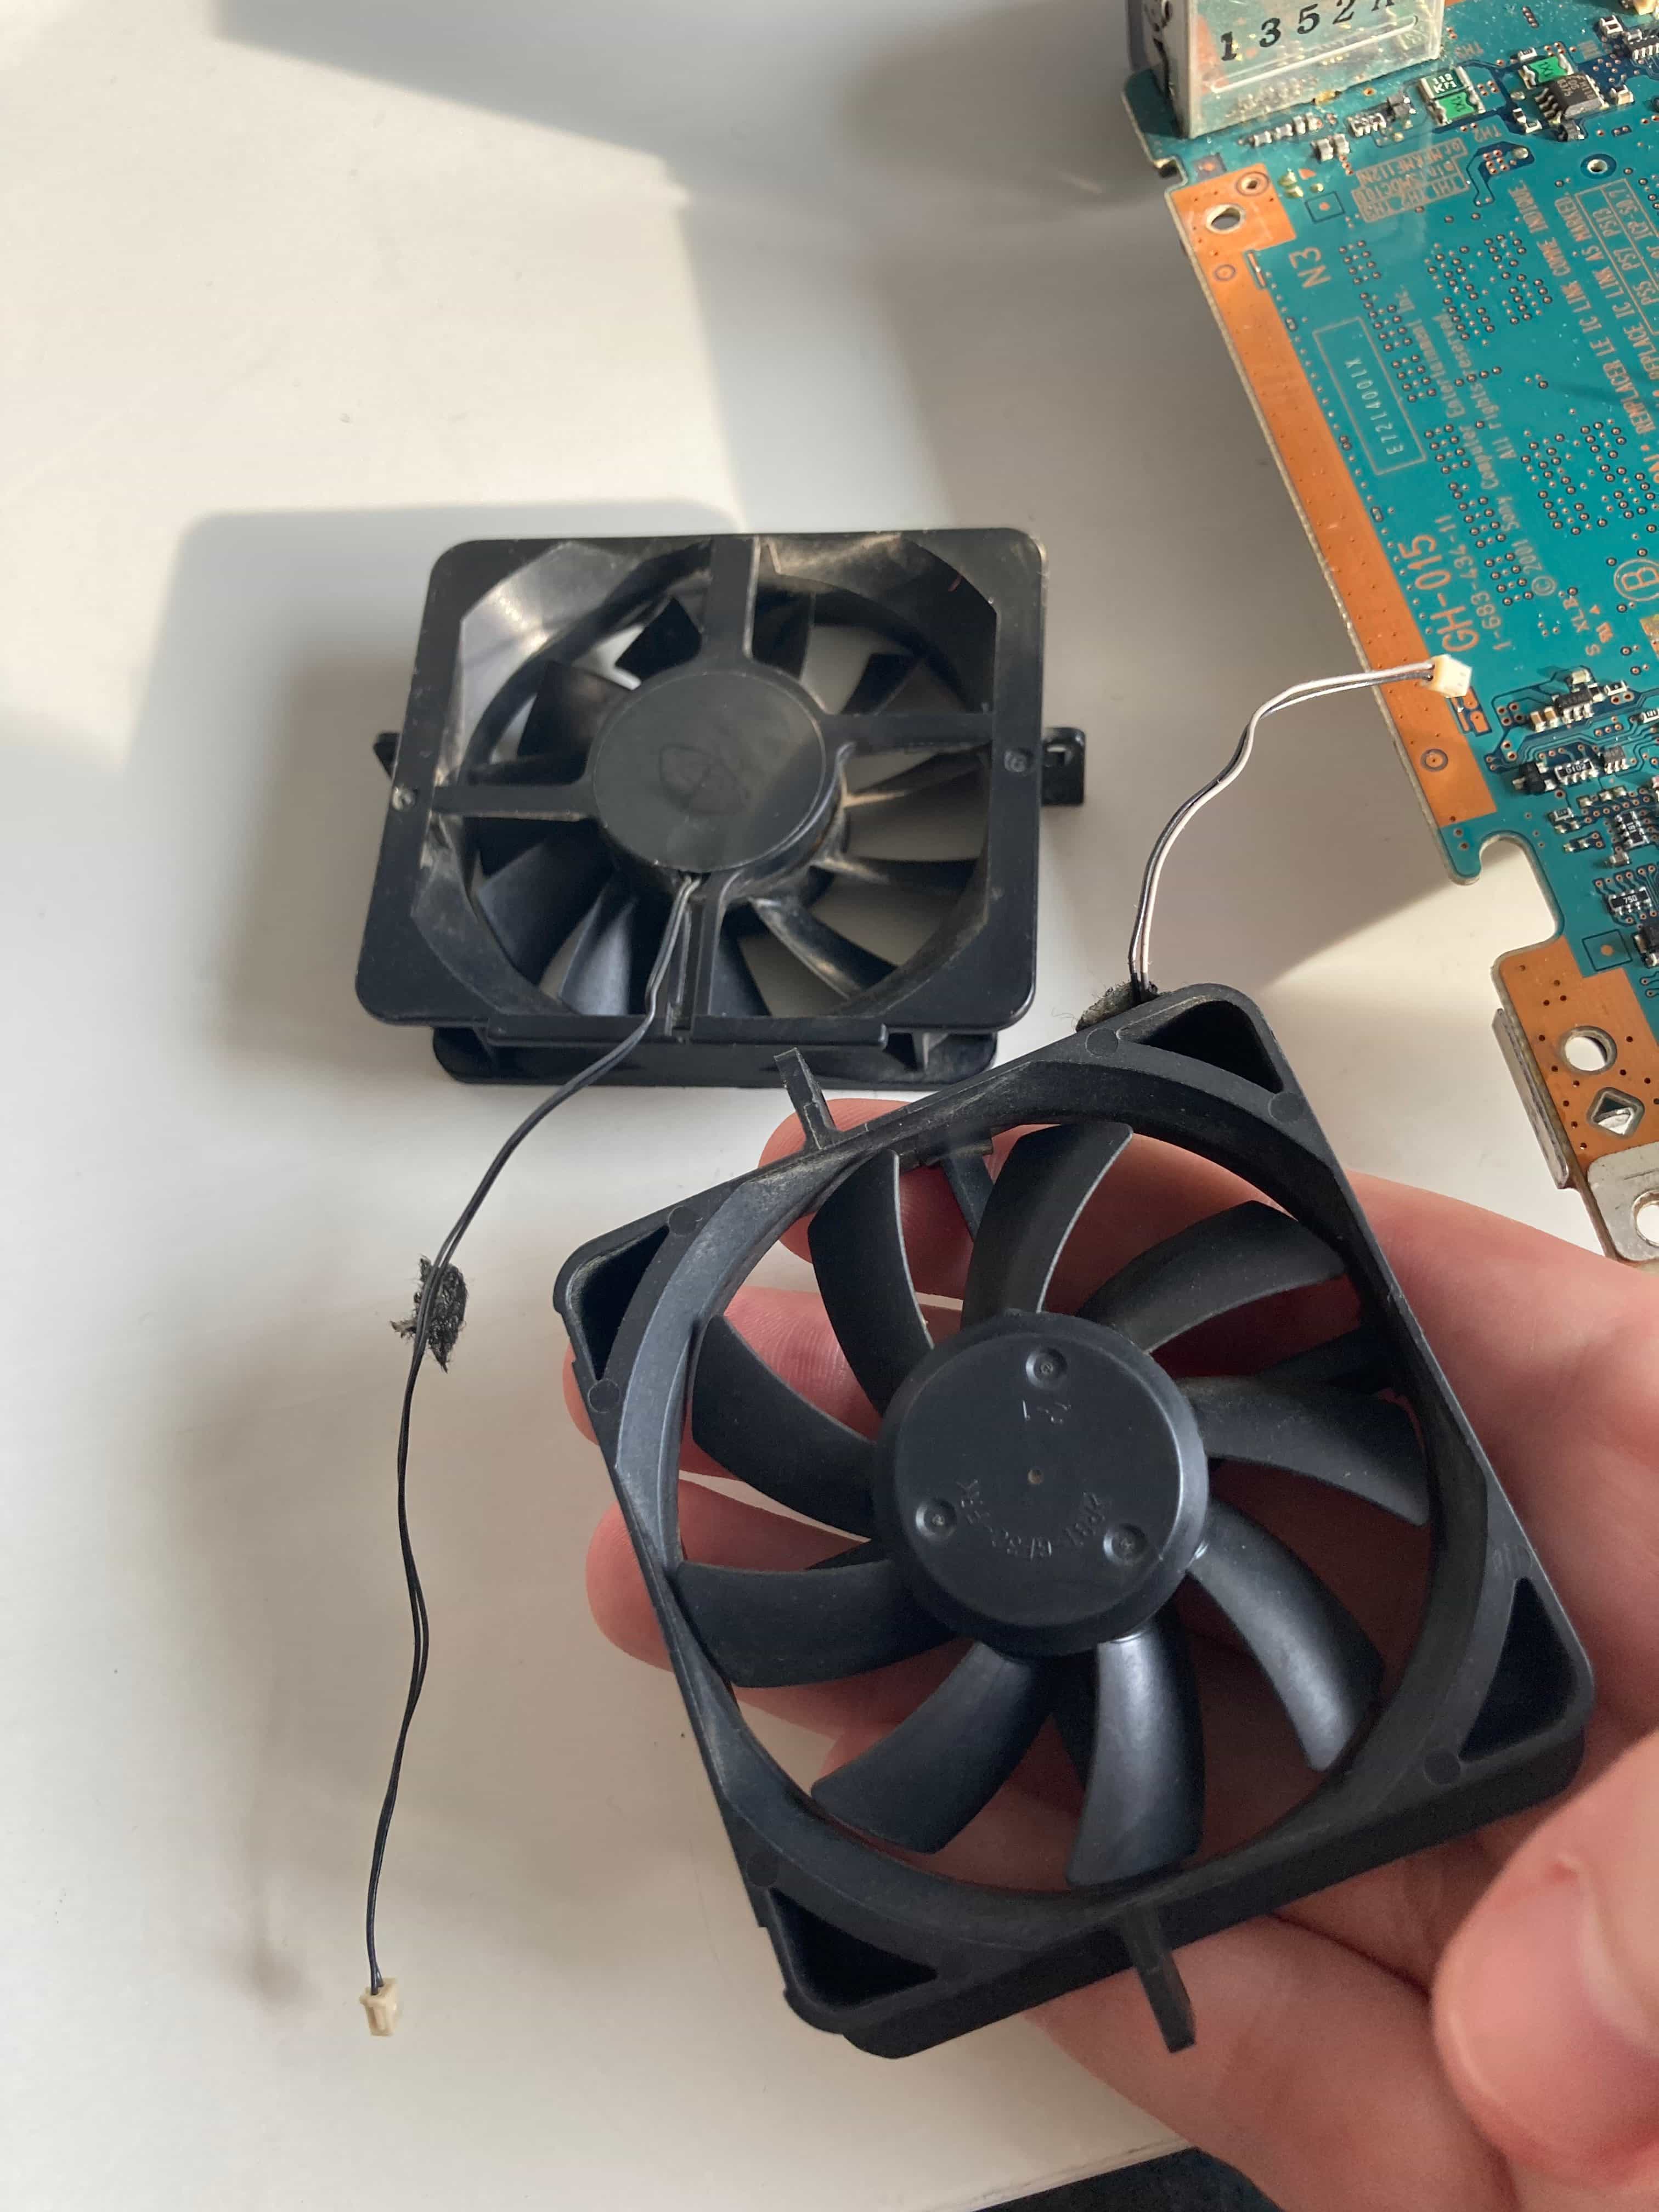
Fan stuff – the image you see on the left is the old fan after cleaning. It's dry as a bone - whatever lubricant was inside is all but gone. On the right is the old fan and a new one - it’s from the other console, as I didn't have a spare fan on hand, but spins alright! The power cable has a different length, interestingly. (even though the models are different, the location of both fan and connector, as well as the routing of the fan cable are identical). I peeled off the sticker and put some lubricating oil for the bearings, as well as cleaned the fan. That’s all! The difference between the old one and the "new" one is incomparable; this will do for the time being.
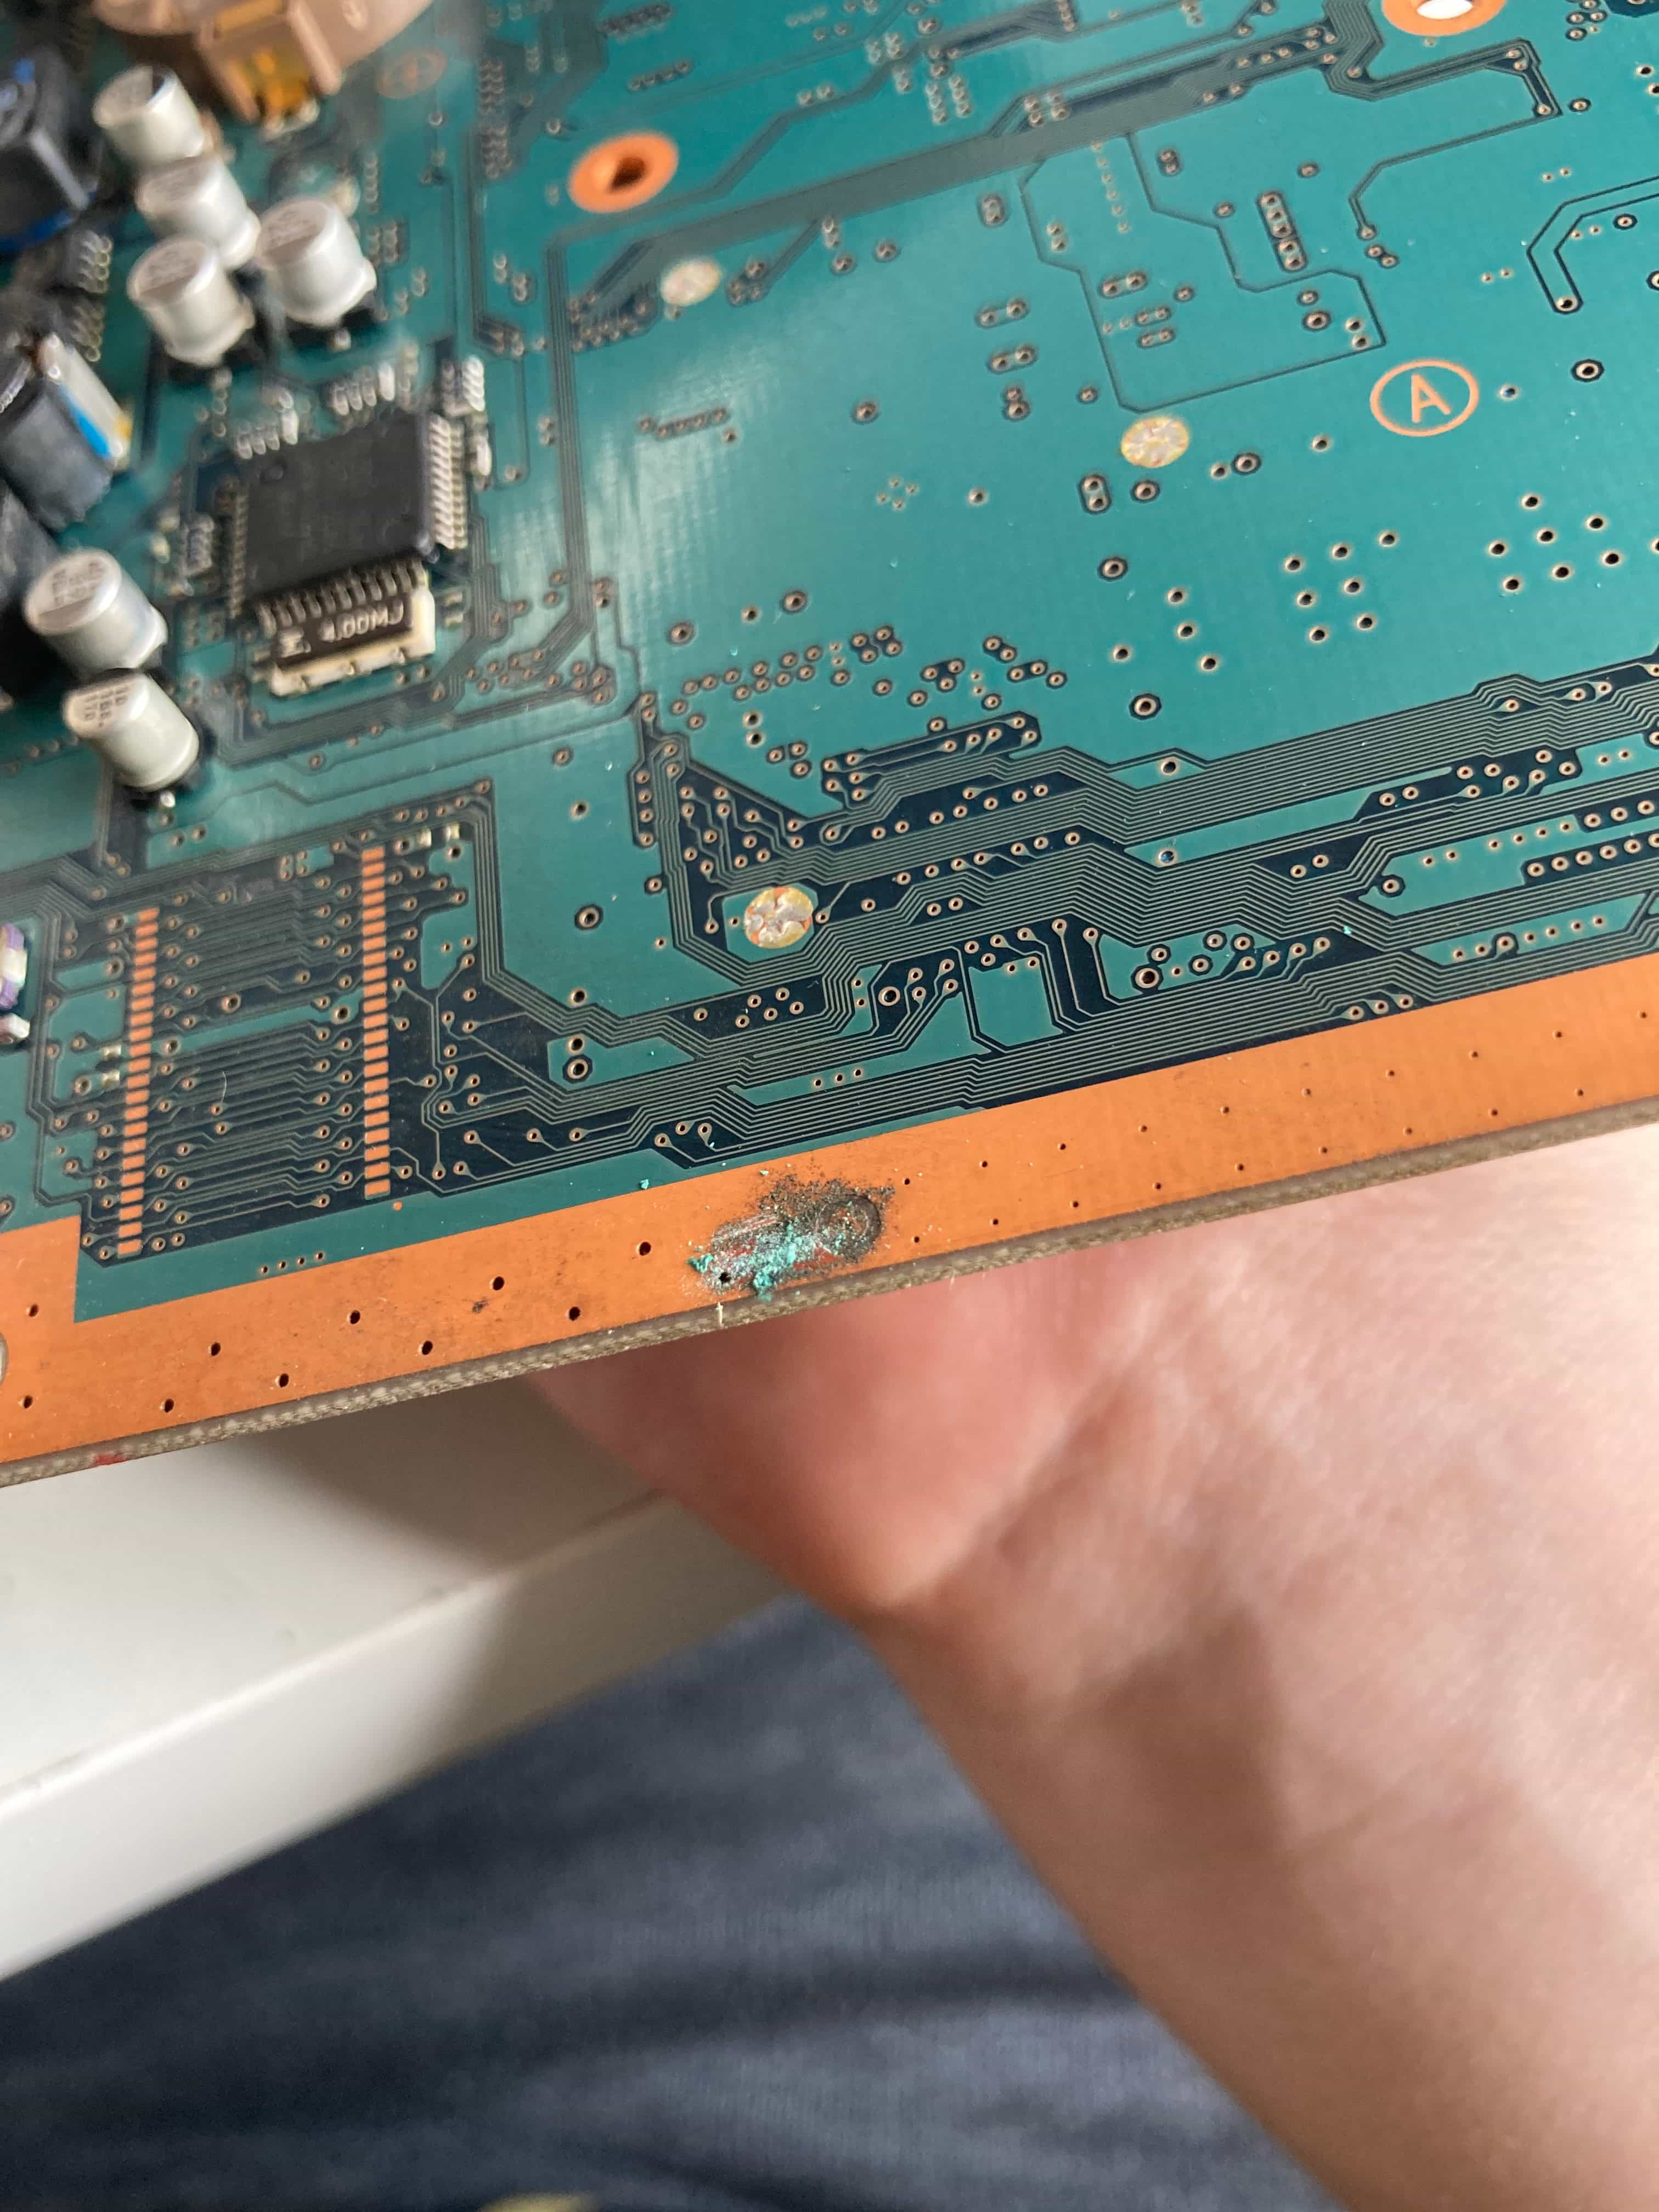
Speaking of cleaning – the board will get doused in IPA, while the chassis and plastic shell are going to soak in good old mild soap and water for now. The leftover flux gave me horrible olfactory sensations - it smells like urine or fish. Anyone who’s dealt with dried cheap flux can probably conjure the smell I'm describing. I noticed a plastic fragment frolicking around on the board - it turned out to be a plastic piece from the base of one capacitor. No biggie!
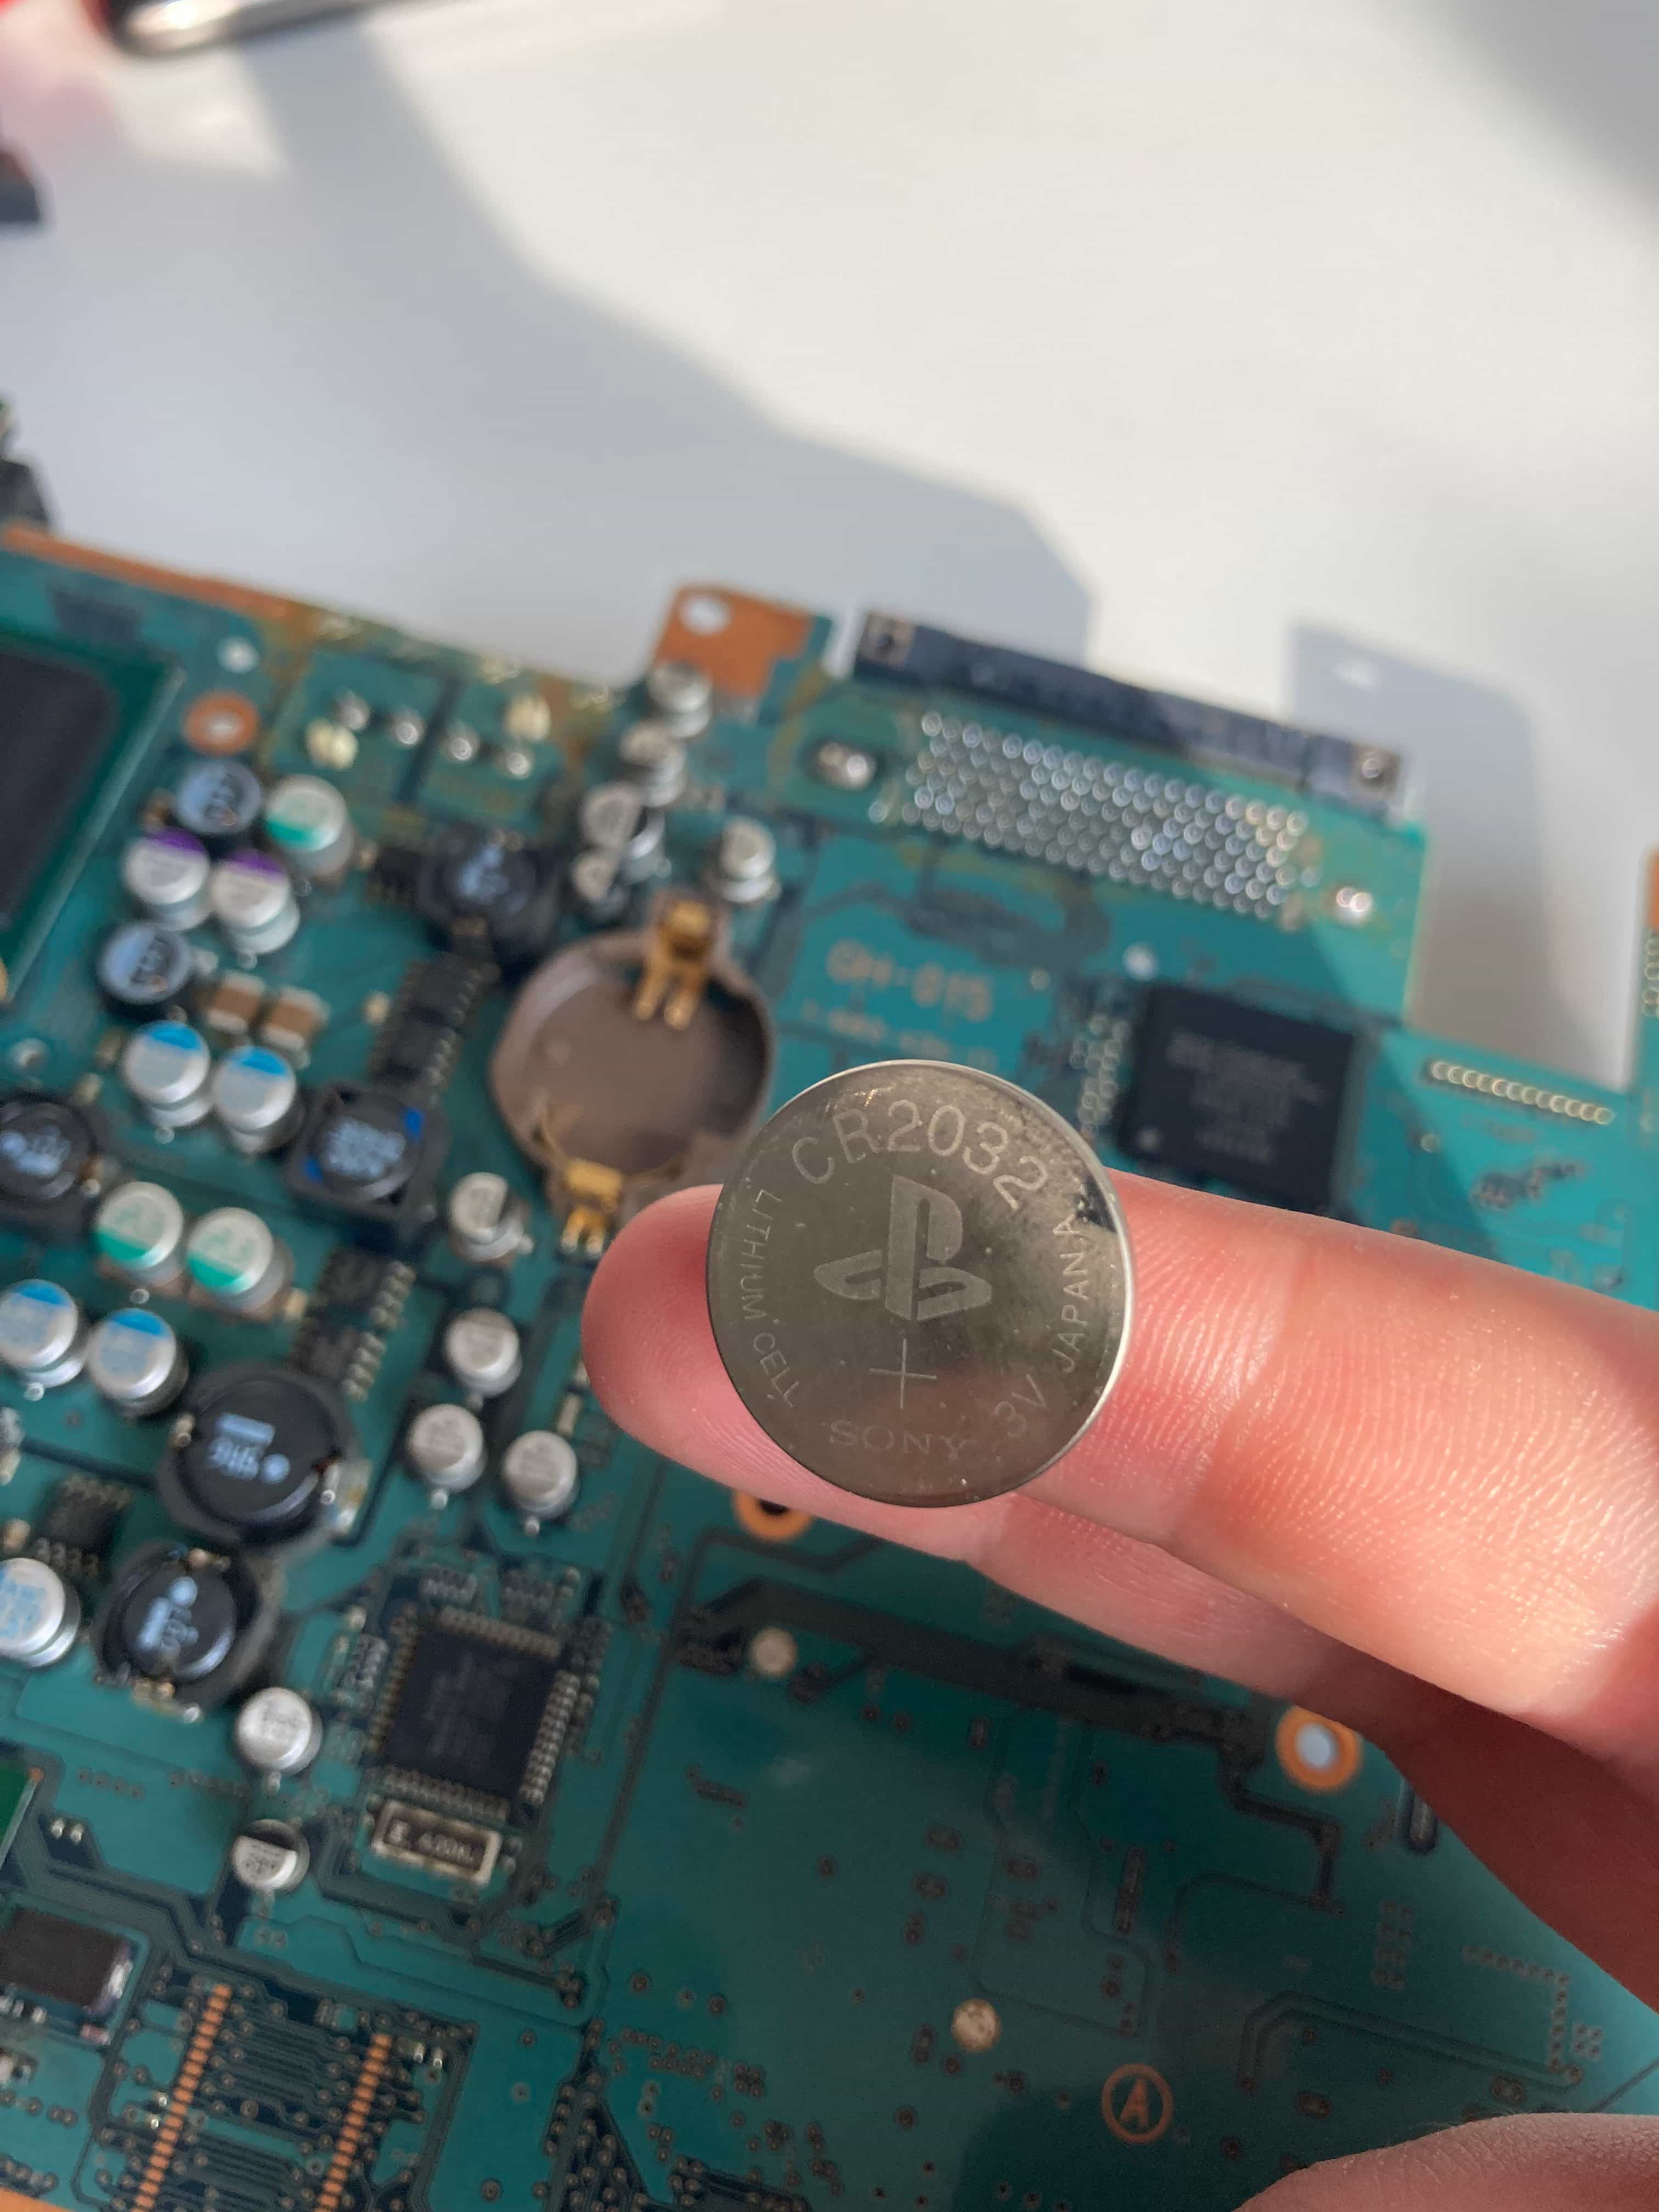
Strangely enough, the PCB is absolutely clean and nice-looking. The original Sony-branded RTC battery is still here, and there are no signs of modding as well, which is… somewhat understandable – depending on where you’re from, unlike the PS1s, PS2s weren’t as much of a subject of piracy – it was decidedly less rampant and the society in general was well off enough so that they could afford a bunch of games. On the other side of the spectrum, had you had a modded console, you would simply go all-in on pirated games. No in-betweens! Around these parts, where the purchasing power of a given currency wasn't yet "comfortable" enough to justify just buying original games, it wasn’t that common to get a modchip installed, as they were markedly more expensive than PS1 installation services. That didn’t stop some users, and as time went on and the prices went lower, more and more owners decided on a modchip service. From what I gather, Rippers, MODBOs and their clones were the most popular – and frankly, nobody really cared about most of the new specs that modchip manufacturers tried to outdo one another in – as long as it played backups, it was fine for most folk.
The other two methods were the nowadays ever-popular Free MCBoot (initially popular only late in the PS2’s life, given that the project landed somewhere in 2007) and Swap Magic – which, I believe, is a rather forgotten element of the PS2 homebrew scene (and one that I used!). This console in particular shows signs that SwapMagic was the weapon of choice, judging by the lack of bezel and damaged DVD tray – but it might well not be true. You just never know. For what it’s worth it could have just been taken to another console, or broken off. Off to wash the entire case & shell – perhaps that will relieve it of that rancid stench. As they are drying, let’s go over the rest of the console and give it a general spa day.
The MagicGate and joystick ports look okay ehough...
… but after some Deoxit (I use something called Kontakt S), IPA and scrubbing, they look shiny! Shame the metal parts bear signs of rust – unfortunately there is not much to do, other than repaint them, which is not something that I plan to do until we get reasonably priced (and reasonally available) clear shells. Then, I could get a clear purple shell, paint the metal parts yellow, and have a totally jazzed out PS2…
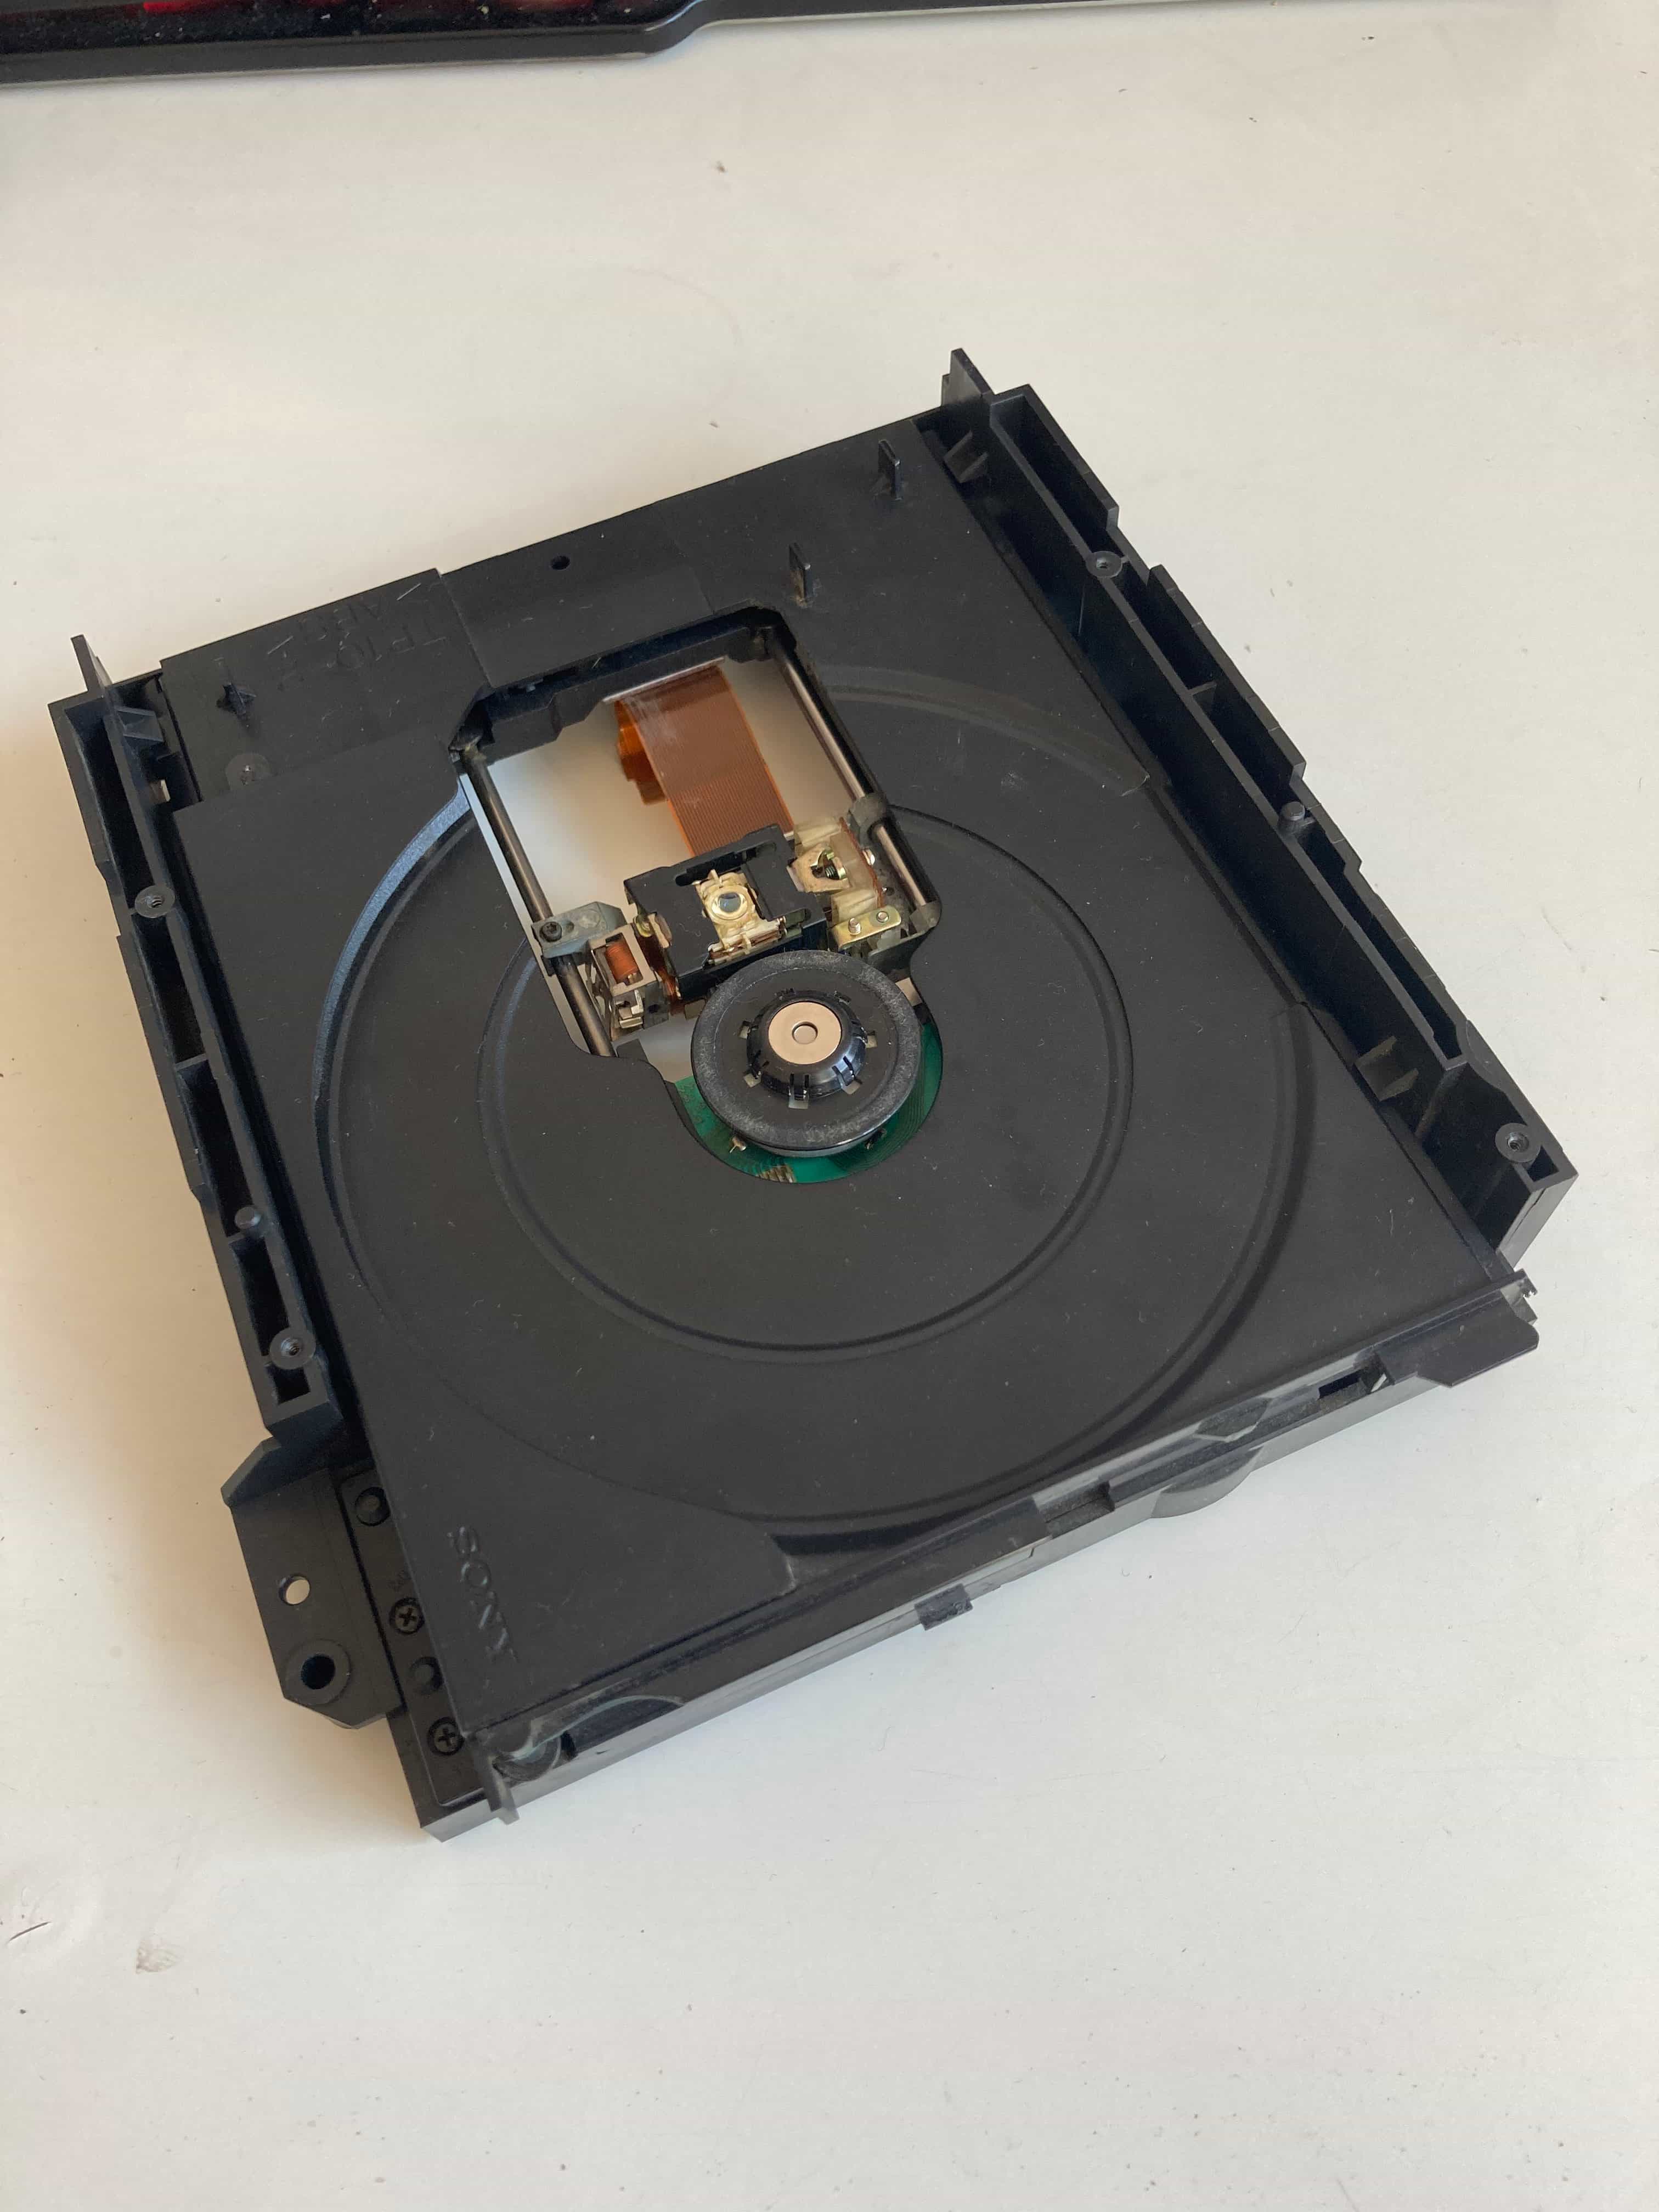
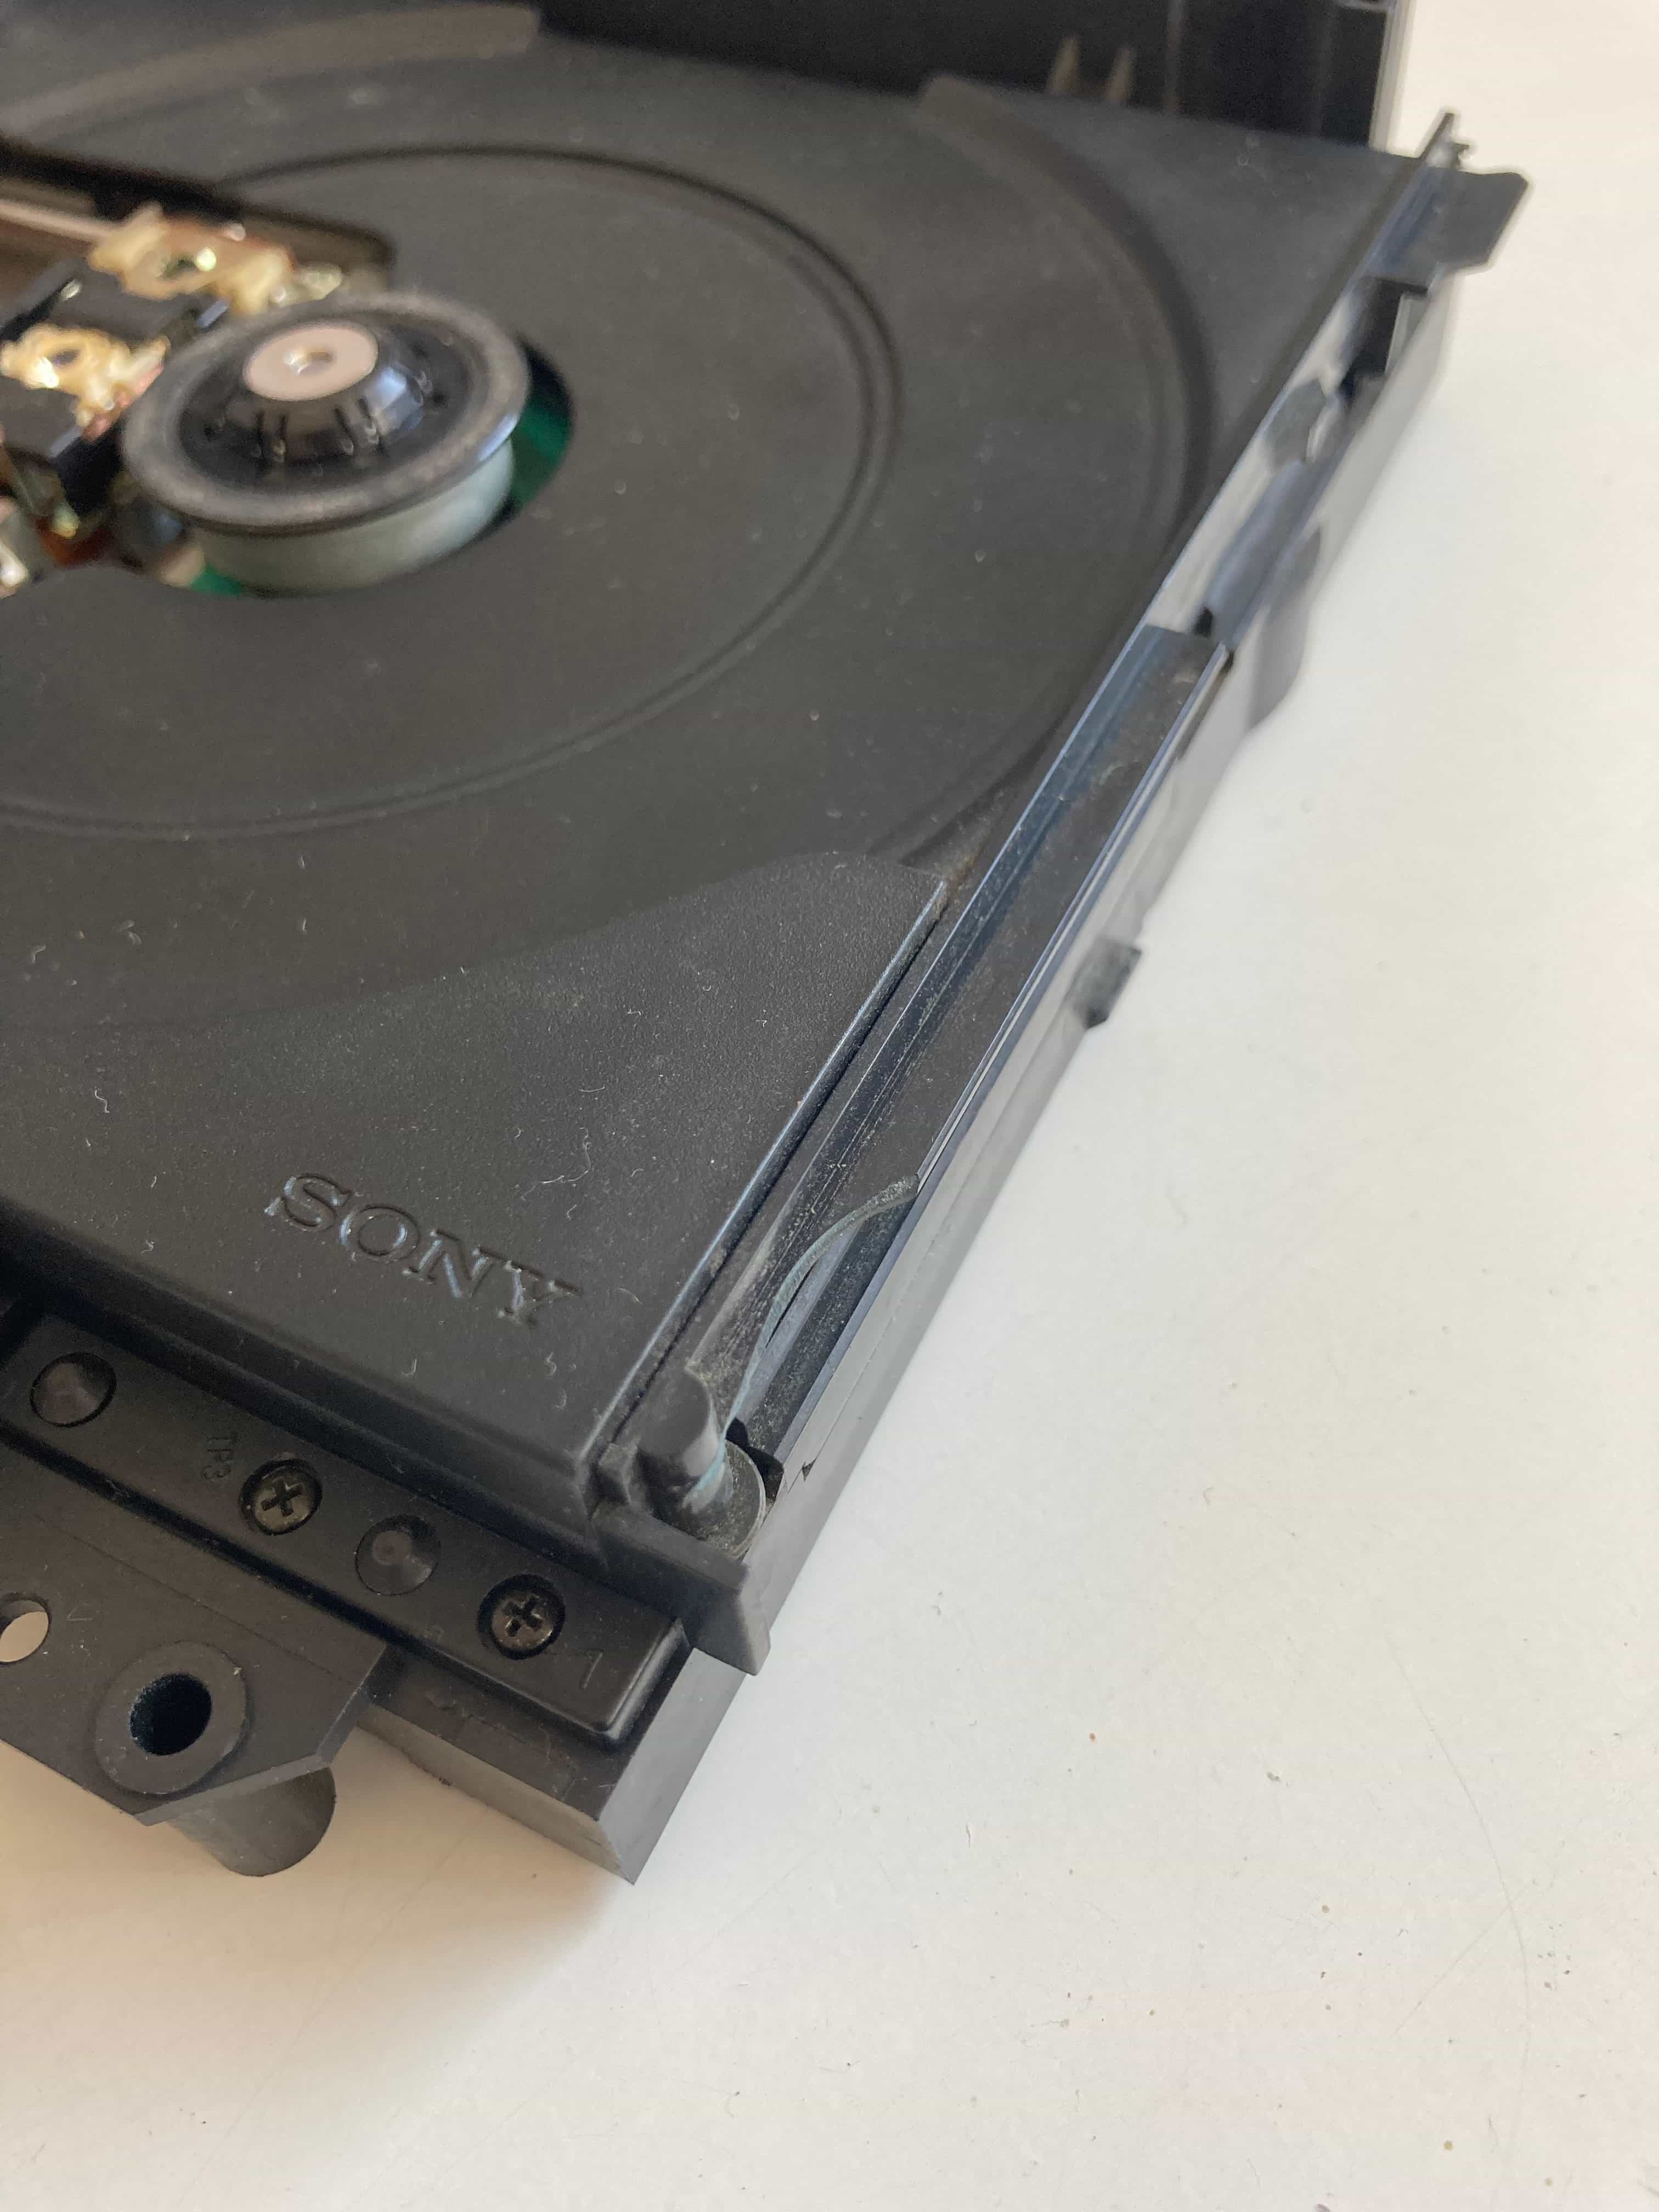
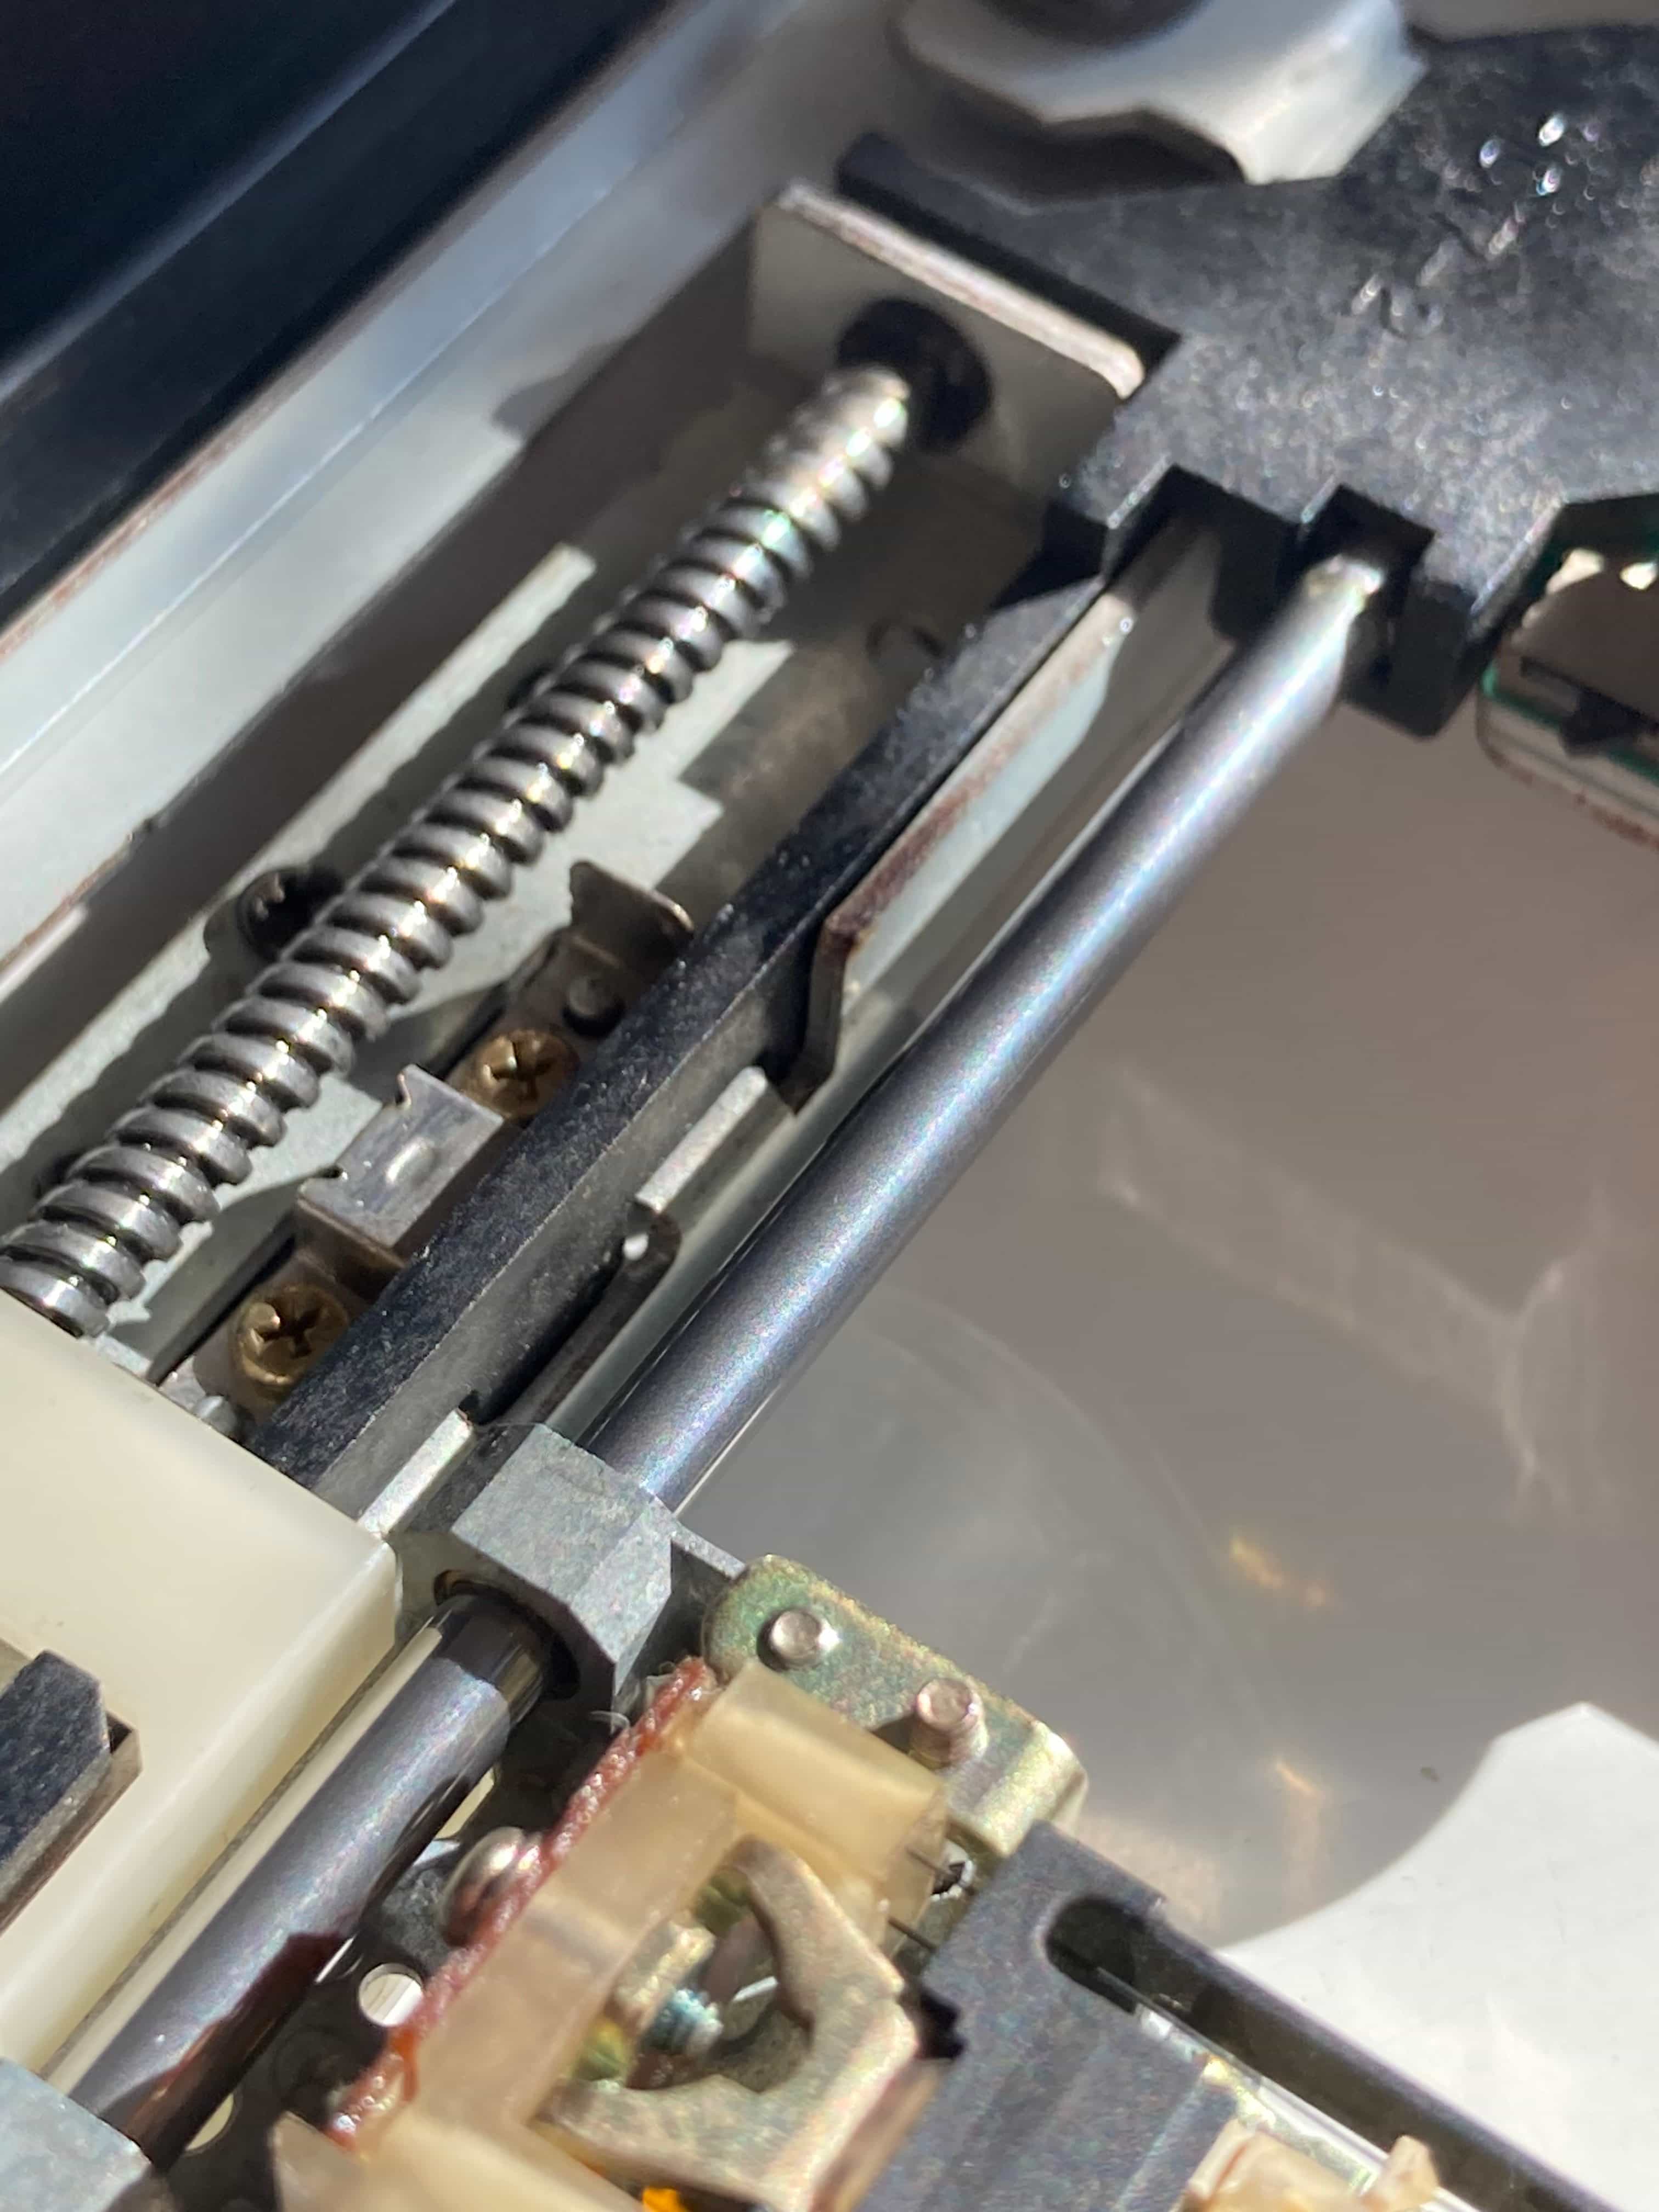
Here’s what the laser assembly looks like. The CD drive’s top cover is taken off on the photo - 2 screws were missing, and 2 had to be unscrewed more to get it to slide open. Note the CD tray at the front – the plastic fins are in bad shape, broken off in places. This is what lends to evidence that SwapMagic was used in this console – while promo materials and the instruction manual would show a special slide tool which would pull out the tray, most of the time it would get stuck and users would pull the tray out manually by hand, often grabbing the aforementioned plastic fins (if you’re wondering, they are helping to hold the bezel in place).
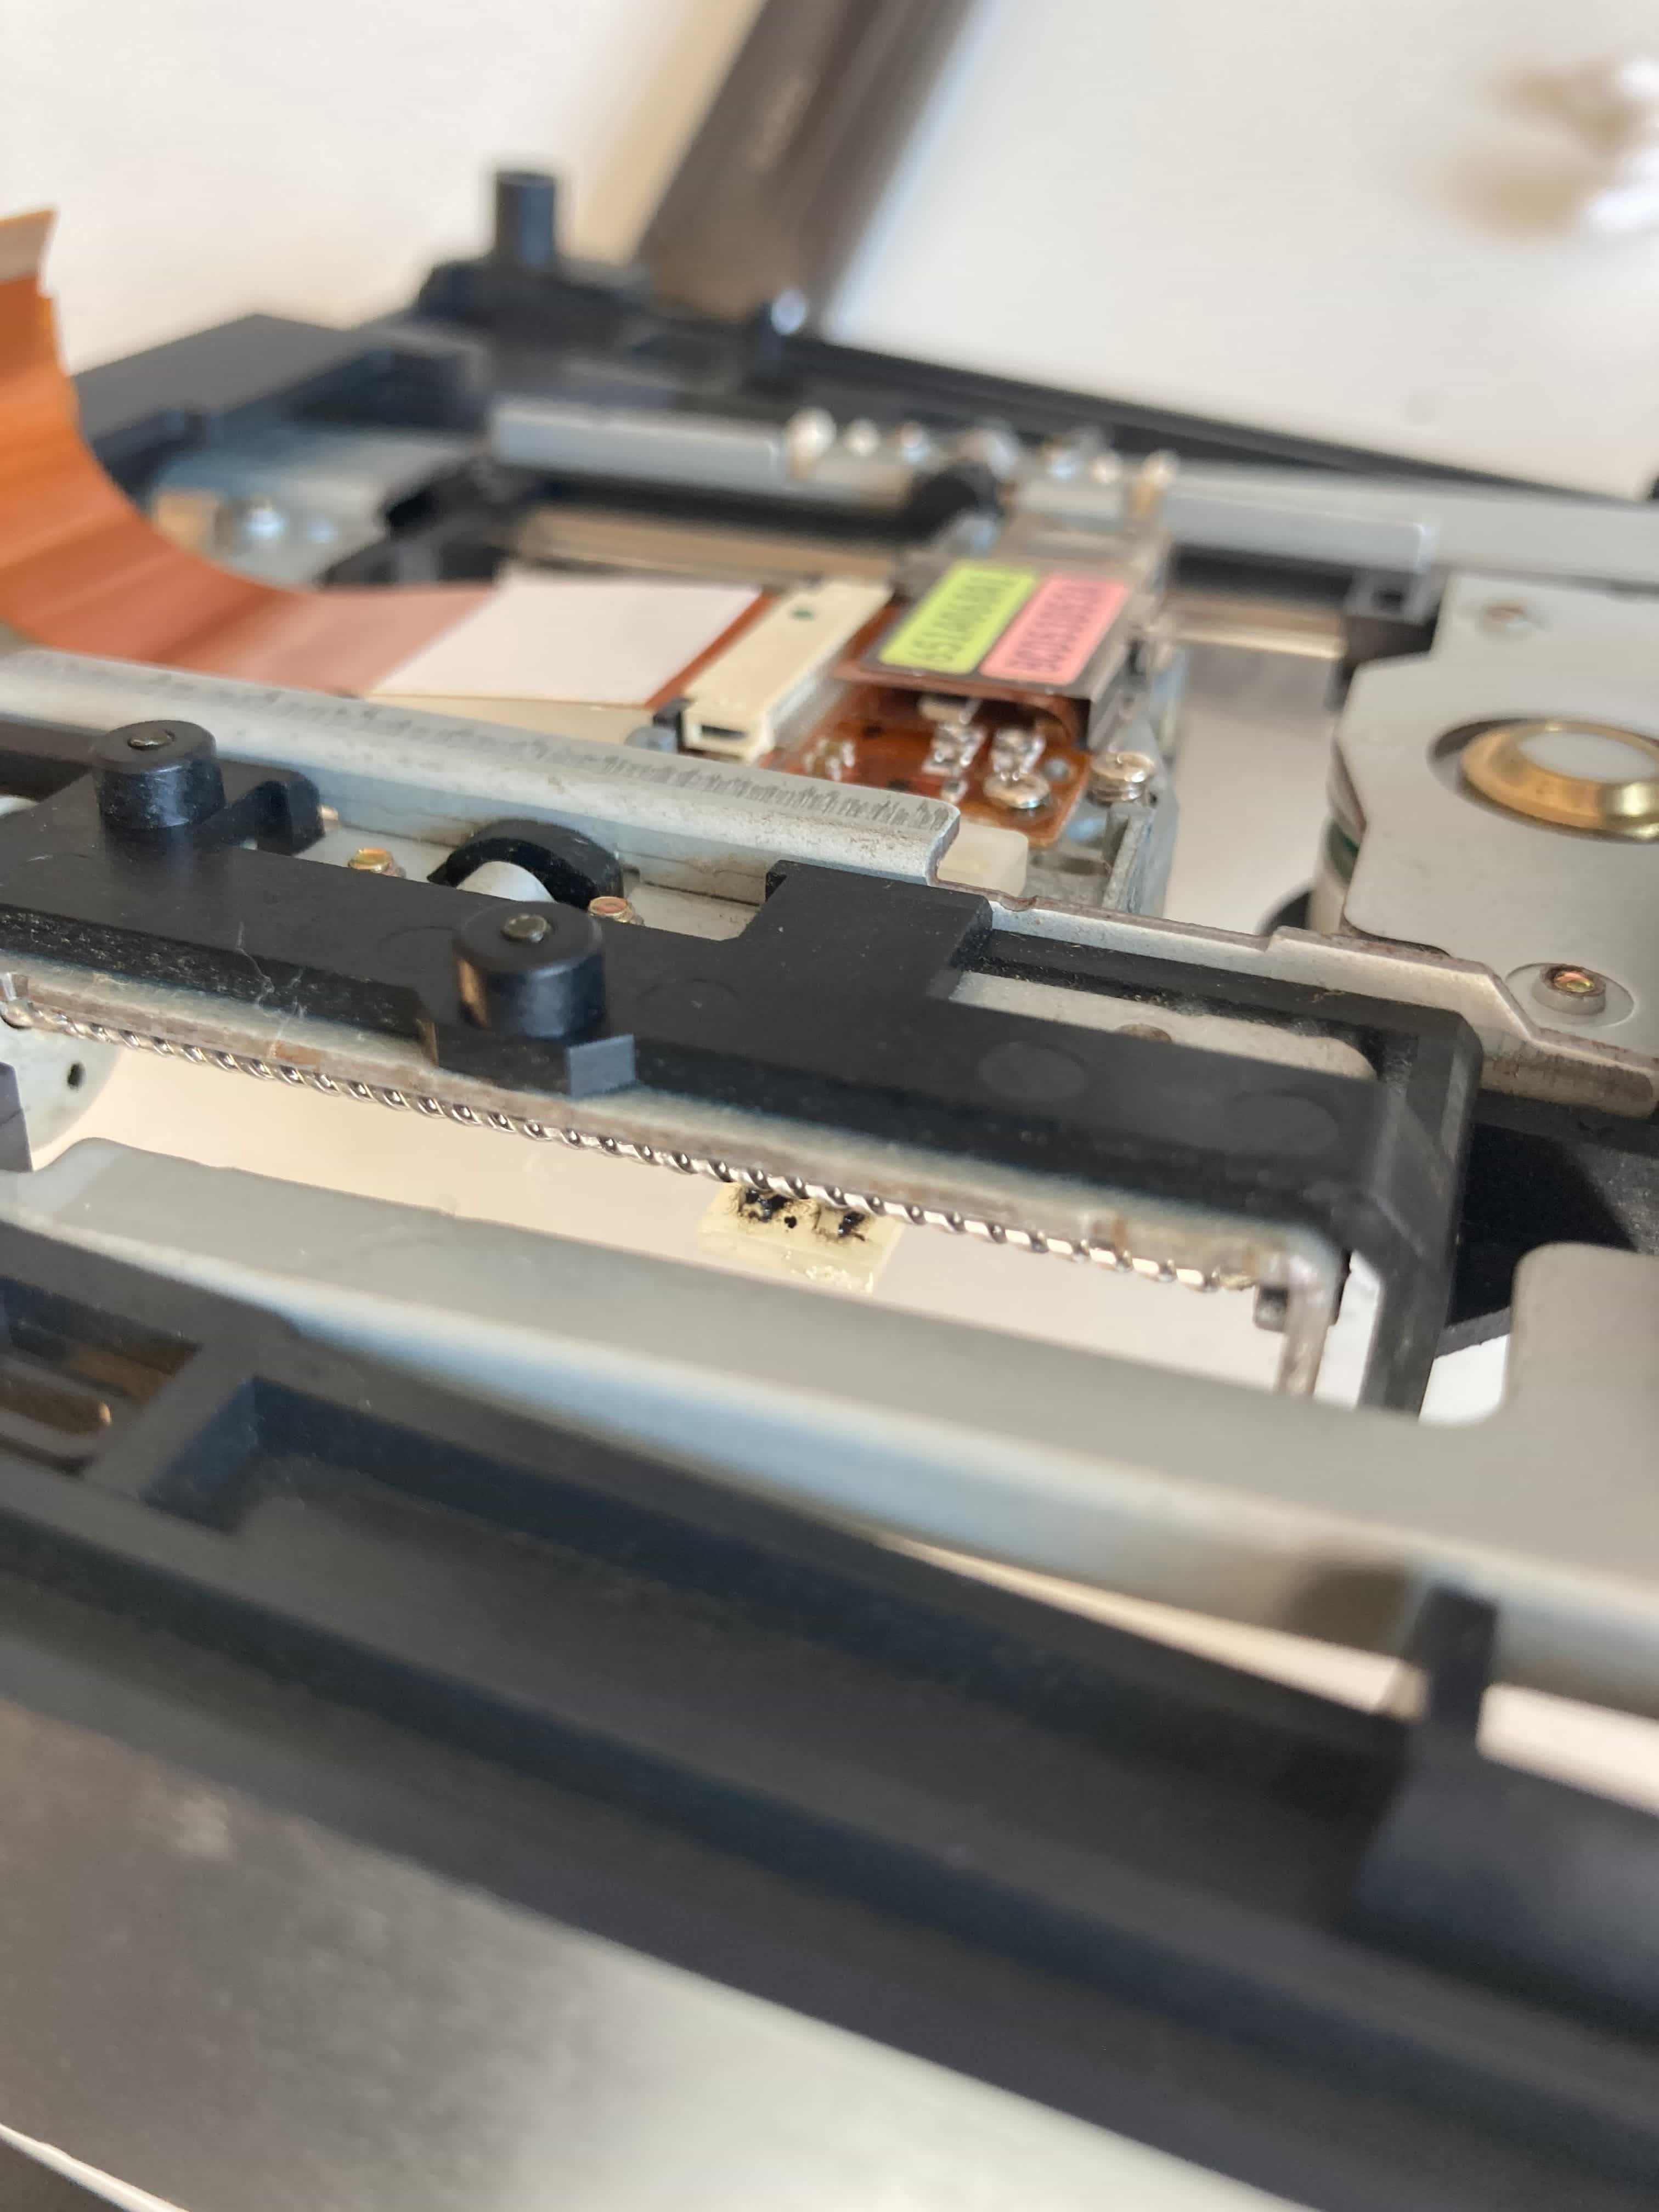
The drive is a bit dusty, so I used compressed air and an ESD brush to clean the specks off. The laser itself needs some force to slide easily and skips back when I push it back – the grease is dry and needs replacing ASAP before the white plastic part in the center of the image will start grinding against the worm screw, which will put the laser out of alignment. The rails, on the other hand, look good enough – just dirty. I got a Q-Tip and cleaned the mixed grease & dust off of the rails and the worm screw, then proceeded to apply a new lubricant. Personally, I use vaseline oil for precise mechanisms – while more liquid than most greases, a little goes a long way – and it does not react with any plastics. I’m the type of person who will re-lubricate the oil every few years, so even if it collects any dirt it will not matter in the long run. In addition, dust and dried grease on the white plastic guide tend to build up and get “sculpted” by the worm screw, causing it to not sit fully in the grooves. Using the Vaseline oil, a toothpick and a Q-Tip I can clean most of it. After that I clean most of the oily stuff off, and reapply the oil in tiny dabs and spread it throughout all the moving parts – rails, worm screw, gears – making sure not to add too much.
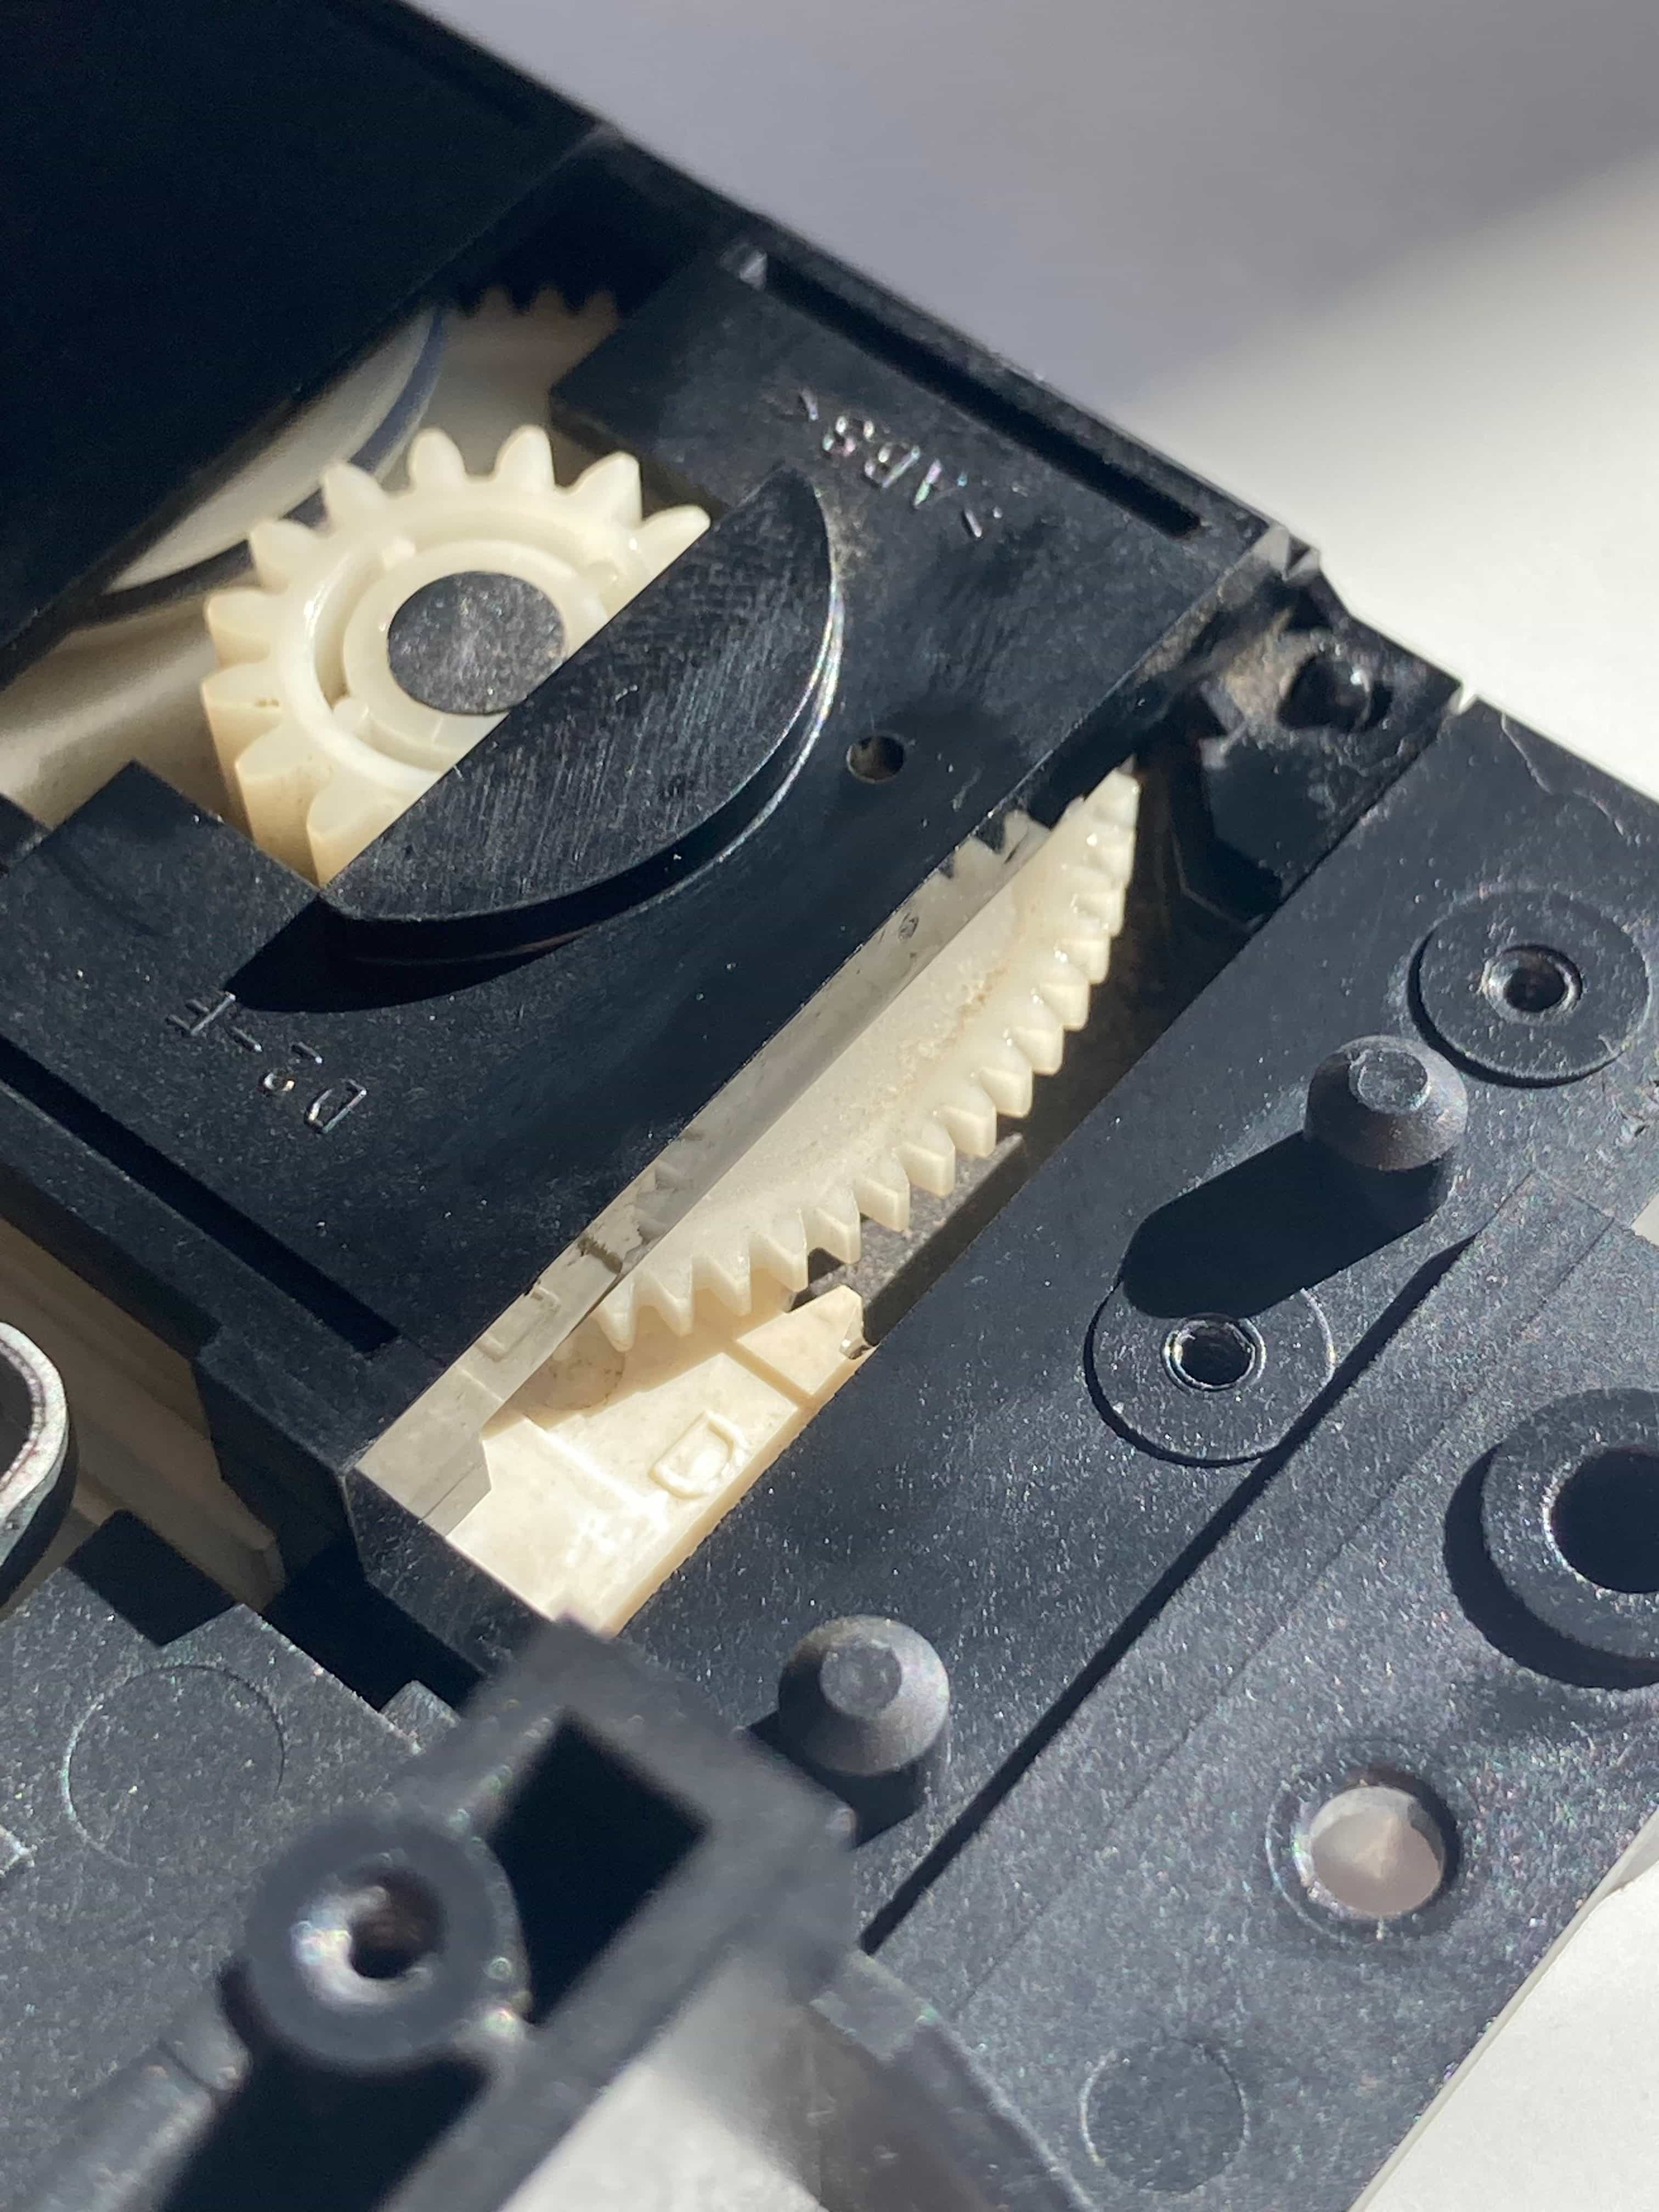
This slight sheen is just enough oil to do the job. Result? The difference is night and day – the laser barely needs any pushing to move and it doesn’t skip along the rails. Everything is buttery smooth and much less silent in general, even if I move it by hand. It’s looking good! All the excess oil that was visible outside the moving parts themselves or near them – inertia does that – was cleaned up and the drive is ready for testing.
The assembly was a breeze, especially since there are soooo many resources online that document the entire teardown process for every model of the PS2. I only made sure that the new power/reset ribbon actually goes where it’s supposed to – it should run through a little opening and between the chassis and the plastic piece that contains the power/reset PCB, and that’s it.
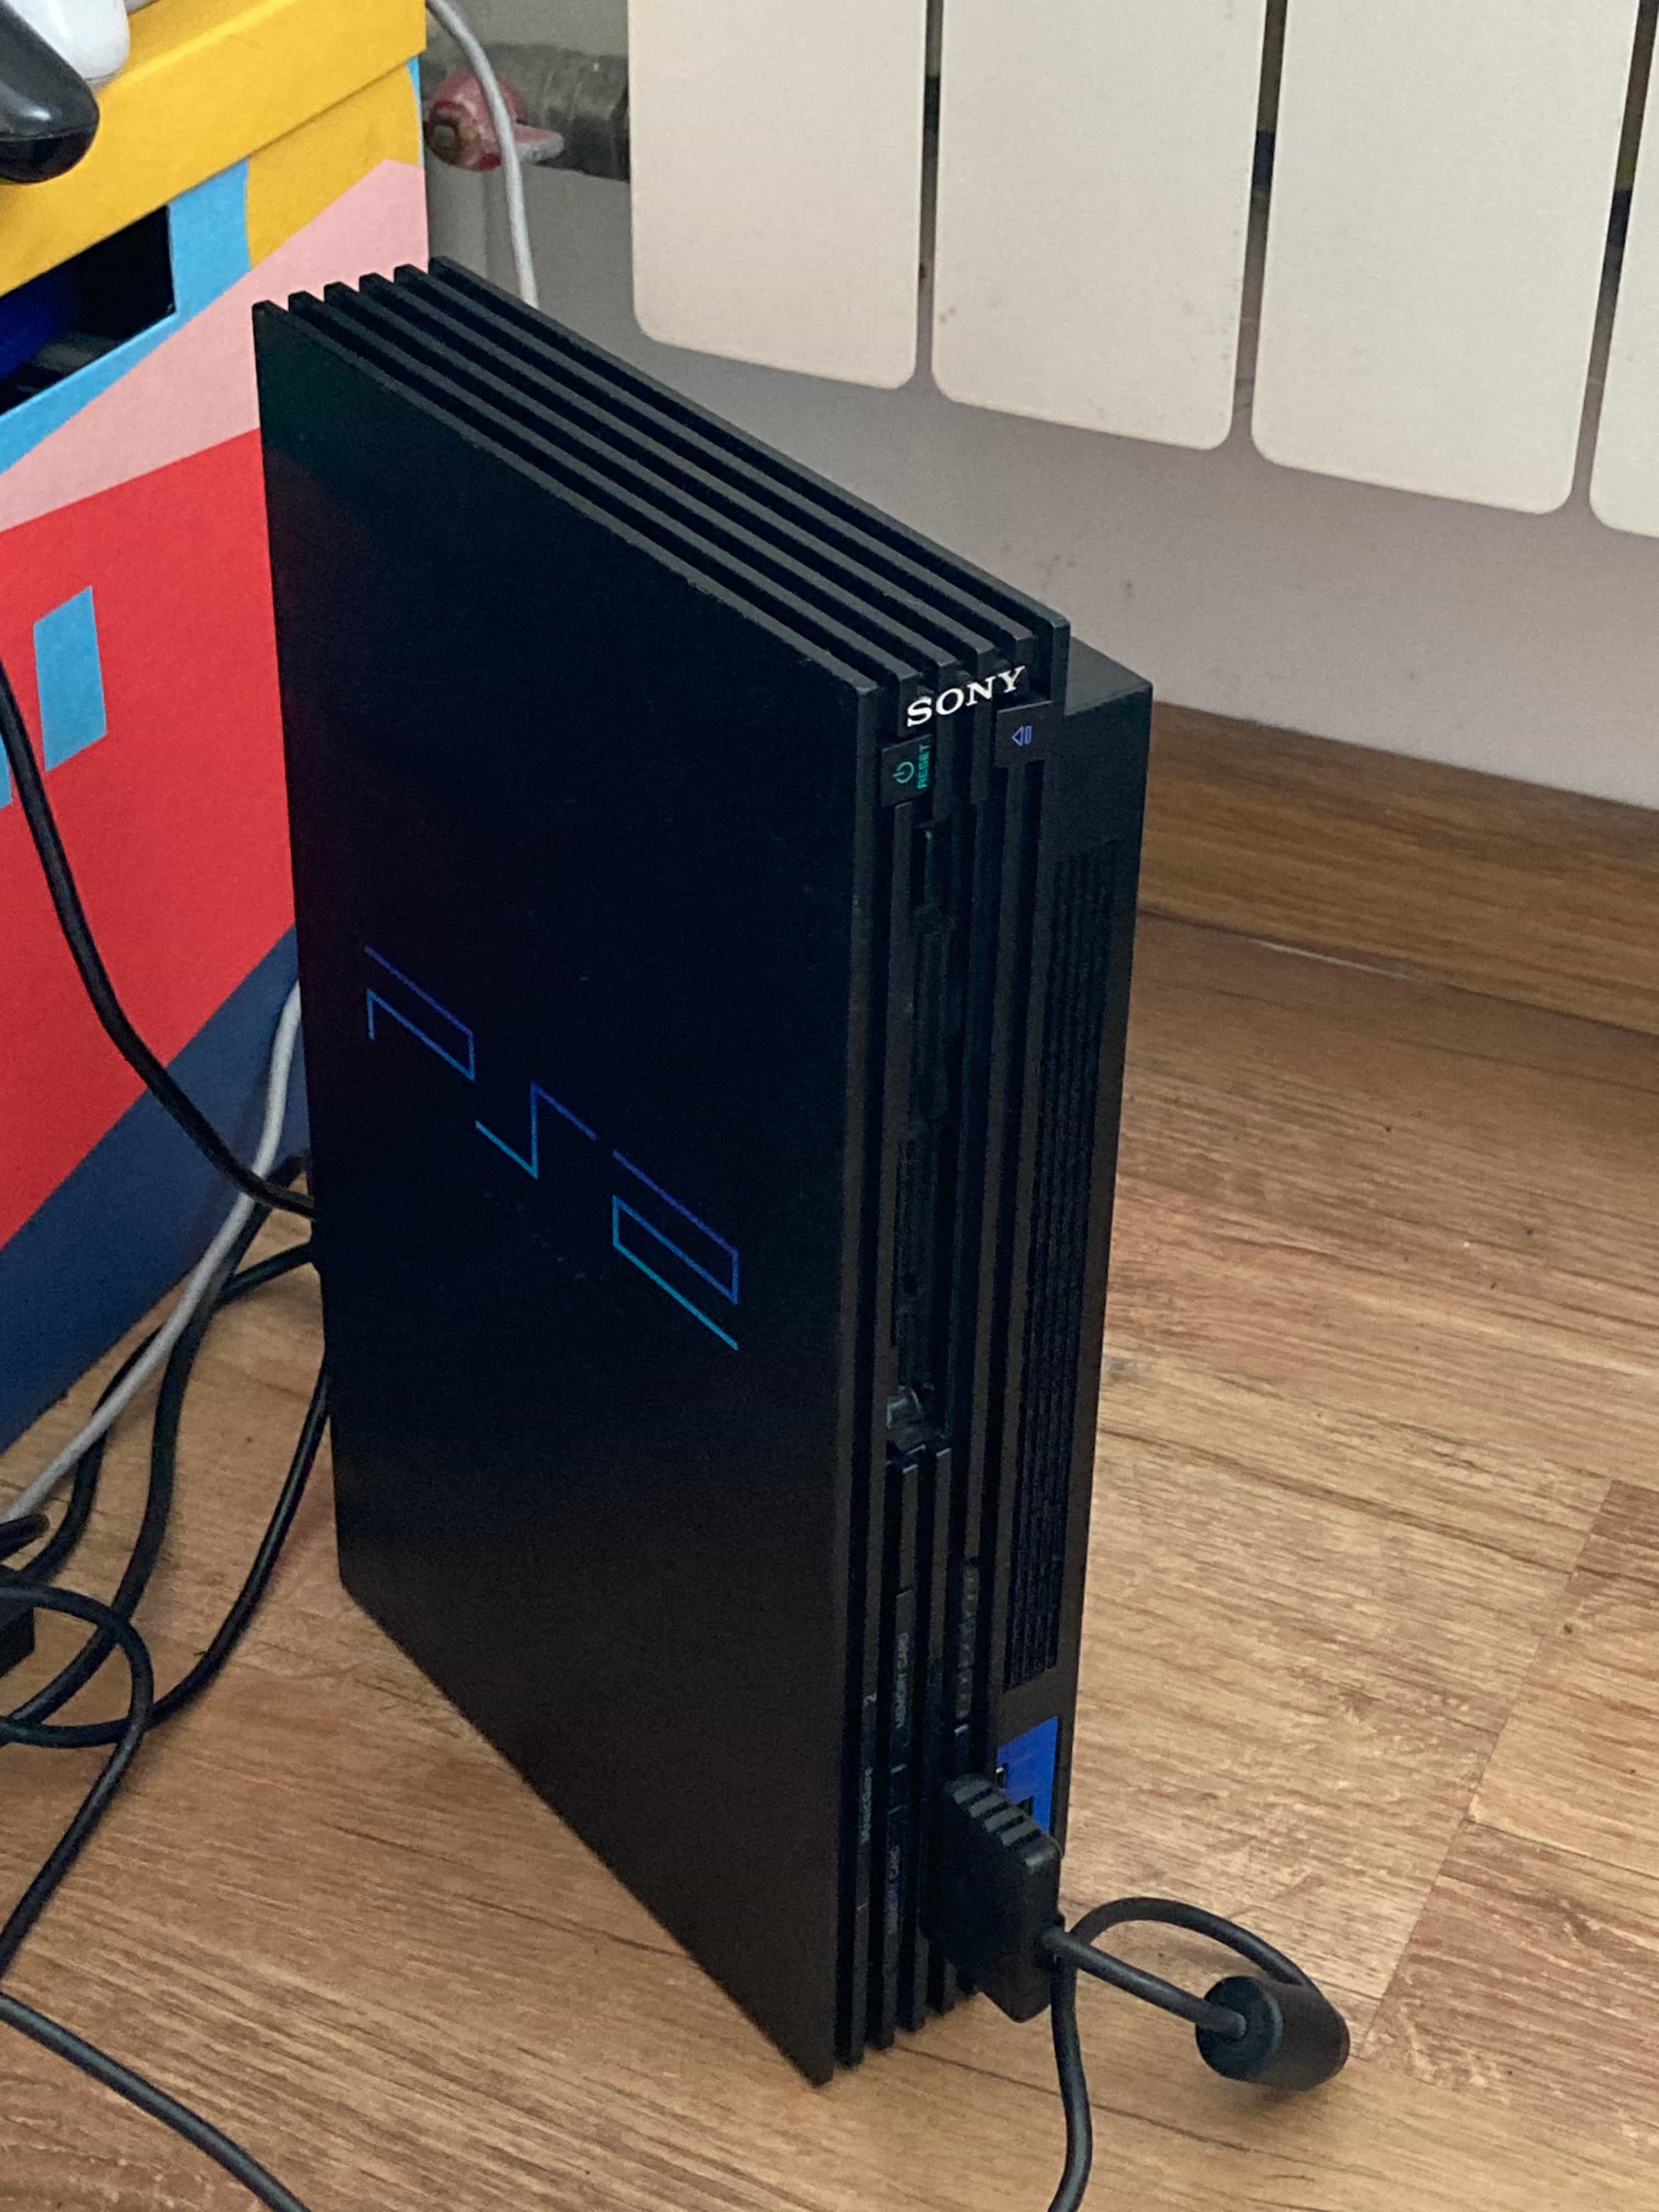
The Playstation 2, model 39003, all done. The fan spins noticeably quieter now, and the drive is as quiet as ever. I put in some games, but the laser had some trouble spinning at first – it wouldn’t load several games. After one of them, however, it started chugging along, so I assume it’s pretty weak, but it still has some life in it. The only drawback is that it still smells off a little bit… especially if you move your nose close to the console. Oh well – it’s made for gaming, not smelling.
As of the time of writing this article, I'm finishing Vice City on this very console. I installed an external hard drive using a Chinese Gamestar adapter, which basically relieves me of worrying about the laser and makes playing games a breeze. The Internet is full of guides on how to set it all up so I will not repeat what is essentially common knowledge - MrMario2011's guide has got you covered. For now I’m perfectly content with the repair and a certain feeling in the back of my head tells me that this was indeed a bargain.
...but we still have two consoles to cover, right?
11 Jul 2023: A couple of months later, this PlayStation 2 works just fine and is used rather often. I have since completed a few games (GTA:VC, GTA:SA, NASCAR: Dirt to Daytona, played a bit of Gran Turismo 4 and Tony Hawk’s Pro Skater 4), but the most pleasant thing of note is that the smell has disappeared completely. Initially, for a few weeks, whenever I would use the console for a longer amount of time, the smell would start emanating again, to the point of being noticeable from 3 meters away (where I would sit and play); later on it simply disappeared. The laser seems to be on its way out (lots of stuttering and struggling to move past the PS2 init logo), which is unfortunate, but again, conversely, the Gamestar HDD adapter combined with a 640GB hard drive and a new version of OPL (which supports FAT32 and drag-and-drop .iso upload through Windows File Manager!) absolutely eliminates any need for a laser in this console. I’m pleased with the result and the experience so far and this is the only PS2 I’m going to be using for now. The fact that it’s not in showroom condition is helpful to any future mods as well.